
This post may contain affiliate links. For more information, please see our disclosure policy.
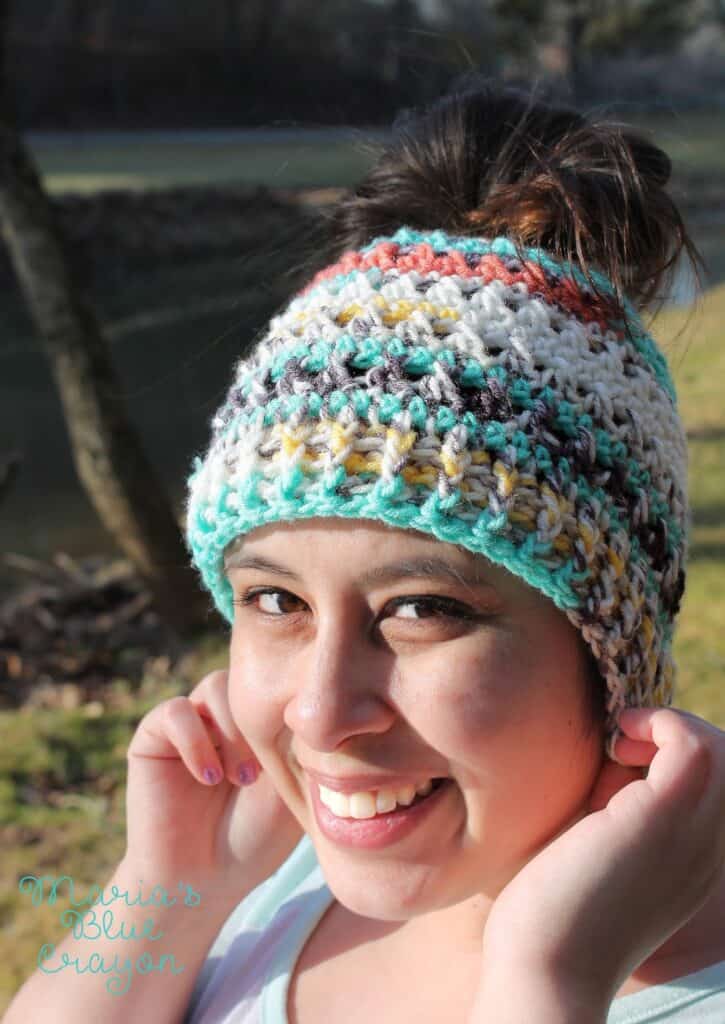
Since Spring is quickly approaching, I had to take this pattern off the back burner and share with you all while the air is still crisp! We have been having Spring-like weather here in Central PA, but this hat is not too heavy and because of the stitching, it is very breathable. I find it comes in handy in the brisk morning and evenings.
Quick, before this weather gets too warm – pick up your hook and get started on your own messy bun hat!
Materials:
1 skein “I Love this Yarn!” in Painted Canyon
H hook
Hair tie
*I have seen some hesitation in the crochet community about using hair ties – mostly because it may snap. I have very thin hair so I was not worried about this happening. If you have concerns, it may be a good idea to use two hair ties to double up the strength. However, I have not done this so I can not truly, 100% say how that would work out.*
Special Stitches:
FPDC (Front post double crochet AKA front loop double crochet)
BPDC (Back post double crochet AKA back loop double crochet)
SC increase – 2 SC in one stitch
Pattern notes:
Beginning chains of each round does not count as a stitch
Gauge: 4″x4″ in double crochet = 12 stitches x 8 rows
Pattern:
Join your yarn to your hair tie
Row 1: Chain 1, 40 SC around the hair tie, join to first SC (40)
Row 2: Chain 3, *skip stitch, DC, DC in skipped stitch, repeat from * around, join to first DC(40)
Row 3: Chain 1, *increase SC, SC, repeat from * around, join (60)
Row 4: Repeat Row 2 (60)
Row 5: Chain 1, *5 SC, SC increase, repeat from * around, join (70)
Row 6: Repeat Row 2
Row 7: Chain 1, SC around, join
Row 8-13: Repeat rows 6&7
Row 14: Chain 3, DC around, join to first DC
Row 15-17: Chain 3, *FPDC, BPDC, repeat from * around, join
If you have any questions, please don’t hesitate to contact me or leave a comment below!
Don’t forget to pin this to your boards to save it for later! 🙂
I love your pattern! That yarn is beautiful also! I just need some clarification on the end of the pattern please? Do you mean front post double crochet alternating with back post double crochet?
Thank you! And yes, you're exactly right! I think I abbreviated it to say "back loop double crochet" instead of post.. I think what you are saying is more common. I will fix it for others. Thanks for brining to my attention! 😀
Do you do acomplete row fpdc and next rowbpdc and so on i had a strke and am learning all over again thank you
Hi Linda! For the brim, you will do a fpdc in one stitch and bpdc in the next stitch and keep alternating back and forth in the same row. You will do this for the last 3 rows 🙂
question on row 3 and 5 are those 2 sc in one stitch when it say sc sc increase??
Hi Cheryl! Yes, the "sc increase" is 2 SC in one stitch 🙂
Row 5, how many stitches should I have?
Thanks for the great pattern! If you're able to update it with how many stiches you should have per row I think that would be very helpful for people. Thanks! 🙂
I just started this! Do you crochet around the hair tie? Or just join, and have it connected??
Crochet around the hair tie 🙂 The hair tie will almost act like the magic ring
I love this pattern for the messy bun hat! I would like to make one for a little girl as well. Do you have a pattern for a childs version? Thanks, Kate
I don't have this particular one for a child size – I can put it on my list!
Hi after increases how many stitches should you have
I fixed the patter to show the stitch counts for the different rows. I also fixed #5 as it was written wrong 🙂
On row 5 how stitches should there be
There should be 70 st, just updated the pattern with the st counts 🙂
hello..this is so pretty. I am wondering, if I opt out of using an elastic band…how many chains would i need instead?
For the 3rd row, 2 SC in each means you gave a total of 80 not 60. Not sure how you cane up with only 60. 40 doubled is 80 and that is exactly what I get when following the partern.
For Row 3, increases will occur in every other stitch which should give you 60 st around. Increasing in each stitch will make your hat too large. Here's what Row 3 says:
Row 3: Chain 1, *increase SC, SC, repeat from * around, join (60)
Please let me know if you need further clarification! Happy Crocheting!
Thank you so much. It don't say to skip. I really love this pattern. Also thank you for replying so quickly.
When I looked up His hook it said an 8mm. I did it and was way too large. What is the H you use in mm if you know?
Hi! The H hook I used is a 5mm
Thank you!
The is prpobably a silly question, but I would like to ask if the chain one and chain three at the beginning of the rows are counted as a sc or dc for the 40 stitch count. And, when joining at the end of the row, do I join into the chain or actual sc or dc? I love this hat and want to get it right from the beginning!
Hi!! Thank you for asking – the chains at the beginning of the rows do not count as a stitch. When you join after each round, join to the first SC or DC
Just made two of these hats for two middle school girls. They are going to love them! Thank you for the awesome pattern!
IF I saw this yarn at a shop I would shrug and walk away, but your hat is so stunning, now I need to have it. It looks great on you, by the way! Now I need to convince my husband we want to travel to the nearest city with a hobby lobby 😛
Hi there! If I want to make the hat larger (wider around) how do I go about that? Also what gauge or size is the yarn that you use? Thanks in advance! Love the pattern
Hi Maria
Thank you for this pattern. I have a question. On row 5; it says ch1, *5sc, sc inc.
do you do 5 sc in one stitch or the next 5?
Thank you
Anna