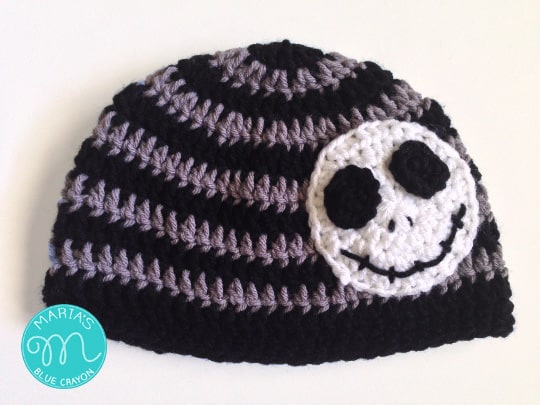
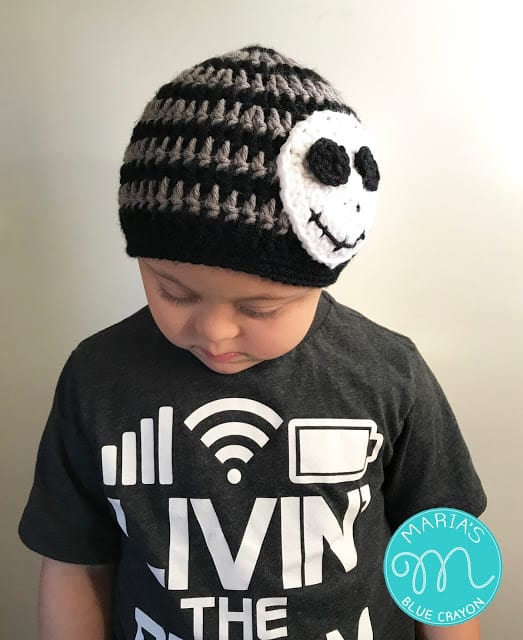
This is Halloween, this is Halloween, Halloween.. Halloween.. Halloween.. Did you sing that in your head, too? So you’re a Nightmare Before Christmas fan, too? I’m a fan of the movie and it’s totally appropriate to watch from now until the end of the year! (Or all year round, right?) My son is also a fan of the movie so I made this beanie with a Jack Skellington applique.
This beanie was made last year (photo below) for him and it was something I sold at the time when I wa I sold quite a few, so I thought I would share the pattern with you all this year now that I have my own little blog to do so!
This year, we have already went through our Fall/Winter hats and decided which ones he wanted to wear again and discussed what kind of new hats he wanted me to make this year. He wanted to keep the skeleton hat, but I had to remake it in a larger size this year 🙂
I wrote up the pattern in multiple sizes: 6-12 months, toddler, child, and adult. Check the parenthesis for head circumference to pick the best size you need.
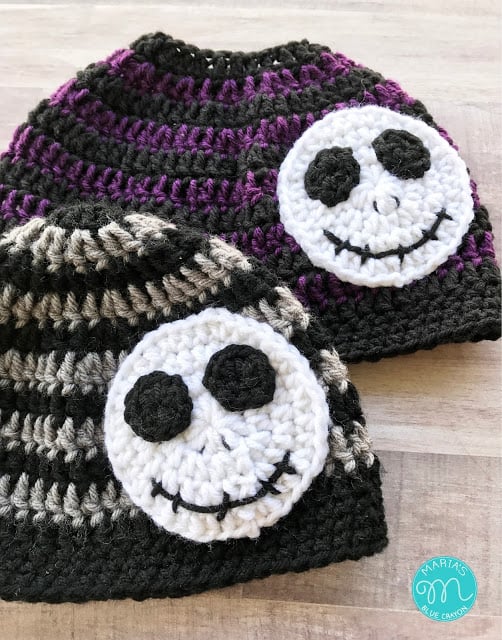
Update: I made a matching beanie for myself in a messy bun beanie style! In our case, it is a ‘mommy and me’ set. Both patterns are written in multiple sizes!
Click here for the Messy Bun version
Sharing in any way helps my blog going and free patterns coming – thank you!
Thank you so much for your support!
Free Crochet Pattern
Materials:
Worsted weight yarn in black, gray, white
H/5.0mm hook
G/4.0mm hook
Tapestry needle
Scissors
Amazon Picks (affiliate links):
Gauge: 4″x4″ = 12 stitches x 7 rows in DC
Pattern notes:
Chain 2 in beginning of rounds do not count as a stitch
Pattern
6-12 months (16” circumference)
Starting with black
Round 1: Magic ring, Chain 2, 12 DC into ring, join to first DC (12)
Change to gray
Round 2: Chain 2, 2 DC in each stitch around, join to first DC (24)
Change to black
Round 3: Chain 2, *DC, 2DC, repeat from * around, join to first DC (36)
Change to gray
Round 4: Chain 2, *DC in next 2 stitches, 2DC, repeat from * around, join to first DC (48)
Change to black
Round 5: Chain 2, DC in each stitch around, join to first DC (48)
Change to gray
Round 6-10: Chain 2, DC in each stitch around, join to first DC
Changing colors for each row to complete the gray-black pattern
Continue with black yarn for the remaining rows
Row 11-13: Chain 1, SC in each stitch around, join to first SC
Fasten off and weave in tail
Toddler size (18” circumference)
Starting with black
Round 1: Magic ring, Chain 2, 12 DC into ring, join to first DC (12)
Change to gray
Round 2: Chain 2, 2 DC in each stitch around, join to first DC (24)
Change to black
Round 3: Chain 2, *DC, 2DC, repeat from * around, join to first DC (36)
Change to gray
Round 4: Chain 2, *DC in next 2 stitches, 2DC, repeat from * around, join to first DC (48)
Change to black
Round 5: Chain 2, *DC in next 7 stitches, 2DC, repeat from * around, join to first DC (54)
Change to gray
Round 6-11: Chain 2, DC in each stitch around, join to first DC
Changing colors for each row to complete the gray-black pattern
Work the remaining rounds in black
Round 12-14: Chain 1, SC in each stitch around, join to first SC
Fasten off and weave in tail
Child size (20” circumference)
Starting with black
Round 1: Magic ring, Chain 2, 12 DC into ring, join to first DC (12)
Change to gray
Round 2: Chain 2, 2 DC in each stitch around, join to first DC (24)
Change to black
Round 3: Chain 2, *DC, 2DC, repeat from * around, join to first DC (36)
Change to gray
Round 4: Chain 2, *DC in next 2 stitches, 2DC, repeat from * around, join to first DC (48)
Change to black
Round 5: Chain 2, *DC in next 3 stitches, 2DC, repeat from * around, join to first DC (60)
Change to gray
Round 6: Chain 2, DC in each stitch around, join to first DC (63)
Change to gray
Round 7-11: Chain 2, DC in each stitch around, join to first DC
Changing colors for each row to complete the gray-black pattern
Work the remaining rows in black
Round 12-14: Chain 1, SC in each stitch around, join to first SC
Fasten off and weave in tail
Adult size (21” circumference)
Starting with black
Round 1: Magic ring, Chain 2, 12 DC into ring, join to first DC (12)
Change to gray
Round 2: Chain 2, 2 DC in each stitch around, join to first DC (24)
Change to black
Round 3: Chain 2, *DC, 2DC, repeat from * around, join to first DC (36)
Change to gray
Round 4: Chain 2, *DC in next 2 stitches, 2DC, repeat from * around, join to first DC (48)
Change to black
Round 5: Chain 2, *DC in next 3 stitches, 2DC, repeat from * around, join to first DC (60)
Change to gray
Round 6: Chain 2, *DC in next 19 stitches, 2DC, repeat from * around, join to first DC (63)
Change to gray
Round 7-12: Chain 2, DC in each stitch around, join to first DC
Changing colors for each row to complete the gray-black pattern
Work the remaining rounds in black
Round 13-15: Chain 1, SC in each stitch around, join to first SC
Fasten off and weave in tail
Skeleton Applique
Using white and a G hook
Make a magic ring
Round 1: Magic ring, 10 HDC in ring, join to first HDC
Round 2: Chain 2, 2HDC in each stitch around, join to first HDC
Round 3: Chain 2, *2HDC, HDC, repeat from * around, join to first HDC
Round 4: Chain 2, *2HDC, HDC in next 2 stitches, repeat from * around, join to first HDC
Fasten off and leave tail for sewing onto hat
Eyes – black – G hook
Round 1: Magic ring, 10 HDC in ring, join to first HDC
Fasten off and leave tail for sewing
Make 2 eyes
Sew eyes onto circle
Sew on mouth using a tapestry needle and black yarn
Sew applique onto side of hat.
Please share with me on Instagram or Facebook with your finished works! I would love to see them!!




Wow, that took alot of time and work into making all the patterns in every size. Thank you for that! My daughter loves Jack Skelton and this could easily be made to look like him. Can't wait to try it! SOO CUTE!