
This post may contain affiliate links. For more information, please see our disclosure policy.
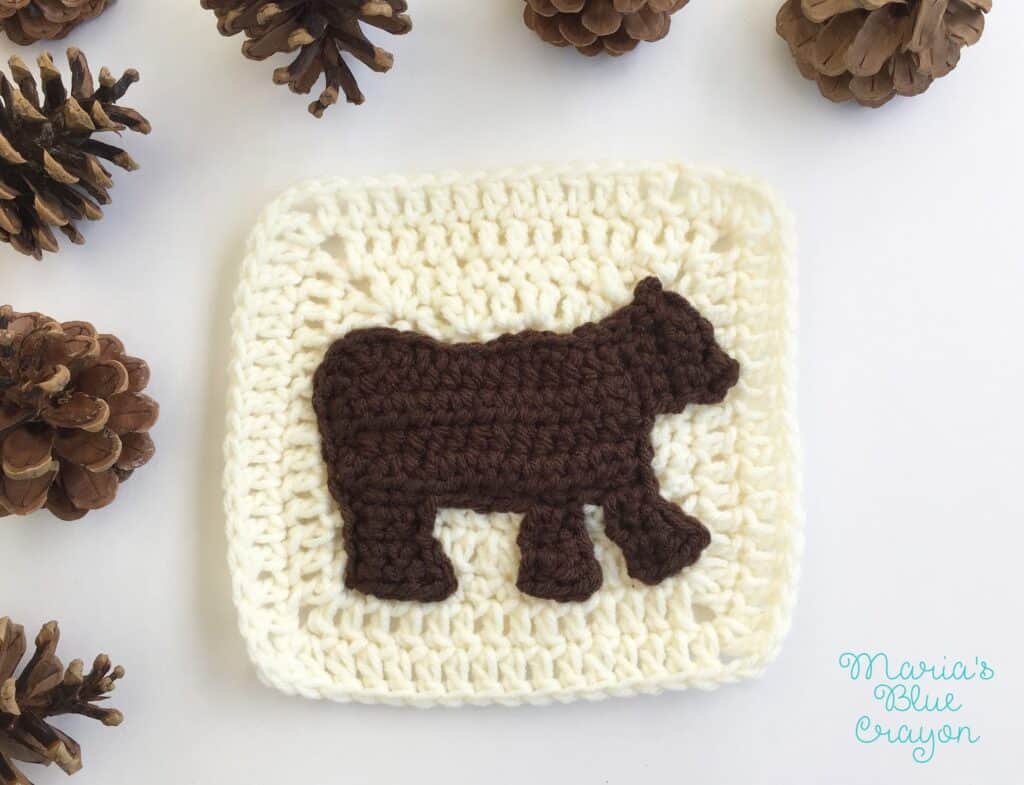
The crochet bear applique is part of the Woodland Blanket. Find the written crochet pattern and video tutorial below.
Crochet Bear Applique Video Tutorial
If you are unable to view the video below this message, you can view it on YouTube.
Crochet Bear Applique Written Pattern
Materials
Worsted weight yarn in dark brown
G/4.00mm hook
Scissors
Tapestry needle
Special Stitches/techniques
The applique will be worked in rows and then around. There will be no fastening off until the end although I do try to break up/explain each part that is being made along the way.
Abbreviations (US terms)
Ch = chain, sc = single crochet, hdc = half double crochet, dc = double crochet, st = stitch, sl st= slip stitch
Pattern
Body
Row 1: Ch 14, hdc in 2nd ch from hook and in each st across, turn (13)
Row 2-3: Chain 1, hdc in each st across, turn (13)
That completes the body of the bear and we will start to work on the legs. Do not fasten off.
Back Legs [Will be worked into the first 3 stitches on the main body]
Row 1: Ch 1, sc in the next 3 st, turn (3)
Row 2-4: Ch 1, sc across, turn (3)
Row 5: Chain 1, sc across, ch 2, dc in same space as last sc (4)
Do no turn your work, keep working around and up the leg. Slip stitch until you get back to the body. The last slip stitch should be in the 3rd stitch on the main body.
Then work the following in stitches 4-8 on the main body:
Belly of bear
Sl st, sc in next 3 st, sl st in next st
Front Leg (This will be worked into the 9-10 stitch of the main body.)
Row 1: sc in next 2 st, ch 1, turn
Row 2-4: Ch 1, sc across, turn (2)
Row 5: Ch 1, sc across, ch 1, dc in same space as last sc
Sc in next space up the leg, then slip stitch up the leg until you get back to the body. The last slip stitch will be in the 10th stitch on the main body.
Final Front Leg (This will be worked in stitches 11-13 on the main body.)
Row 1: sc in next 3 st, turn
Row 2: Ch 1, sc in next 2 st, turn
Row 3-4: Repeat row 2
Row 5: Ch 1, sc in next 2 st, ch 2, dc same space as last sc
Keep working up the leg.
Sc in next st and sl st until there are 4 spaces left on the side of the body.
Head/top of body
Row 1: Ch 1, sc in next 4 sp, turn
Row 2-4: Ch 1, sc across, turn (4)
Row 5: Ch 2, dc in next st, sc in next 2 st, 2sc in next st
Keep working around to form the top of the head and the top of the body.
(sc, ch 3, sc) all in next space, sl st in next 2 spaces ( you should now be back onto the main body) sl st in next 2 spaces, sc in next 3 spaces, sl st in next 5 spaces, sc in next space, hdc in next space, 3dc in next space (last stitch on top of the body – keep working around) dc in next space, hdc in next space, sc in next 3 spaces, sl st until you reach the bottom of the back feet.
Fasten off.
Do you have a video
Unfortunately, I do not. I have never made a video yet, although I am planning on having videos available in the near future!
I love this so much, I am working on a piney woodland afghan and these animals are perfect!
How did you do the actual granny square?
Hi! You can find how to do the granny square here : https://mariasbluecrayon.com/2017/02/woodland-afghan-series.html
I'd like to start off by saying thank you for sharing these adorable patterns. I'm having fun making these squares and looking forward to the finished afghan. I'm having trouble with the bear though. I'm not sure I'm reading the pattern correctly but try as I might, I can't get the same contours of the face and head. Mine looks nothing like yours. If you do decide to make a video, would you consider making the bear first. I really need help here. Thanks again for sharing. It's so kind of you to share your talent with others.
I am having ths same issue's with the bear pattern and i am an expeiced crocheter and pattern reader a video would be greatley appreciated.
Hi Jenna! Sorry you're having issues. I did have this bear tested and re-wrote directions but I understand it can be a bit confusing. I am working on creating video tutorials. If there is a certain section I can explain in the mean time, please let me know!
just started the bear. So much fun. Thanks for sharing Maria! I'll see if I can get through the "tricky" part ��
I am looking forward to the video… my bear looks more like a cow. The contours are not right and it looks too skinny in the middle.
Thank you for sharing your patterns. I'm having problems with the bear. Do you have a video? Would appreciate the help. Blessings!
I've recently posted a video tutorial! I hope it is helpful 🙂
Sooo glad you added the video! I'm not experienced enough to fully follow the written so it was exrtremely helpful. Just starting this afghan for my grandson who is due in Aug and my daughter loves the woodland collection! Very excited! Thank you for the wonderful pattern ����
Thank you for this pattern. I just made the bear, it came out perfect (with help from the video), love, love, love it. Can't wait to make the entire afghan! Thanks again! Lisa
Hi, my name is Judy and i have a question.How are you attaching the appliques? Are you stitching them, fabric glue? I'm making this for a 2 yr old so what's the best method? Thanks
Hi Judy! I attach the appliqués by sewing with a tapestry needle and the same color yarn as the appliqué 🙂