• Skip to primary navigation
  • Skip to main content
  • Skip to primary sidebar

Maria's Blue Crayon

  • Free Crochet Patterns
  • Crochet Tips
  • Printables
  • Privacy Policy
  • About Me/Contact
  • Navigation Menu: Social Icons

You are here: Home / crochet / Chunky Crochet and Knit Pumpkins – Free Pattern Download

Chunky Crochet and Knit Pumpkins – Free Pattern Download

August 30, 2018 by Maria Weaber 2 Comments

These crochet and knit pumpkins make wonderful decor for the fall. Find the free pattern to download below.
These chunky knit and crochet pumpkins are so squishy and adorable! Topped with a delicious smelling cinnamon stick, they are the perfect fall decor for your home!
Because I used a super bulky yarn, they were so quick to make! To be honest, I usually have a hard time finding unique patterns using super bulky yarn so I thought I would make these pumpkins to use up some super bulky yarn I had.
The pumpkin that is a grayish blue color is knit and the oatmeal tweed pumpkin is crochet. The knit pumpkin is just a simple knit stitch in the round. I learned how to knit last year and although I love it, I don’t knit as much as I’d like to so I thought it would be fun to make two different versions of pumpkins. Win win for the knitter, crocheter, and the bistitchual!
The crochet version uses the knit stitch (also called the waist coat stitch). I love the way the knit stitch looks, but to be perfectly honest I do find knitting it more enjoyable!
The knit stitch/waist coat stitch can become rather tight. If you’re a tight crocheter, I suggest trying your best to crochet as loosely as possible. You’ll find a quick video on how to make the knit stitch below.
These pumpkins are already set as a centerpiece in my house and I love it! My puppy even loves it so much, he managed to eat part of the cinnamon stick stem. I should have known – he was eyeing them up when I was setting them out to take photos!

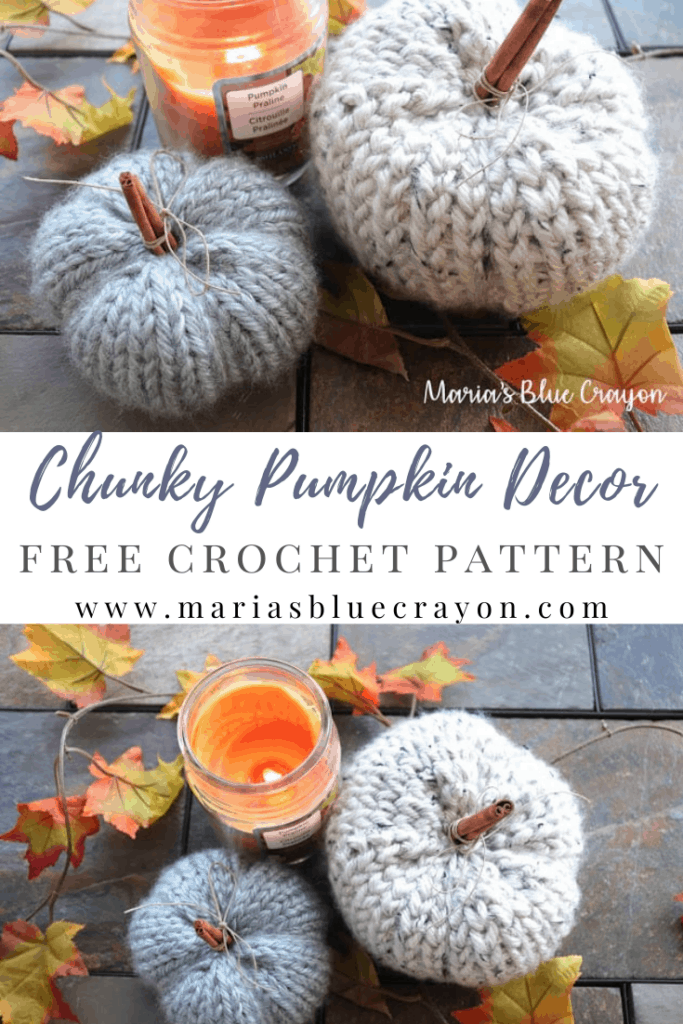
Crochet and Knit Pumpkin Pattern

Materials
Lion Brand Hometown USA (super bulky yarn)
P/11.50mm hook (for crochet)
9.0mm 16” circular needles (for knit)
Poly-fil Stuffing
Cinnamon Sticks and twine for stem
Tapestry and Scissors

Pattern notes
The pumpkin will be made by working in the round then sewn and cinched up at the top and bottom to create the sphere. We will additionally add grooves to the side with yarn and needle.

Adjusting Pumpkin size: If you would like to make multiple pumpkins in different sizes, simply add or subtract the number of beginning stitches/cast on stitches as well as the number of rows. I suggest adding/subtracting in multiples of 10 for the beginning stitches and adding/subtracting in multiples of 2-3 for the number of rows.

Beginning Chain 2 does not count as a stitch. (crochet)

Special stitches: knit stitch/waistcoat stitch (crochet)

You may need to use the magic loop method as the stitches will be quite stretched around the circular needles. (knit)

Abbreviations (US terms):
Ch = chain, sc = single crochet, st = stitch(es), k1 = knit one
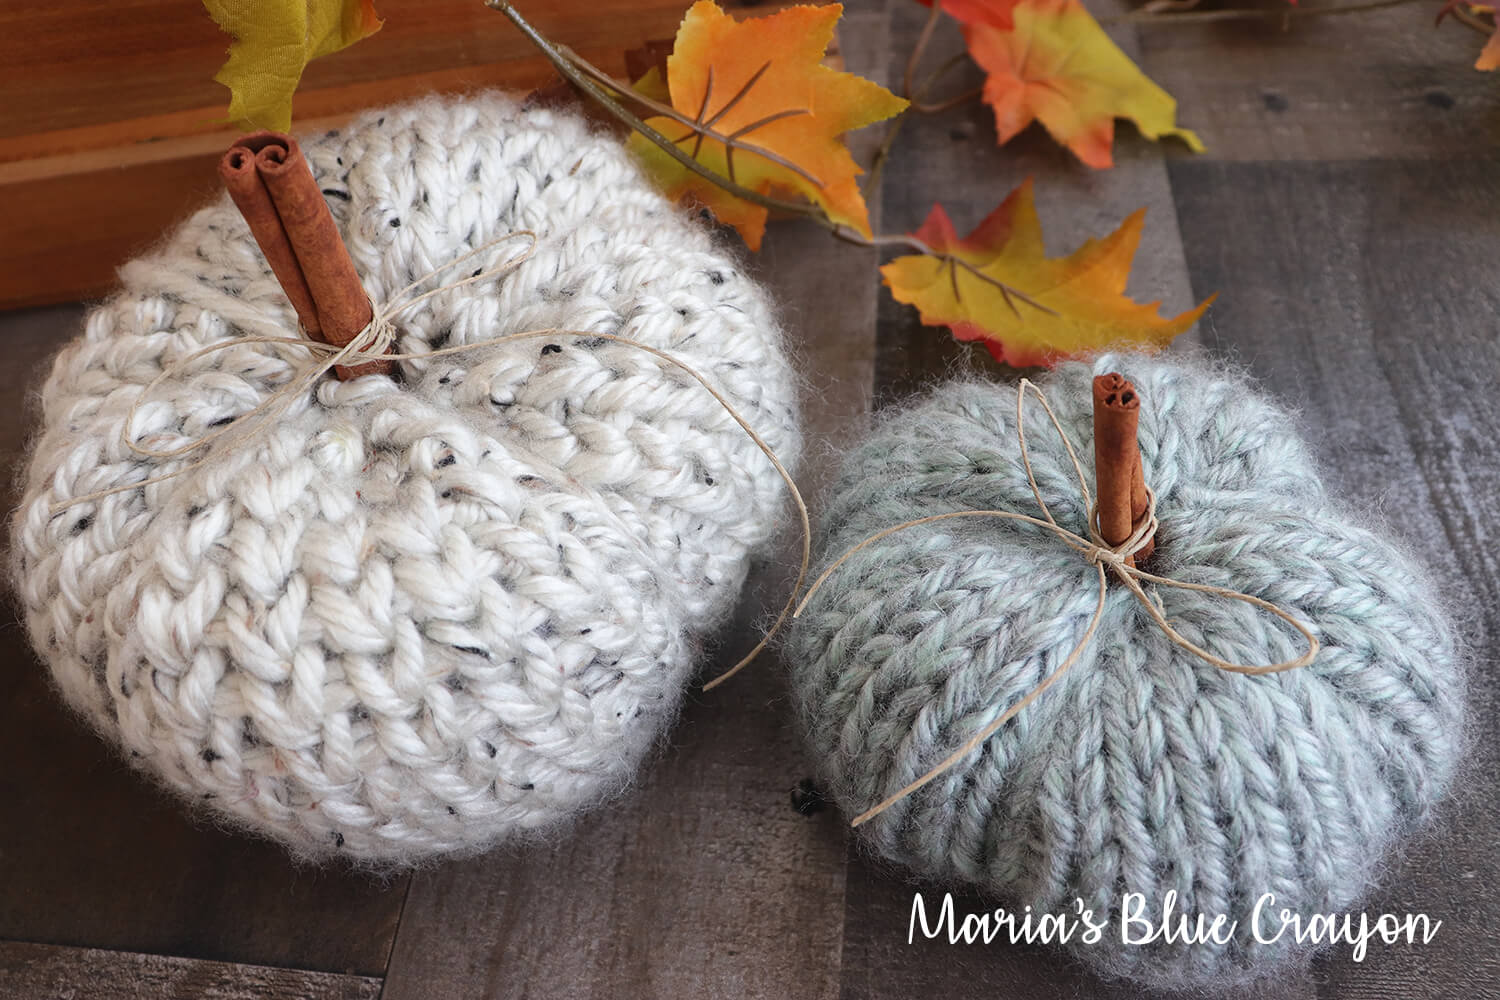
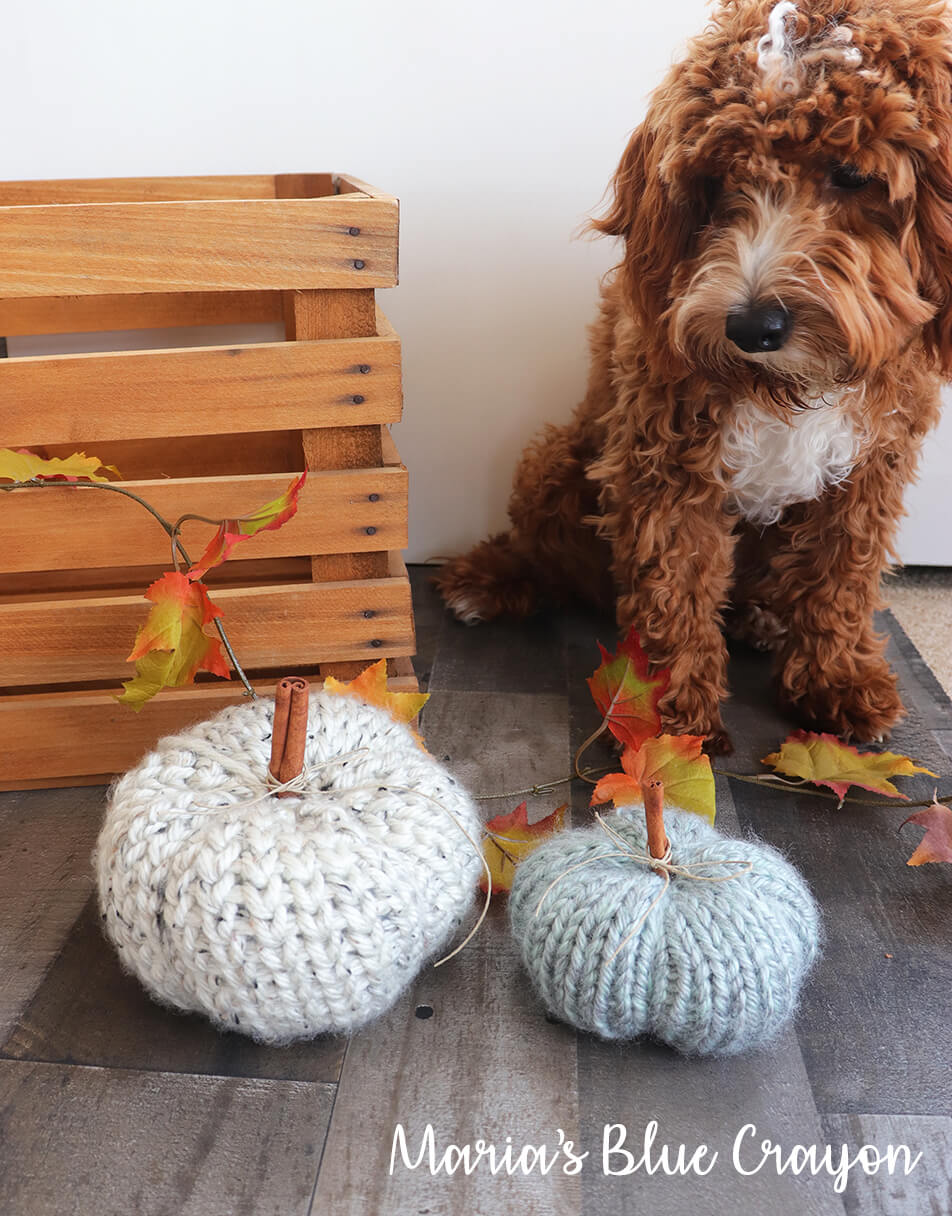
Dimensions:
Crochet pumpkin – 7” in diameter
Knit pumpkin – 5” in diameter

Crochet Pattern

Round 1: Ch 27, join to first ch
Round 2: Ch 1, sc around, join to first sc
Round 3-15: Ch 1, knit stitch in each st around, join to first st
Fasten off and leave long tail (~3ft, more if you are making a larger pumpkin). Follow assembly instructions.
Add cinnamon stick and twine for stem.

Knit Pattern

Round 1: Cast on 30 st
Round 2-18: K1 in each st around
Bind off and leave long tail (~3ft, more if you are making a larger pumpkin).  Follow assembly instructions.
Add cinnamon stick and twine for stem.

The assembly instructions are the same as my Lil Dollop Pumpkins – learn how to assemble your pumpkins here.

Filed Under: crochet, home decor Tagged With: fall, homedecor, pumpkin

Previous Post: « Halloween Cat Applique and Granny Square – Free Crochet Pattern
Next Post: Halloween Crochet Blanket Joining and Border Tutorial »

Reader Interactions

Comments

  1. Keksey

    September 25, 2019 at 8:15 pm

    Hello, clarifying question on the knit version. You have k1 in each st around for 17 rows. Do you mean increasing each stitch every row? Or simply knit each round? You start with 30 stitches, do you end with 30?
    Thanks!

    Reply
    • Maria Weaber

      October 11, 2019 at 6:48 pm

      No increasing, just simply knit in the round. Each row will have the same number of stitches in the beginning and end.

      Reply

Leave a Reply Cancel reply

Your email address will not be published. Required fields are marked *

Primary Sidebar

Hi, I'm Maria! I'm sharing with you my own free crochet patterns and tutorials, while fulfilling my love for learning and creating with my hands.
I hope you find creativity and inspiration while you're here!

  • Facebook
  • Instagram
  • Pinterest
  • YouTube

Grab Your Free Handy Crochet Cheat Sheet!

Sign up to receive my newsletter full of crochet goodness starting with this handy crochet cheat sheet along with free pattern downloads! Unsubscribe at any time.

Thank you!

Please check your email to confirm subscription.

.

Copyright © 2023 Maria's Blue Crayon on the Foodie Pro Theme