PURCHASE THE AD-FREE PDF CROCHET PATTERN OF THE DON’T BE A SQUARE BEANIE HERE.
OR SCROLL DOWN FOR THE FREE CROCHET BEANIE PATTERN.
I don’t know about you, but I LOVE the corner to corner (C2C) stitch! I’ve made lots of blankets with this stitch. I find it to be a great mindless stitch as well as easy and quick to work up.
Most of my C2C projects were rather large, but not this one! I thought a beanie would be a nice short project using one of my favorite stitches.
I wasn’t sure how it would turn out because I’ve never seen this stitch used in a small project such as a hat, but I’m happy to say – it turned out fantastic!
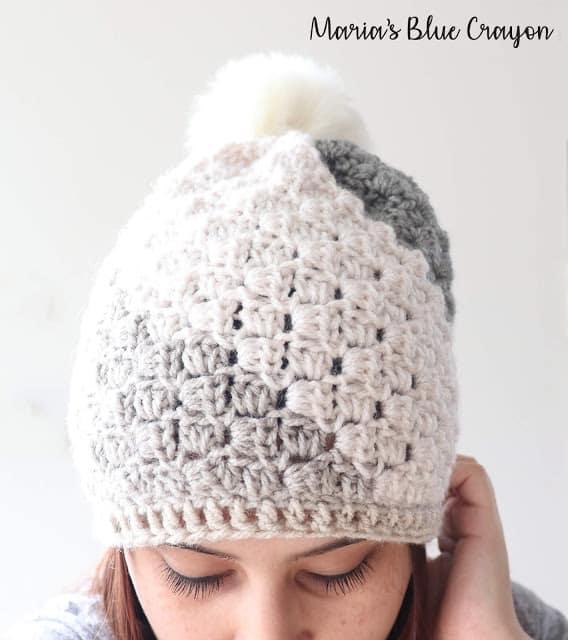
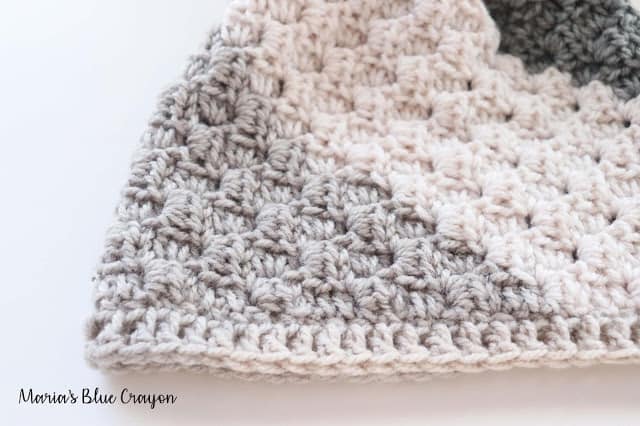
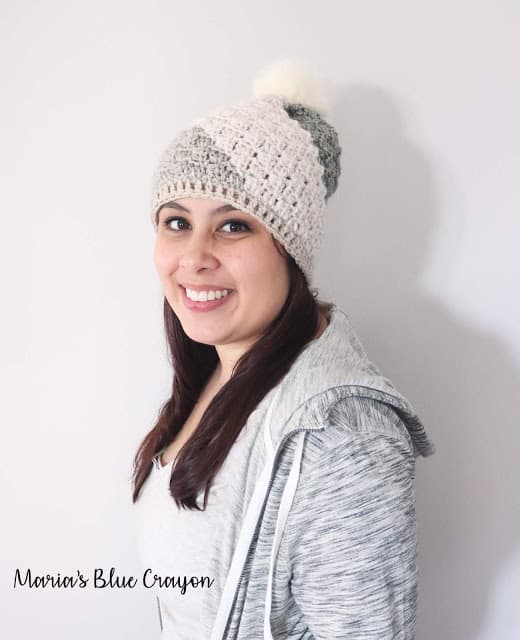
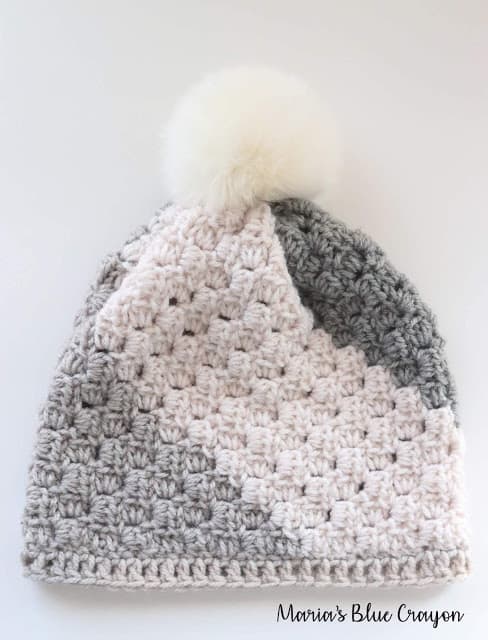
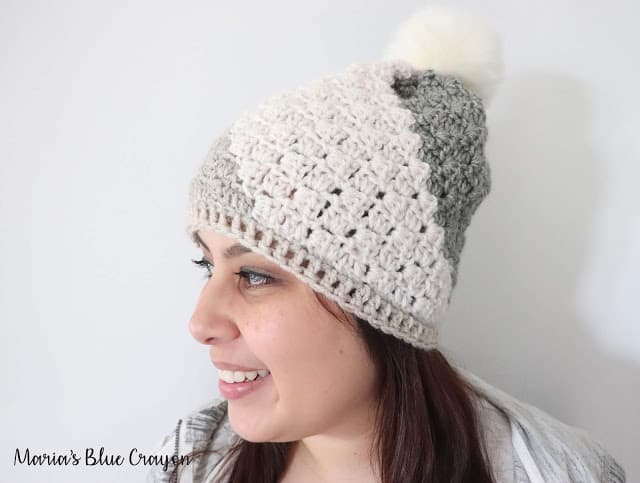
Coupled with one of my favorite yarns, Caron cakes, this C2C beanie has great texture and pretty diagonal blocks of color in beautiful neutral shades.
Typically, the C2C stitch is made with double crochets, but for a less “hole-y” look I opted to use half double crochets instead. Same concept, just different stitch!
This beanie also has a slight slouch to it, which makes the pom pom sit just right! I love faux fur pom poms, but you can opt to make a yarn pom pom or leave it as is!
I have a photo tutorial to aide in the pattern below as well as a video tutorial that shows you how to achieve the corner to corner stitch using half double crochets.
If you are using the video to learn or if you are already familiar with the corner to corner stitch – please refer to the pattern notes as I have condensed the instructions for the main portion of the hat! I just tell you how many rows you need to increase/decrease so you don’t have to wade your way through the pattern if you already know the ins and outs of C2C.
I hope you have fun with this beanie! Please share with me either on my Facebook group or Instagram your C2C beanie – I can’t wait to see all the color variations!
PURCHASE THE AD-FREE PDF HERE ON RAVELRY.
Pattern Includes Sizes Newborn – Adult.
Thank you so much for your support!
PIN IT TO YOUR CROCHET BOARDS ON PINTEREST.
Sharing in any way really helps my blog going and the free patterns coming – thank you!
Free Crochet Beanie Pattern
Materials
1 skein Caron cakes (White Truffle)
H/5.00mm hook
Tapestry needle & Scissors
Faux Fur Pom Pom (optional)
Pattern notes
The beanie is made by crocheting a rectangle shape then folded in half before assembling.
Abbreviations (US terms):
Ch = chain, sc = single crochet, dc = double crochet, hdc = half double crochet, sp = space, st = stitch(es), sl st = slip stitch
Gauge: 4” x 4” ~ 6 squares x 6 squares in C2C stitch (each cluster of 3hdc will make a square for the C2C stitch/pattern)
Sizes/Head Circumferences:
Newborn – 13”
0-3 months – 15”
3-6 months – 16”
6-12 months – 17”
Toddler – 18”
Child – 20”
Adult (women) – 21”
Adult (men) – 22”
If you are familiar with the corner to corner stitch using half double crochets you can follow these condense instructions to make the main portion of the hat for the following sizes:
Newborn: Increase for 7 rows, increase on one side for 12 rows, decrease for 6 rows. You will have 25 diagonal rows total. Your finished rectangle will be roughly 13” x 5”. Go to assembly instructions to finish beanie.
0-3 months: Increase for 8 rows, increase on one side for 14 rows, decrease for 7 rows. You will have 29 diagonal rows total. Your finished rectangle will be roughly 14” x 5.5”. Go to assembly instructions to finish beanie.
3-6 months: Increase for 9 rows, increase on one side for 13 rows, decrease for 8 rows. You will have 30 diagonal rows total. Your finished rectangle will be roughly 15” x 6”. Go to assembly instructions to finish beanie.
6-12 months: Increase for 9 rows, increase on one side for 15 rows, decrease for 8 rows. You will have 32 diagonal rows total. Your finished rectangle will be roughly 16” x 6.5”. Go to assembly instructions to finish beanie.
Toddler: Increase for 10 rows, increase on one side for 14 rows, decrease for 9 rows. You will have 34 diagonal rows total. Your finished rectangle will be roughly 17” x 7”. Go to assembly instructions to finish beanie.
Child: Increase for 12 rows, increase on one side for 15 rows, decrease for 11 rows. You will have 38 diagonal rows total. Your finished rectangle will be roughly 19” x 7.5”. Go to assembly instructions to finish beanie.
Adult (women): Increase for 13 rows, increase on one side for 15 rows, decrease 12 rows. You will have 40 diagonal rows total. Your finished rectangle will be roughly 20” x 8.5”. Go to assembly instructions to finish beanie.
Adult (men): Increase for 13 rows, increase on one side for 18 rows, decrease for 12 rows. You will have 43 diagonal rows total. Your finished rectangle will be roughly 22” x 8.5”. Go to assembly instructions to finish beanie.
Pattern
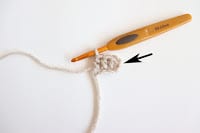
Row 1: Ch 5, hdc in 3rd ch from hook and across, turn
Make note of ch 2 sp formed from beginning ch, we will be working into this sp in the next row (see Photo 1)
 |
| Photo 1 |
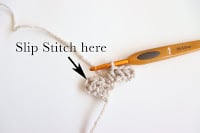
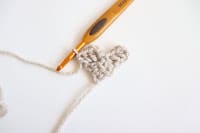
Row 2: Ch 5, hdc in 3rd ch from hook and in next 2 ch, sl st into ch 2 sp, ch 2, 3hdc in same ch 2 sp, turn (see Photo 2 & 3)
 |
| Photo 2 |
 |
| Photo 3 |
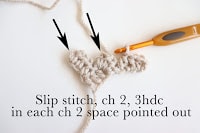
Row 3: Ch 5, hdc in 3rd ch from hook and in next 2 ch sp, *sl st in next ch 2 sp, ch 2, 3hdc in same ch 2 sp, repeat from * across, turn (See Photo 4 & 5)
Repeat Row 3
4 times for newborn
5 times for 0-3 months
6 times for 3-6 months and 6-12 months
7 times for toddler
9 times for child
10 times for adult (women and men)
 |
| Photo 4 |
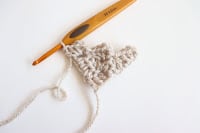 |
| Photo 5 |
We will now start to decrease on one side to start creating a rectangle shape. You will find how many rows total to repeat rows 14-15
Row 14: Ch 1, sl st into next 2 st and ch 2 sp, ch 2, 3hdc in same ch 2 sp, *sl st to next ch 2 sp, ch 2, 3hdc in same ch 2 sp, repeat from * across, turn (See Photo 6 & 7)
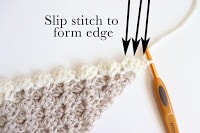 |
| Photo 6 |
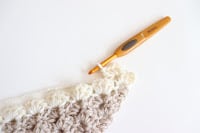 |
| Photo 7 |
Row 15: Ch 5, hdc in 3rd ch from hook and in next 2 ch, sl st in next ch 2 sp, ch 2, 3hdc in same ch 2 sp, repeat from * across until you get to the last ch 2 sp, sl st in that ch 2 sp, turn (See Photo 8)
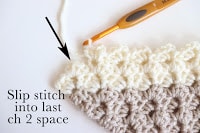 |
| Photo 8 |
Repeat Row 14-15
for 12 rows for newborn ending with row 15
for 14 rows for 0-3 months ending with row 15
for 13 rows for 3-6 months ending with row 14
for 15 rows for 6-12 months ending with row 14
for 14 rows for toddler ending with row 15
for 15 rows for child and adult (women) ending with row 14
for 18 rows for adult (men) ending with row 15
We will not start decreasing the remaining rows to complete the rectangle.
Ch 1, sl st into next 2 st and ch 2 sp, ch 2, 3hdc in same ch 2 sp, *sl st in next ch 2 sp, ch 2, 3hdc in same ch 2 sp, repeat from * across until you get to the last ch 2 sp, sl st in last ch 2 sp, turn
Repeat
4 times for newborn
5 times for 0-3 months
6 times for 3-6 months and 6-12 months
7 times for toddler
9 times for child
10 times for adult (women and men)
Second to last row: Ch 1, sl st into next 2 st and ch 2 sp, ch 2, 3hdc in same ch 2 sp, sl st in next ch 2 sp, ch 2, 3hdc in same ch 2 sp, sl st in last ch 2 sp, turn
Last row: Ch 1, sl st into next 2 st and in ch 2 sp, ch 2, 3hdc in same ch 2 sp, sl st in next ch 2 sp.
Fasten off and leave tail for sewing.
Assembly
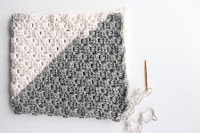
Fold rectangle in half horizontally and whip stitch up the side. Fasten off and weave in ends. (See Photo 9)
 |
| Photo 9 |
Flip inside out, this will now be the right side of the hat.
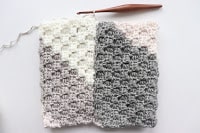
Join yarn on the open edge where you left of sewing. (See Photo 10)
 |
| Photo 10 |
Ch 1, sc evenly around, join to first sc (making roughly 3 single crochets for every two “squares”)
Ch 2, dc around, join to first dc.
Fasten off and weave in ends.
Close up the top of the hat by weaving needle in and out of top stitches and pulling tight. Knot to secure.
Add pom pom as desired.

Cute,innovative pattern. Love, love, love. Thank you!
I. Freaking. Love. This! Gunna start one tomorrow. Thanks for the pattern!
Love this hat! I am Making one now from a Caron Cupcake. Because the Cupcake is size 3 yarn I am using a double crochet st instead of a half doubles. To retain the height of the squares.