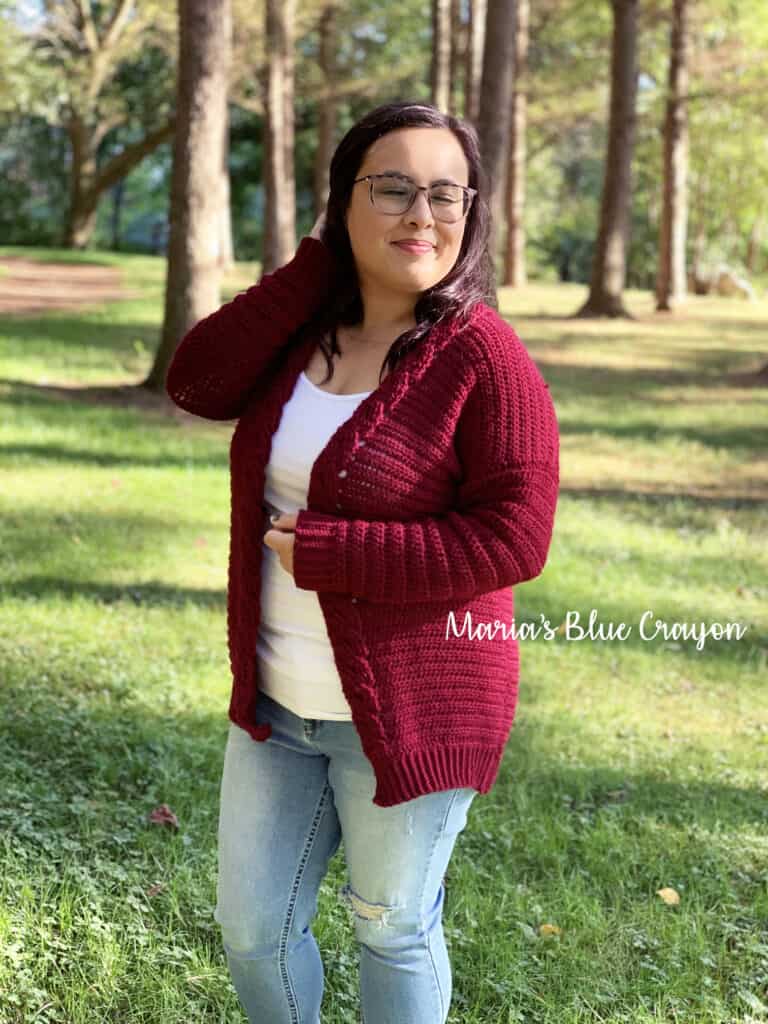
This crochet cardigan is a basic cardigan with a pretty cable detailing on the front panels. You can find the free pattern to view on my blog below.
I’ve had this design idea in my mind for a while and I’m so glad it’s finally out! It took me a few tries to get it how I wanted it, but it was so worth it.
- Get the ad-free PDF download/printable on Ravelry or Etsy.
- PIN it to your crochet boards to save it for later and help support my blog!
- Scroll down to view the pattern right here on my blog.
What Makes This a Cozy Cardigan
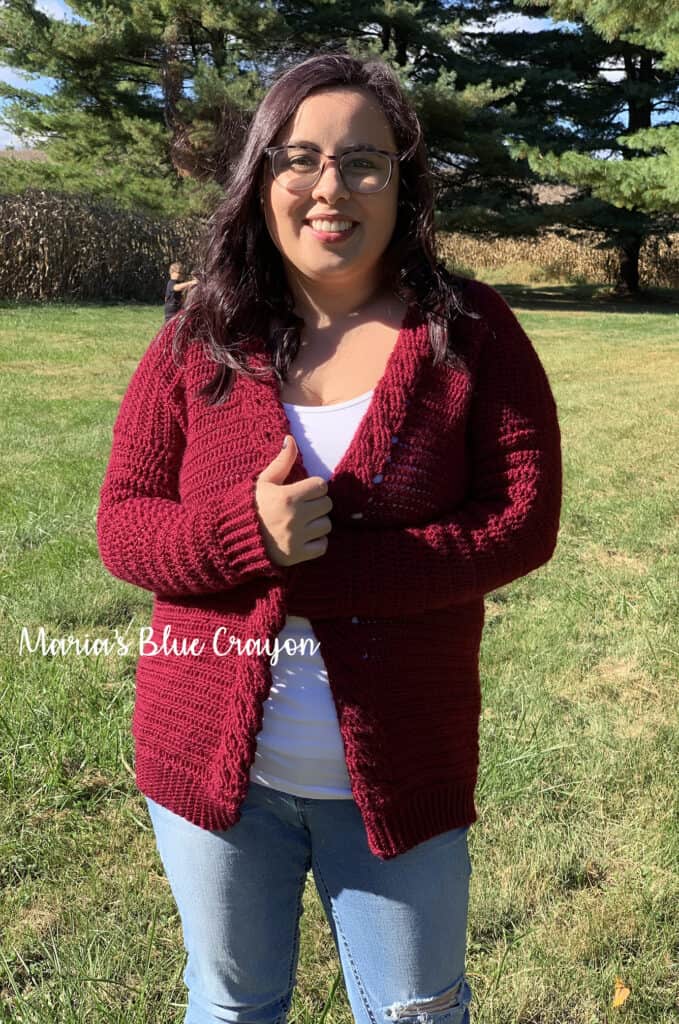
The yarn, drape, and fit makes the cardigan THE cardigan you will be wanting to wear on the daily. Whether it be at work, to pick your kids up from school, or lounging around the house – this cardigan will be perfect.
I used Knit Picks Brava Sport which is a category 2 yarn. That technically makes it a ‘fine’ yarn, half the weight of our beloved worsted weight yarn.
Hold your horses – I know it’s a lighter weight yarn than you are probably used to working with, but I promise that is what MAKES this cardigan a dream.
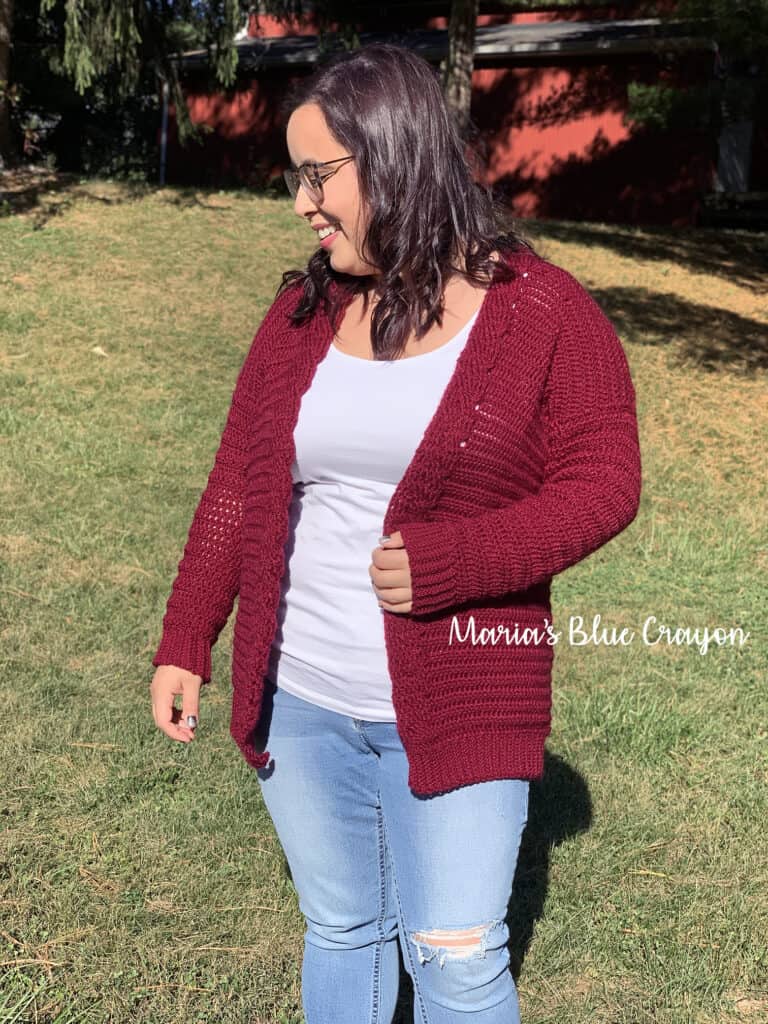
Using an H/5.00mm hook, it actually isn’t so bad and it doesn’t take years to make. Because of the combination of the yarn weight and hook, it makes such a fabulous drape. No rigid, stiff cardigans here.
This yarn is also very soft and cozy to wear. It is 100% acrylic, so it’s also machine washable and easy to care for.
Yarn Substitutions
Honestly, I don’t know if I personally recommend using any other yarn. If you are in the US, you know there aren’t a ton of options of lighter weight yarns in the big box stores.
If you’re like me, that’s typically where I shop for my yarn and it’s mostly worsted weight yarn. I can’t even think of a Category 2 yarn that I can find in store off the top of my head.
If I had to recommend a substitute, I would say Loops and Threads Joy DK from Michael’s. It is technically a Category 3, but you will just have to check your gauge and adjust from there.
Also, using other DK weight yarns/category 3 could work. Again, just check your gauge! If you are unfamiliar – I have a tutorial here to show you how to check your gauge and adjust your hook size accordingly.
- Purchase the ad-free PDF download/printable on Ravelry or Etsy.
- View the pattern on my blog below.
- Be sure to save it for later and share with your crochet friends – just a few clicks helps support my blog!
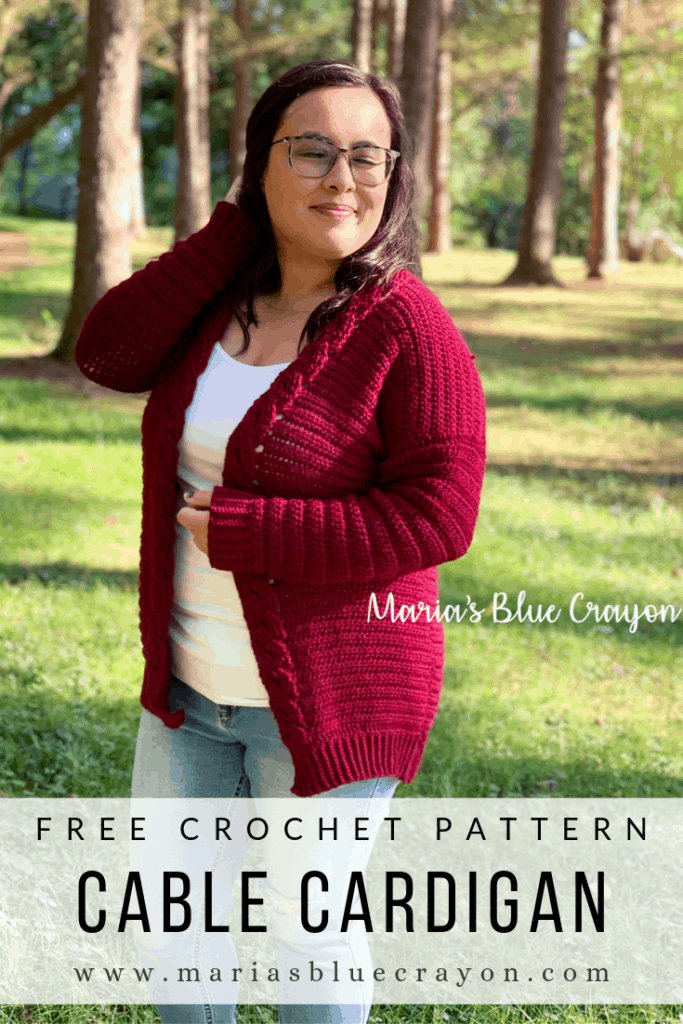
Cable Cardigan Crochet Pattern
Materials
Knit Picks Brava Sport, Category 2, 273yds/100grams, “wine”
4 (5, 5, 6, 6, 6) skeins
Tapestry needle
Scissors
Pattern notes
Beginning chain does not count as a stitch.
When working the pattern, be mindful that fptr and fpdc are worked in the same row in the cabling. The abbreviations may look like the same stitch at first glance.
Cable Cardigan is made by crocheting back panel and two front panels separately. Panels will be seamed together. Sleeves are crocheted onto assembled panels last.
Cardigan is a drop shoulder style. When wearing the cardigan, the panels will drop down a few inches on the arm. The arm hole opening will sit a few inches down from the very top of the upper arm.
Sizes:
Small fits bust size: 32” – 34”
Medium fits bust size: 36” – 38”
Large fits bust size: 40” – 42”
XLarge fits bust size: 44” – 46”
2XL fits bust size: 58” – 50”
3XL fits bust size: 52” – 54”
Finished Dimensions: (Width/Length/Arm Hole Circumference)
Small: 20.5″/25″/13″
Medium: 21.5″/25″/14″
Large: 23″/25″/15″
XLarge: 24″/27.5″/16″
2X: 26″/27.5″/17″
3X: 28″/27.5″/18″
Adjusting for Petite/Tall sizes:
Petite: Subtract 6 rows from the repeat on each panel. This will make it 2” shorter in length.
Tall: Add 6 rows to the repeat on each panel. This will make it 2” longer in length.
Gauge: 4” x 4” ~ 14 st x 12 rows in half double crochet
Abbreviations (US terms):
Ch = chain, sc = single crochet, hdc = half double crochet, dc = double crochet, fpdc = front post double crochet, bpdc = back post double crochet, fptr = front post treble crochet, st = stitch(es), sk = skip, BLO = back loop only
Pattern
Back Panel
Row 1: Ch 74 (78, 82, 86, 94, 100), dc in 3rd ch from hook and in each ch across, turn (72, 76, 80, 84, 92, 98)
Row 2: Ch 1, hdc in each st across, turn (72, 76, 80, 84, 92, 98)
Repeat Row 2 for an additional 67 (67, 67, 74, 74, 74) rows
Last Row: Ch 2, dc in each st across
You will now have a total of 70 (70, 70, 77, 77, 77) rows.
Do not fasten off. We will begin crocheting the bottom edging in short rows.
Edging
Row 1: Ch 12, sc in 2nd ch from hook and in each ch across, sl st into next 2 st on body of cardigan, turn (11)
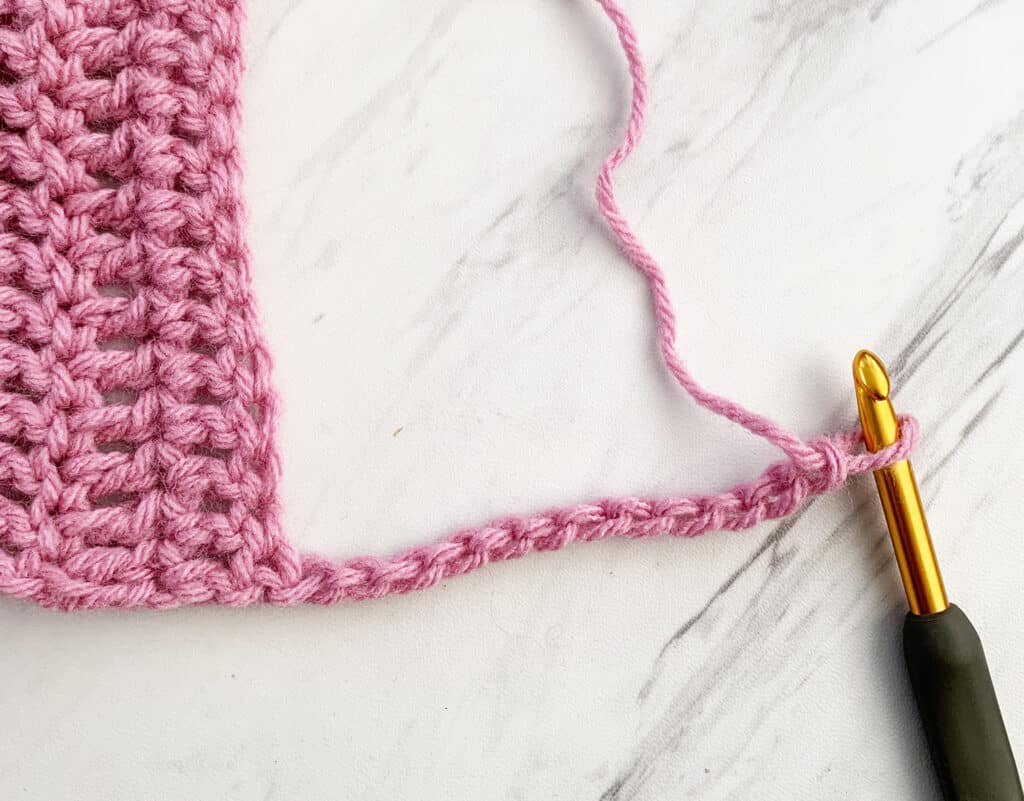
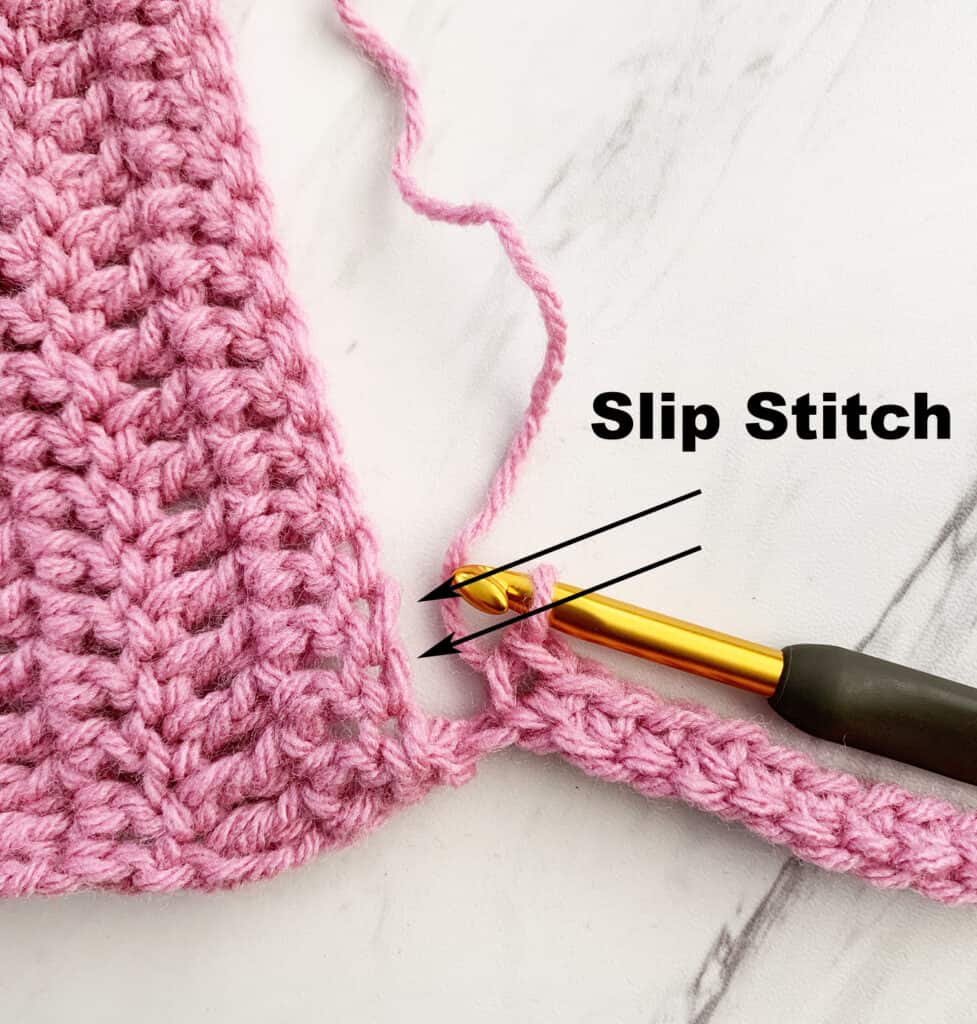
Row 2: sc in BLO in each st across, turn
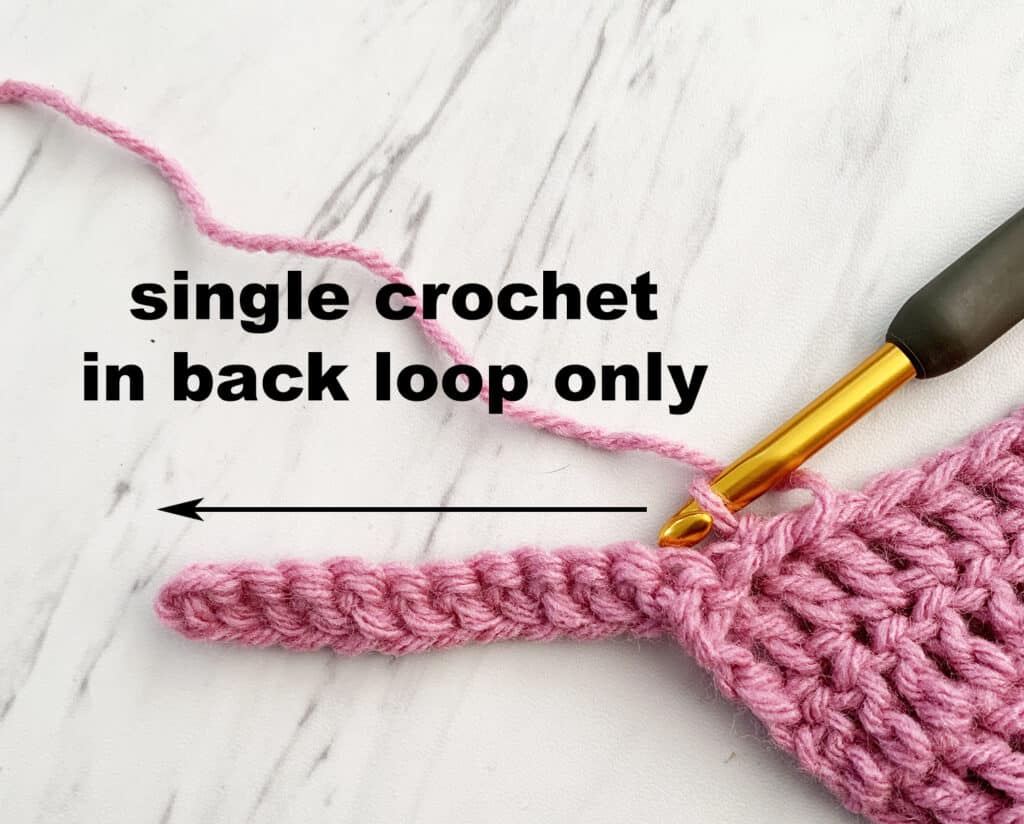
Row 3: Ch 1, sc in BLO in each st across, sl st into next 2 st on body of cardigan, turn (11)
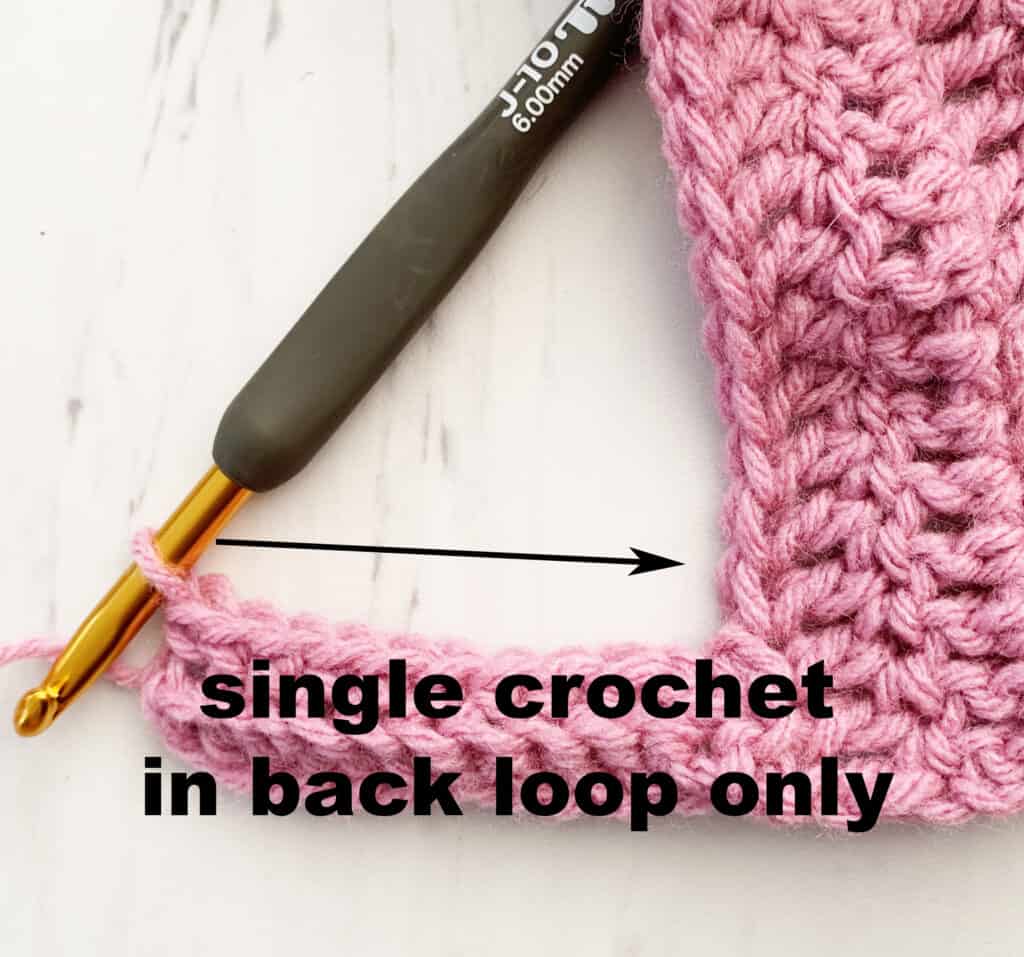
Repeat Row 2&3 across the bottom of back panel.
Fasten off.
Front Panel #1
Row 1: Ch 38 (40, 42, 44, 48, 51), dc in 3rd ch from hook and in each ch across, turn (36, 38, 40, 42, 46, 49)
Row 2: Ch 1, hdc in next 26 (28, 30, 32, 36, 39) st, sk 3 st, fptr in next 3 st, fptr in each of the 3 skipped st, fpdc in next 3 st, hdc in last st, turn (36, 38, 40, 42, 46, 49)
Row 3: Ch 1, hdc, bpdc in next 9 st, hdc in remaining 26 (28, 30, 32, 36, 39) st, turn (36, 38, 40, 42, 46, 49)
Row 4: Ch 1, hdc in next 26 (28, 30, 32, 36, 39) st, fpdc in next 3 st, sk 3 st, fptr in next 3 st, fptr in each of the 3 skipped st, hdc in last st, turn (36, 38, 40, 42, 46, 49)
Row 5: Repeat Row 3
Repeat Rows 2-5 until you have a total of 69 (69, 69, 76, 76, 76) rows
Last Row: Ch 2, dc in each st across, turn (36, 38, 40, 42, 46, 49)
You will now have a total of 70 (70, 70, 77, 77, 77) rows.
Do not fasten off. We will begin crocheting the bottom edging in short rows.
Edging
Row 1: Ch 12, sc in 2nd ch from hook and in each ch across, sl st into next 2 st on body of cardigan, turn (11)
Row 2: sc in BLO in each st across, turn
Row 3: Ch 1, sc in BLO in each st across, sl st into next 2 st on body of cardigan, turn (11)
Repeat Row 2&3 across the bottom of front panel.
Fasten off.
Front Panel #2
Row 1: Ch 38 (40, 42, 44, 48, 51), dc in 3rd ch from hook and in each ch across, turn (36, 38, 40, 42, 46, 49)
Row 2: Ch 1, hdc, sk 3 st, fptr in next 3 st, fptr in each of the 3 skipped st, fpdc in next 3 st, hdc in remaining 26 (28, 30, 32, 36, 39) st, turn (36, 38, 40, 42, 46, 49)
Row 3: Ch 1, hdc in next 26 (28, 30, 32, 36, 39) st, bpdc in next 9 st, turn (36, 38, 40, 42, 46, 49)
Row 4: Ch 1, hdc, fpdc in next 3 st, sk 3 st, fptr in next 3 st, fptr in each of the 3 skipped st, hdc in remaining 26 (28, 30, 32, 36, 39) st, turn (36, 38, 40, 42, 46, 49)
Row 5: Repeat Row 3
Repeat Rows 2-5 until you have a total of 69 (69, 69, 76, 76, 76) rows
Last Row: Ch 2, dc in each st across, turn (36, 38, 40, 42, 46, 49)
You will now have a total of 70 (70, 70, 77, 77, 77) rows.
Do not fasten off. We will begin crocheting the bottom edging in short rows.
Edging
Row 1: Ch 12, sc in 2nd ch from hook and in each ch across, sl st into next 2 st on body of cardigan, turn (11)
Row 2: sc in BLO in each st across, turn
Row 3: Ch 1, sc in BLO in each st across, sl st into next 2 st on body of cardigan, turn (11)
Repeat Row 2&3 across the bottom of front panel.
Fasten off.
Assemble Panels
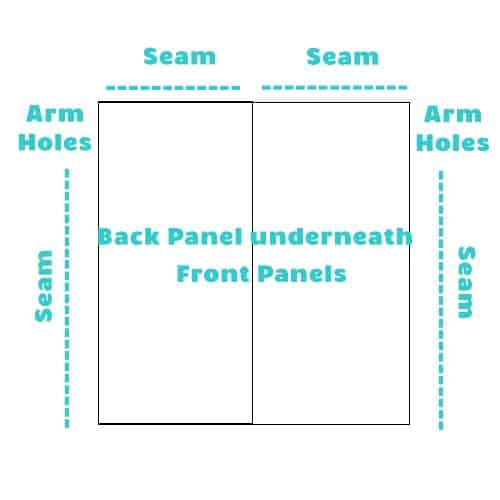
Lay back panel flat.
Lay front panels on top of the back panel so that the “wrong side” of the cable detail is facing you. Arrange so cable detail becomes the edging/collar of the cardigan.
Using the mattress stitch or whip stitch, seam along the top to create the shoulder seam.
Seam along the sides of the cardigan leaving 6.5 (7, 7.5, 8, 8.5, 9) inches for the armholes on either side.
Turn inside out, this will now be the right side. The “right side” of the cable detail will now be visible.
Sleeves
We will now be working in rounds for the sleeves as well as turning after each round.
Attach yarn to the armpit area of the armhole opening.
Row 1: Ch 2, dc around evenly (making approximately 3 dc on the side of every 2 hdc rows from the body of the cardigan), join to first dc, turn (46, 49, 52, 56, 60, 63)
Row 2: Ch 2, dc2tog, dc in remaining st around, turn (45, 48, 51, 56, 59, 62)
Repeat Row 2 for 24 (24, 26, 26, 28, 28) rows.
Each row will have one less stitch than the previous row.
Last Two Rows: Ch 2, dc in each st around
You will now have a total of 28 (28, 30, 30, 32, 32) rows.
Do not fasten off. We will begin crocheting the bottom edging in short rows.
The edging will add roughly 2 inches to the length of the sleeve.
At this time, Repeat Row 2 for more length as desired.
Edging
Row 1: Ch 12, sc in 2nd ch from hook and in each ch across, sl st into next 2 st on body of cardigan, turn (11)
Row 2: sc in BLO in each st across, turn
Row 3: Ch 1, sc in BLO in each st across, sl st into next 2 st on body of cardigan, turn (11)
Repeat Row 2&3 around the bottom of the sleeve.
When you get to the beginning of the round, sl st the last row to the first row of the edging.
Fasten off and weave in ends.
Repeat for second sleeve.
Weave in all ends.


Leave a Reply