
This post may contain affiliate links. For more information, please see our disclosure policy.
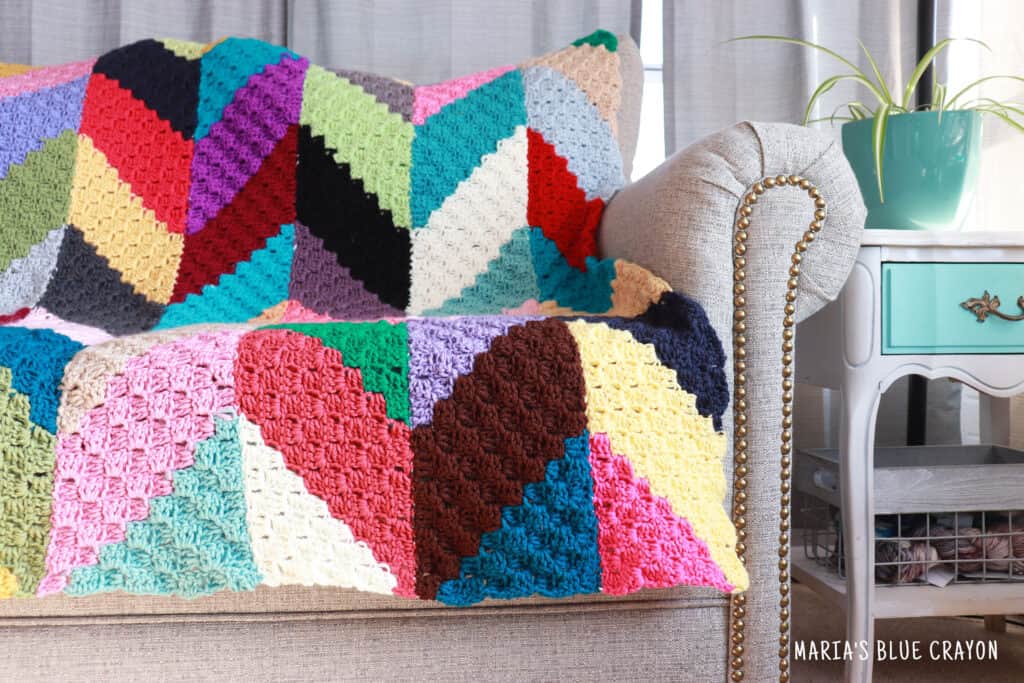
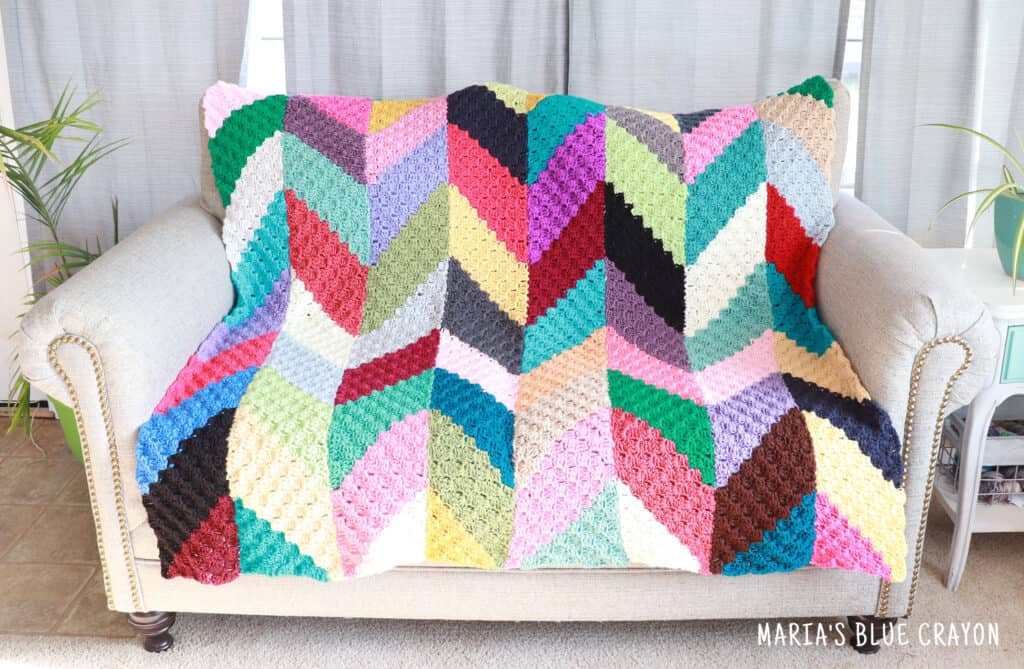
Use up your scrap yarn with this crochet scrap blanket! This blanket has a really cool unique pattern and is made easily with the corner to corner stitch. Find the tutorial on how to make your own crochet scrap blanket below.
- Save this to your Ravelry here.
- PIN it to your Pinterest boards here.
- Keep scrolling for the tutorial!
Two things I really love: the corner to corner stitch and using up my scrap yarn!
I’ve had this idea rolling around in my head for a while to use the C2C diagonal look to make this pattern and I finally got around to doing it! I love that this blanket has a nice even pattern but it’s made up with all different colors – great for stash busting!
I always have left over yarn from projects and I also have yarn from years ago when I used to buy yarn just because I like the color. Okay, I still do that sometimes, but not nearly as much as I used to! This project was great for all of those yarns.
This blanket was really easy to make and if you love the mindless corner to corner stitch, you’ll absolutely love making this crochet scrap blanket!
Tips for Crochet Scrap Blanket
I made this crochet scrap blanket very fast, but there are a few things I’m glad I did and I think will help you when you make your blanket too!
Organize your Yarn
What I did was just go through all of my totes/drawers and picked out the yarns I had that were half (or less) skeins or single skeins that I have no idea what I was going to use them for.
I ended up with one bag and one basket overflowed with yarn. Some tangled, some on the verge of being tangled if I moved it any further. I didn’t want to end up with a mess so I prepped each color.
For the half used skeins, I used my yarn winder to wind them up into neat little cakes. I have this inexpensive one that I have been using for over a year now. It works great for caking up my left over skeins.
Now that my potentially tangled yarn was caked (I did leave some skeins uncaked since they weren’t too messy), I was able to crochet without stopping and untangling!
Join as You Go/Plan Color Pattern
Since this blanket is made by crocheting strips and then joining them together, I highly recommend joining the strips as you go.
Not only does this allow you to have the blanket finished when you’re done crocheting, but you’ll probably have a higher probability of finishing it this way!
If you’re like me, seaming together pieces isn’t your favorite part. If you leave it to the end, you may keep procrastinating and this blanket may become another lost WIP in your pile. (I know that pile all too well – haha!)
Also, when you join the strips as you go, you will be able to coordinate your colors well. After laying down the strips I had finished, I was able to plan out what colors I wanted where.
I didn’t take too much time planning on what colors went where since this is meant to be a scrappy/random colored blanket but I didn’t want to have two of the same color touching each other. I also did not want to have too much of the same shades of colors together, instead I wanted them somewhat evenly dispersed.

Seam Together on a Higher Surface
I learned this the hard way and you may know better than I do, but seaming together a blanket on the floor is just calling for back pain.
I seamed up half of my blanket hunched over on the floor before I thought maybe, just maybe, putting it on the table or my oversized ottoman would be easier on my back.
Spoiler alert, it put so much less strain on my back having it up on a higher surface to seam together! So I definitely recommend this so you don’t strain your back while doing a not very fun task to begin with. 🙂
Crochet Scrap Blanket Tutorial
If you aren’t familiar with corner to corner crochet, I do have a tutorial showing you how to crochet the stitch here. In the video tutorial, I am using half double crochets – in this blanket I used double crochets.
Be sure to learn the stitch before reading the rest of the tutorial! I will be explaining how to make the blanket assuming you are familiar with the corner to corner method including increasing and decreasing.
Materials
Worsted weight yarn
J/6.00mm hook
Tapestry needle
Scissors
C2C Scrap Blanket Tutorial
Notes: Each rectangular strip will have 10 colors.
You will need to know how to increase and decrease to make a rectangle shape.
Finished dimensions of blanket: 50″ x 54″
Start with one color. Using the C2C stitch (double crochets), make 7 rows increasing on both ends of the row.
Switch to next color.
Row 8: Increase on both ends of the row.
Row 9: Increase in the beginning of next row and decrease at the end of the row. We will continue to do this to make a long rectangular strip.
Make 5 more rows in this color (again, continuing to increase on one side and decrease on the other).
Continue to switch colors after every 7 rows to make a long rectangular strip.
Once your strip has 9 different colors, switch to the last color.
The last color will be decreased on both sides to close up the rectangle. Decrease on both sides for remaining rows. You should have 7 rows total for the last color.
The strip will measure approximately 54″. Depending on your tension and yarn used, size may vary.
Make 8 strips total and seam together using the mattress stitch. Use the photos above as a guide when arranging the strips to get the chevron pattern. You can find the tutorial on how to use the mattress stitch here.
I used a light cream colored yarn to seam it all together.
It did show a little bit on my blanket but it’s not obvious. I made sure to tie off and weave in the ends on the same side of the blanket so there is a “back” side that I can hide.
Weave in all ends and celebrate that you used up your scrap yarn!
More Crochet Blanket Patterns
Star Stitch Blanket | Beginner Striped Blanket | Color Block Blanket
This is gorgeous. Thanks so much I love your way of doing this blanket. Looks pretty straight forward. You are so clever. Thanks for sharing with us.!
Another Gorgeous creation that I will be making, don’t know how to do c2c but will learn. Thank you.
How do you join as you go with a c2c stitch? I cant find a tutorial for this so i dont have to seam it all together at end. If im being honest they would be used as scarves before any seaming would accutally happen haha.
Hi! I, myself, am not knowledgable with joining as you go for the corner to corner method. Have you tried searching YouTube?
Please explain how to increase at both ends of the row for row 8 of the scrap blanket.
Hi Susan! Row 8 is just like the previous rows. Sorry for any confusion, I put it as a separate row 8 since it will be a new color.
I had started a different scrap yarn afghan project, got your email today with this pattern link, and pulled out the many rows I’d done to make this instead …thanks for the pattern! Do you happen to know how many different colors you used?