
This post may contain affiliate links. For more information, please see our disclosure policy.
Find the free crochet hat pattern to view on my blog below.
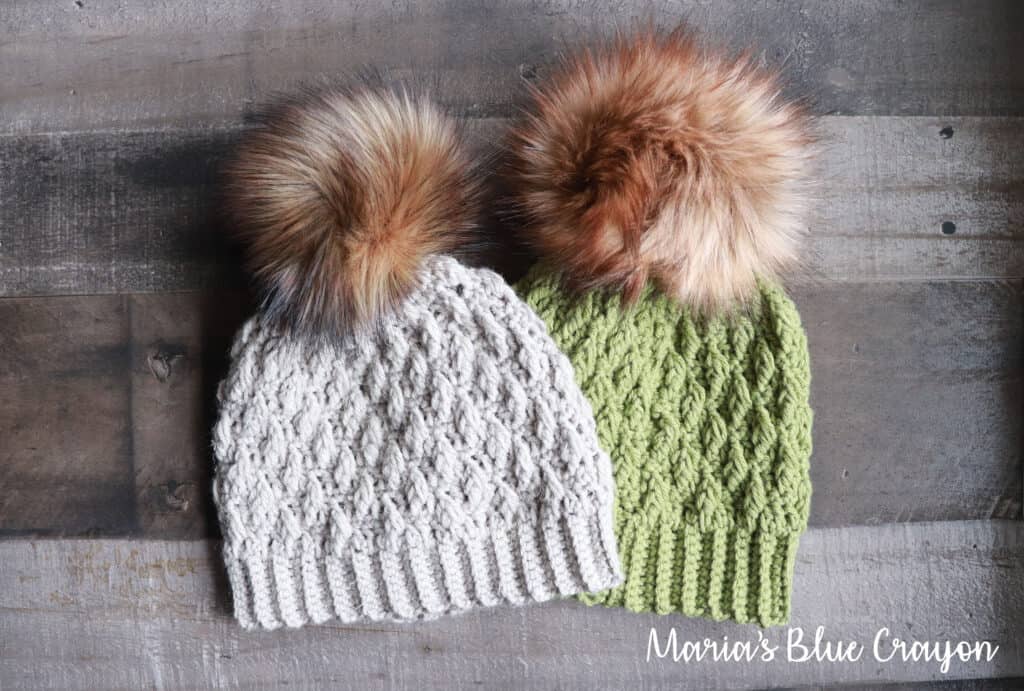
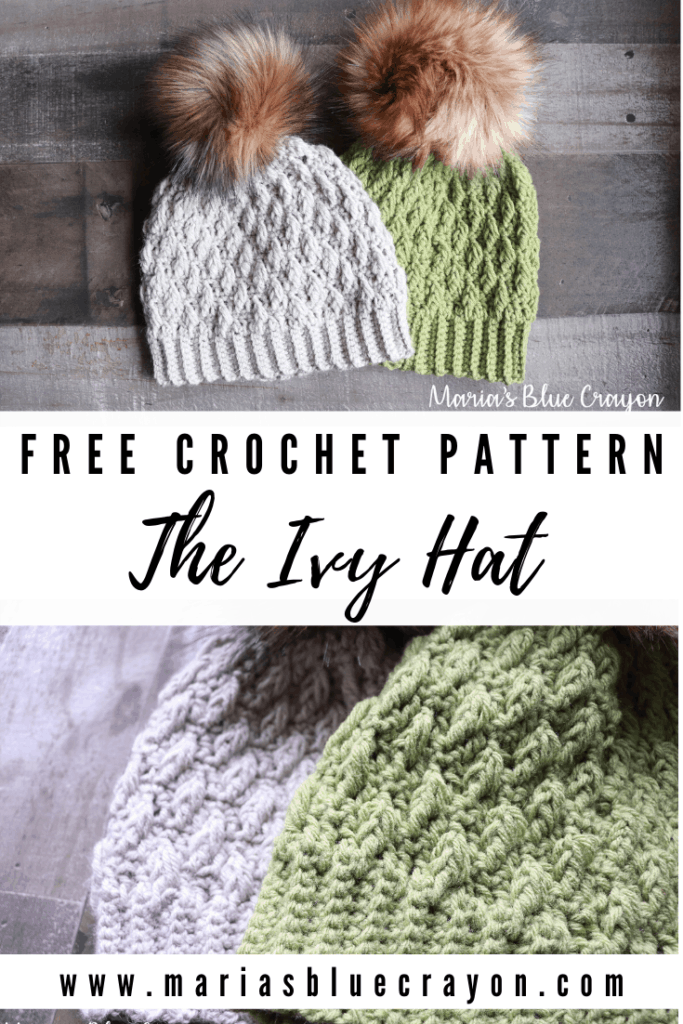
This crochet hat pattern offers great texture in a bottom up structure. With some shaping at the top, this hat does not have too much extra fabric when sewing the top of the hat closed.
- Purchase the ad-free PDF download/printable on Ravelry or Etsy.
- PIN it to your crochet board on Pinterest for later.
- Keep scrolling to view the free pattern below.
Crochet Hat Pattern Using Worsted Weight Yarn
I opted to use worsted weight yarn for this crochet hat design because it’s always readily available in my stash.
The texture of the stitches also show up nicely with the worsted weight yarn. It almost resembles a puff or popcorn stitch but without the gaps in between the stitches, so the worsted weight yarn will be adequate in keeping your head warm!
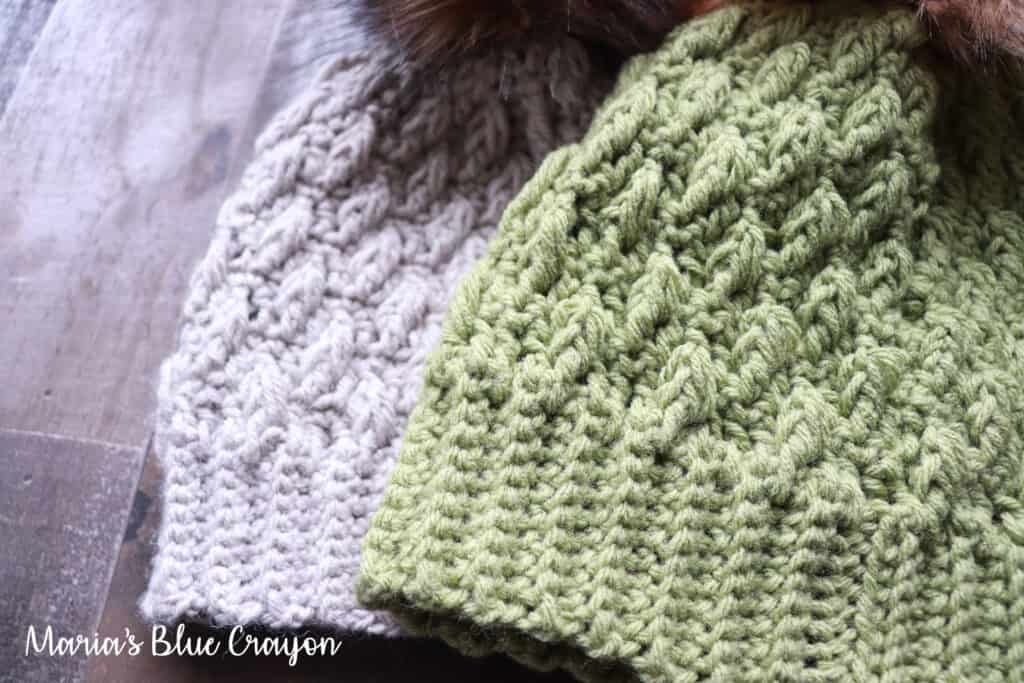
Plump Posts Stitch
The main stitch used in this hat was found in the Crochet Every Way Stitch Dictionary. This is a new crochet stitch book for me, and I am loving it!
Included with the basic instructions of each stitch, it also gives instructions on how to increase the stitch which is a must have for designers like myself!
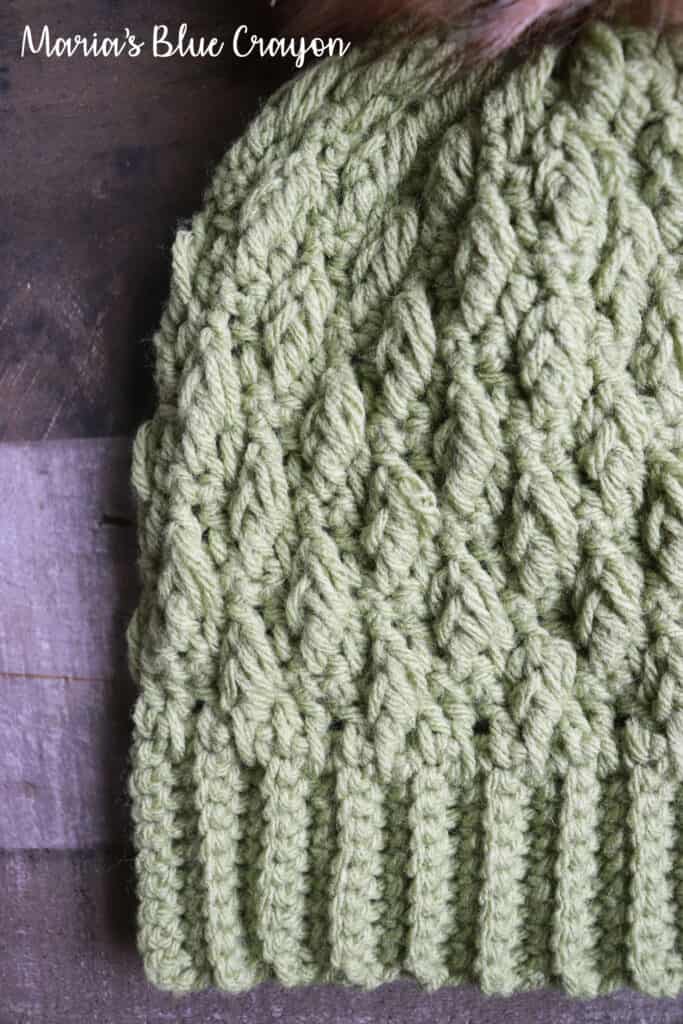
This stitch caught my eye immediately. It gives a nice puffy texture, but does not leave any gaps in between since the puffy stitches are worked in the rows below.
Ivy Crochet Hat Pattern Tips/Notes
I’m adding some photos/tips for this pattern to hopefully make it a little more visual and helpful!
- Purchase the formatted, ad-free PDF download/printable on Ravelry or Etsy.
- Bookmark this page for later to view the pattern below!
Free Crochet Hat Pattern – The Ivy Hat
Materials
Worsted weight yarn
Tapestry needle
Scissors
Pom Pom (optional)
Notes
Suitable for 21” circumference heads. Go up a hook size for a looser fit.
Hat is worked from the brim up. The brim will be made first and then the body of the hat will be made on top of the brim.
After each round of the body, you will have to turn your work.
Beginning stitches do not count as a stitch.
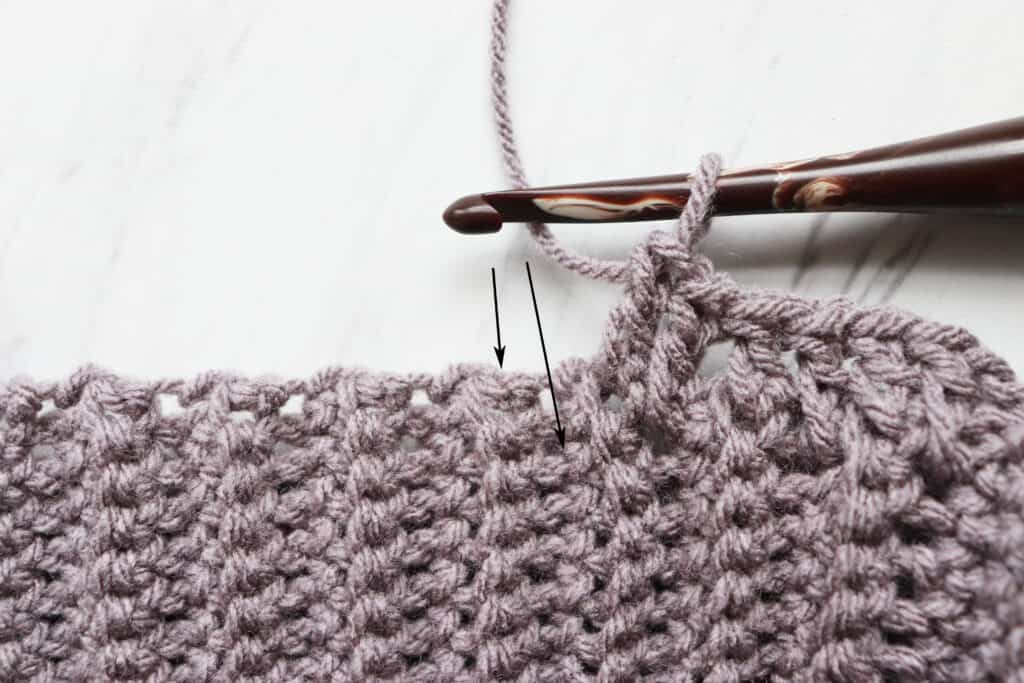
When making the double post stitches, they will be made in the double crochet row below while skipping the next stitch.
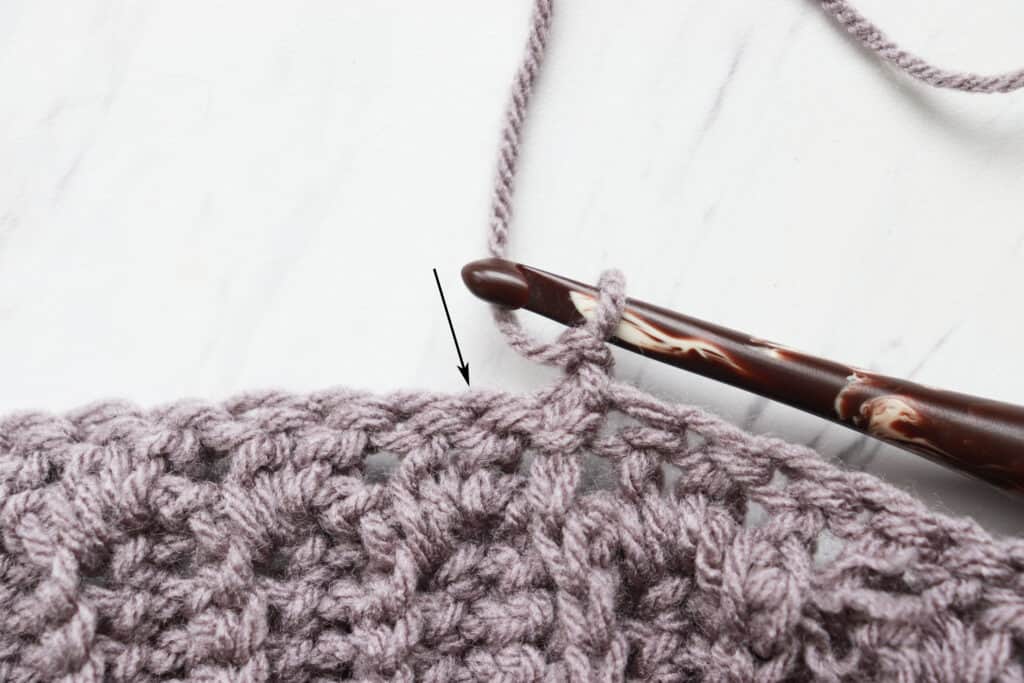
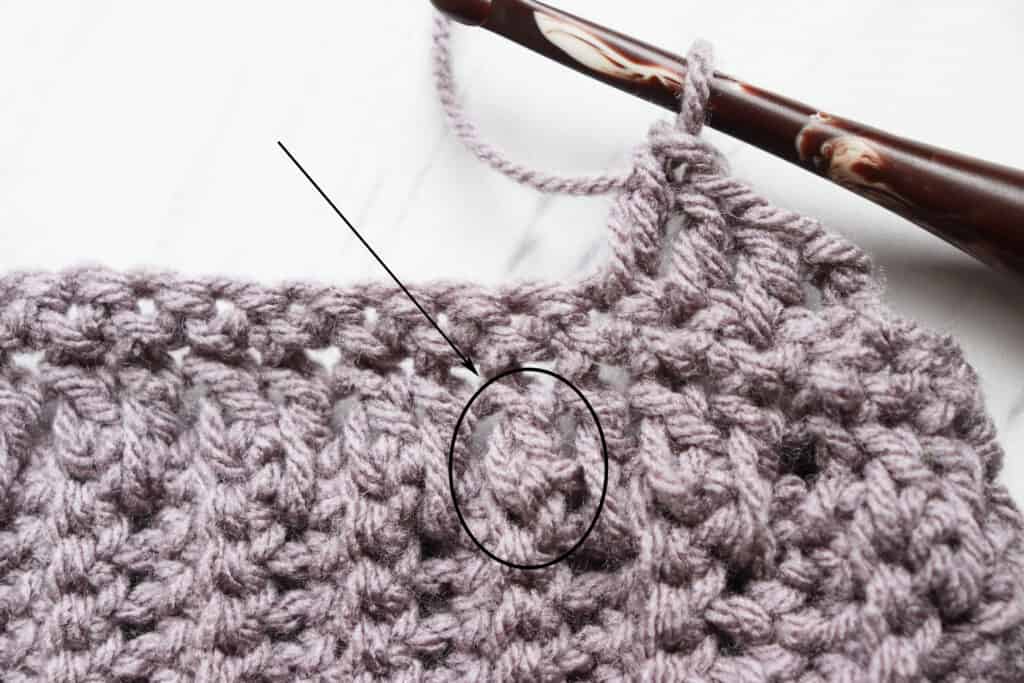
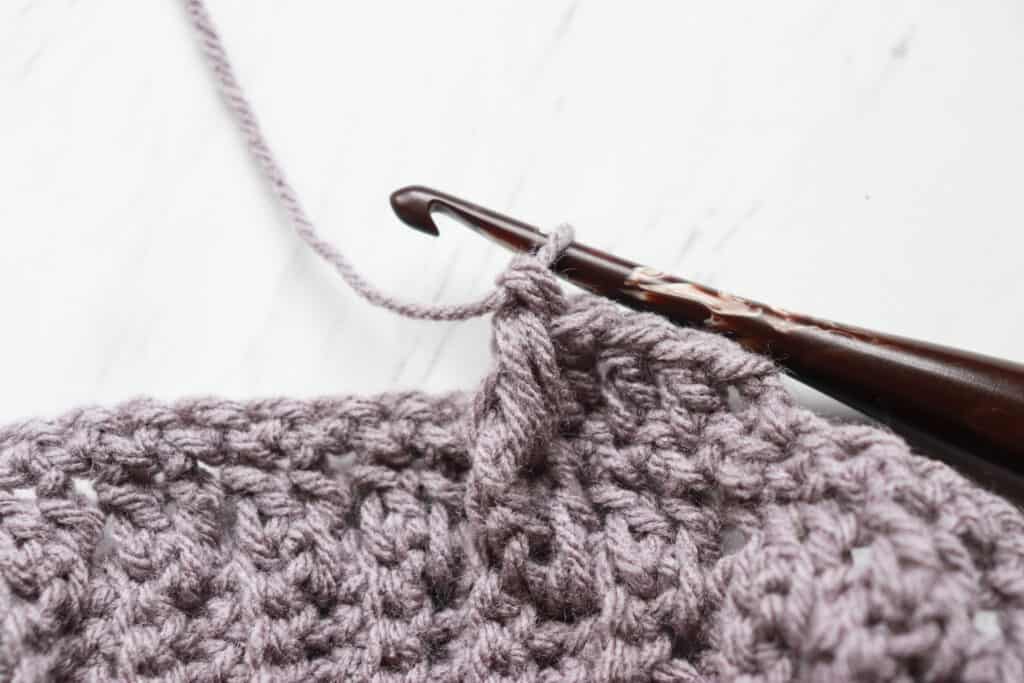
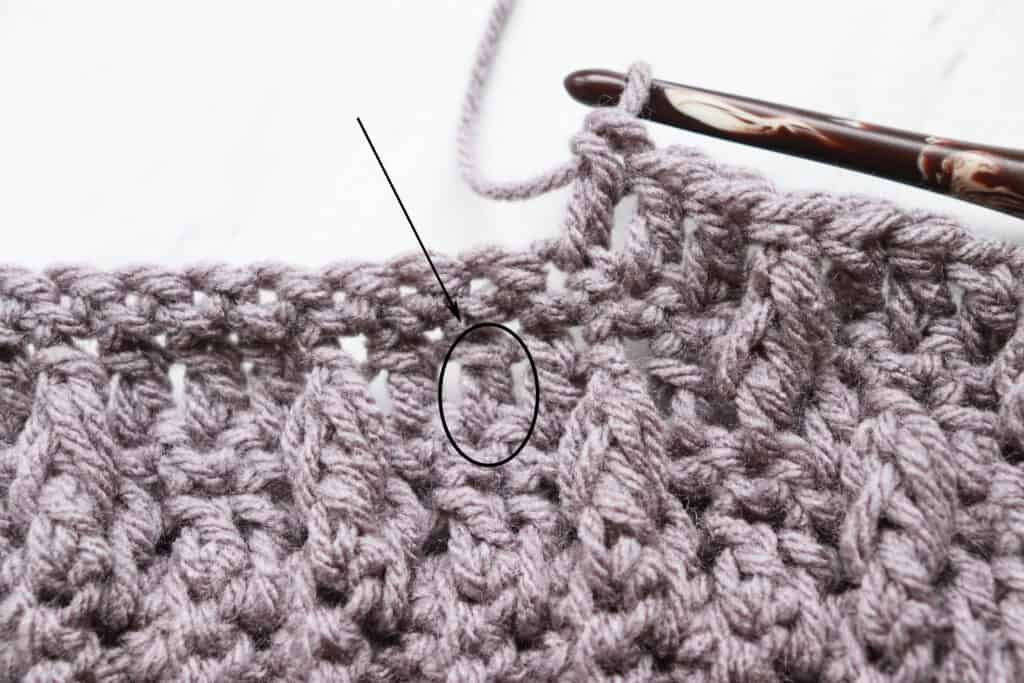
See Photos above in the blog post for additional notes/tips.
Check out the plump posts stitch tutorial here.
Special Stitches
Double Post is worked as follows: Working into the double crochet in the row below, double crochet two together around the post of the double crochet.
More in depth explanation: Yarn over, insert hook around the double crochet in the row below from the back to the front. Yarn over, pull up a loop, yarn over, insert hook around the double crochet post again, yarn over, pull up a loop, yarn over, pull through 4 loops, yarn over, pull through 2 loops.
Dimensions of finished hat: 8.5” across when laid flat x 8” in height
* Not matching gauge below may yield different results.
Gauge: 2” x 2” ~ 10 st x 6 rows in sc BLO
Abbreviations (US terms)
Ch = chain, sc = single crochet, dc = double crochet, DP = double post, sc2tog = single crochet two together, BLO = back loop only, sk = skip, sp = space, st = stitch
Pattern
Brim
Row 1: Ch 11, sc in 2nd ch from hook and across, turn (10)
Row 2-60: Ch 1, sc in BLO in each st across, turn (10)
Join the last row to the first row by sc together to form the brim.
Rotate work 90 degrees to start working on the side of the rows just made.
Body
Round 1: Ch 2, dc evenly around the brim, making 1 st per row of the brim, join to first dc, turn (60)
Round 2: Ch 1, sc in each st around, join to first sc, turn (60)
Round 3: Ch 2, *dc in next 3 st, DP in the dc row below the next st, sk st above DP just worked, repeat from * around, join to first dc, turn (60)
Round 4: Ch 1, sc in each st around, join to first sc, turn (60)
Round 5: Ch 2, dc, *DP in the dc row below the next st, sk st above DP just worked, dc in next 3 st, repeat from * around, dc in last 2 st, join to first dc, turn (60)
Repeat Round 2-5 until you have a total of 13 rows for the body of the hat.
Round 14: Ch 1, *sc in next 2 st, sc2tog, repeat from * around, join to first sc (45)
Round 15: Ch 2, *dc in next 2 st, DP in the dc row below the next st, sk st above DP just worked, repeat from * around, join to first dc, turn (45)
Round 16: Ch 1, *sc in next st, sc2tog, repeat from * around, join to first sc (30)
Round 17: Ch 2, *DP in the dc row below the next st, sk st above DP just worked, dc in next st, repeat from * around, dc in last st, join to first dc, turn (30)
Round 18: Ch 1, sc2tog around, join to first sc (15)
Fasten off and leave a long tail for sewing.
Close up the top hole by weaving the yarn tail in and out of the top loops. Pull tight, knot, and weave in ends.
(Optional) Add pom pom.
Leave a Reply