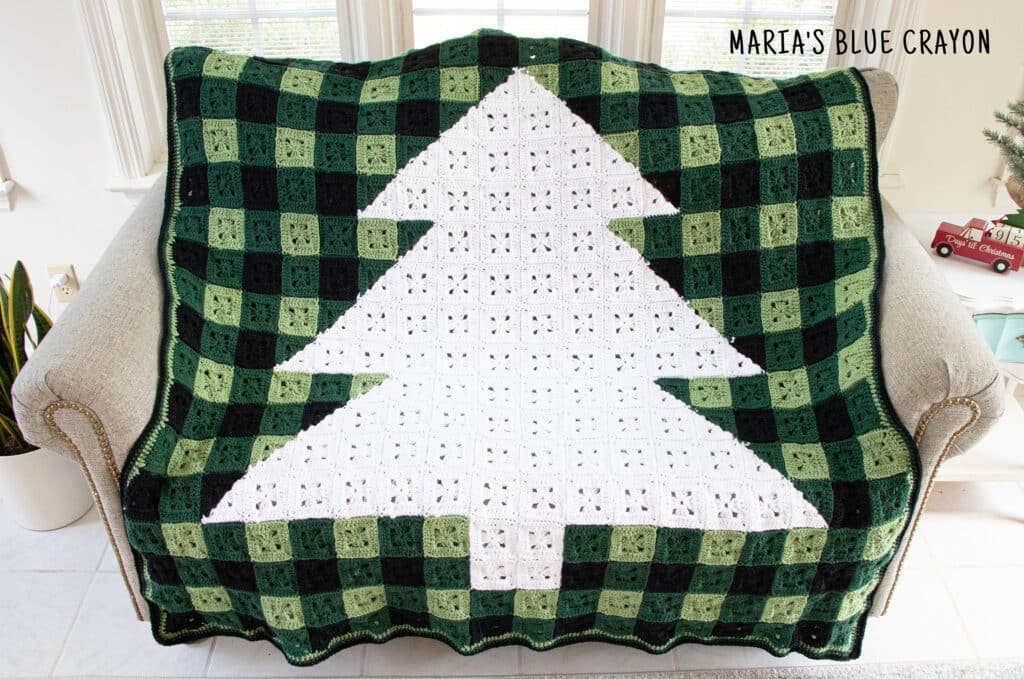
This crochet plaid blanket is made with granny squares and features a tree in the center – perfect for Christmas and winter time. Video tutorial included for the granny squares.
- Purchase the ad-free PDF on Etsy or Ravelry.
- PIN it to your Pinterest boards for later.
- View the free pattern below on my blog supported by ads.

Granny Square Plaid
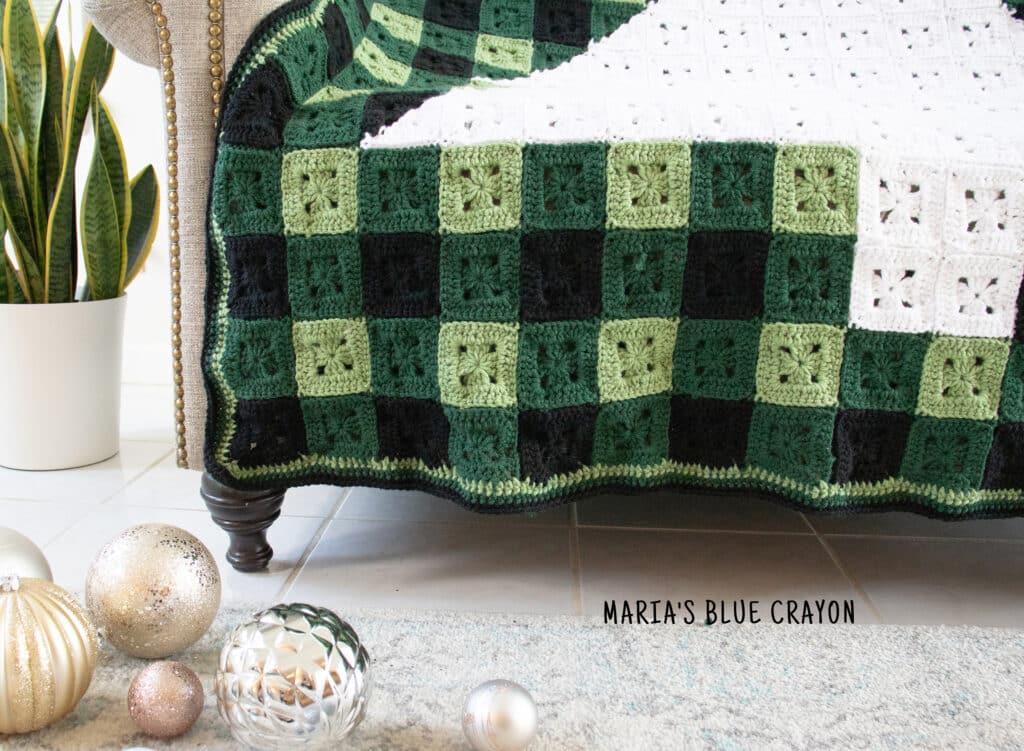
For this project, I used small granny squares in 2 shades of green and black to create a plaid look. To make it a step further, I graphed out a tree for the middle to really make a stunning project I can display all winter long!
If you prefer, you could make this in red or any other color plaid. I would stick with the black and then a darker and lighter shade of the color of your choice. You really want the white of the tree to pop so I personally wouldn’t choose anything too light.

Solid Granny Squares
Solid granny squares are used for this project to lessen the amount of gaps/holes for the blanket.
The granny squares are only two rounds, so they are super easy and quick to make. It’s a great project to take on the go when you are making just the granny squares.

Two Color Granny Squares
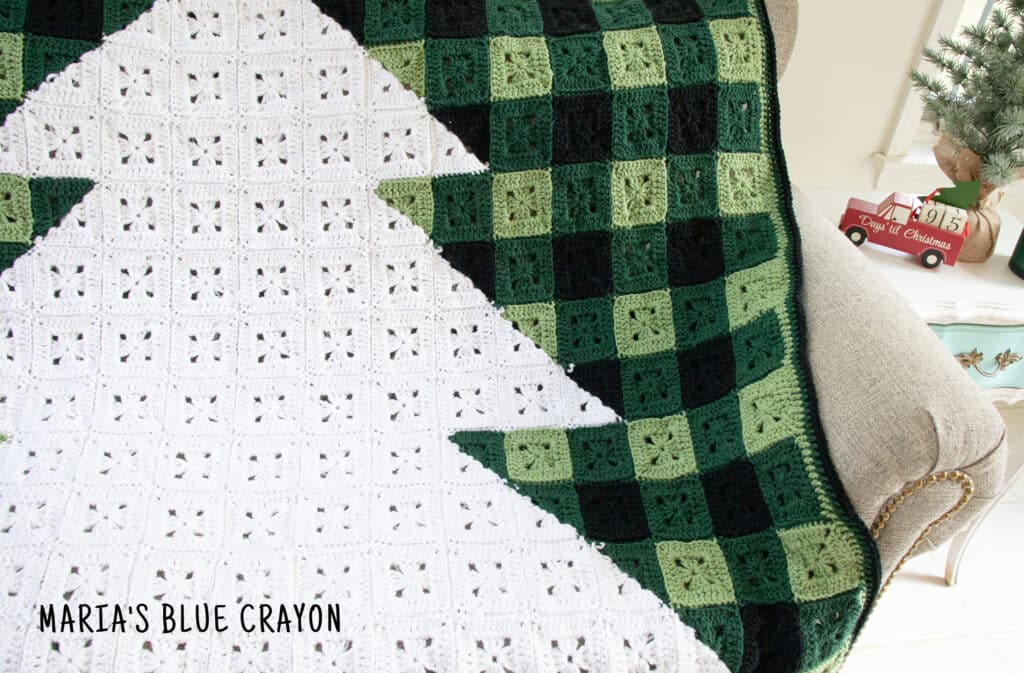
To get the shape of the tree, I had to make some of the granny squares two colors. The color splits the square diagonally so each color is in the shape of a triangle.
Since the granny squares are only two rounds, this was very easy to accomplish the color changes within the square. You will find the directions below on how to do this.
Tips for Tackling this Large Blanket Project
324 granny squares total might sound daunting but if you love crocheting granny squares and feel satisfied after each little square – it won’t feel never ending!
These squares are only 2 rounds. I actually timed myself and it took me about 2 minutes (or less) to crochet each one. Once you get the pattern down, it’s just a mindless project.
I found myself crocheting these baby squares on the go, in between homeschool sessions, waiting for dinner to bake in the oven, on the couch at the end of the night, etc. Because of that I had squares everywhere. It would be helpful to have a basket or bag to keep them all in one place.
Once I had a good bit of squares done, I did start joining them. It was a good break from crocheting the squares and to see some real progress.
Takeaway: bring the yarn with you for this project on the go so you can complete these little squares anywhere, keep them all in one spot, and start joining when you have the time to so it’s not so daunting at the end!

Granny Squares Crochet Video Tutorial
If you are unable to view the video below this message, you can also watch it on YouTube.
Crochet Plaid Tree Blanket Pattern
Materials
I Love this Yarn! (Weight 4 acrylic) in the following colors and number of skeins (355 yds each):
Forest Green 4 skeins
Mid Green 2 skeins
Black 2 skeins
White 3 skeins
J/6.00mm hook
Tapestry needle
Scissors
Pattern Notes
Turn your work after each round when crocheting the granny squares.
Joining tutorial can be found here.
Dimensions: ~60” x 60” with border
Gauge: Each granny square should measure 3”
Abbreviations: (US terms)
Ch = chain, hdc = half double crochet dc = double crochet, sl st = slip stitch,
sp = space, st = stitch
Instructions
Make the number/color of squares listed using the patterns below.
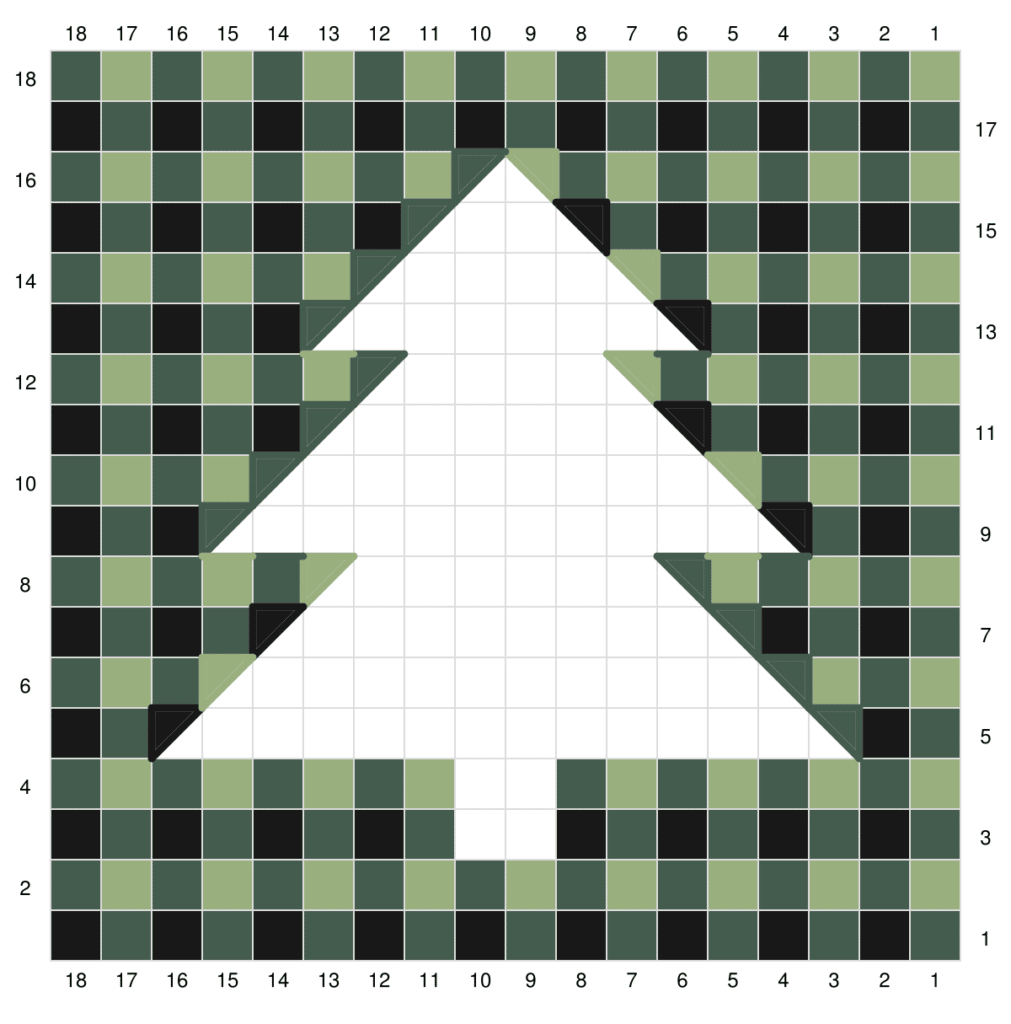
Forest Green: 110
Mid Green: 58
Black: 52
White: 80
Forest Green/White: 12
Mid Green/White: 6
Black/White: 6
Join squares using tutorial linked above (or any method of your choice) with the graph below as a guide. Use forest green to join all the green/black squares. Use white to join all the white squares.
*Be sure to knot all the tails of the magic ring before weaving in ends. This will ensure the magic ring will not come undone over time.
Border
Row 1: Use mid-green, attach yarn to corner of blanket. Ch 2, 5hdc in first corner, hdc in each stitch around making 5 hdc in each corner, join to first st
Change to forest green color
Row 2: Ch 2, 3hdc in first corner, hdc in each stitch around making 3 hdc in each corner, join to first st
Change to black yarn color
Repeat Row 2
Fasten off.
Weave in all ends. Use the yarn ends around the two color squares to cover any imperfections/to create clean edges around the tree.
Granny Square Pattern
Round 1: Magic ring, ch 3, 2dc, *ch 2, 3dc, repeat from * 2 more times, ch 2, join to top of beginning ch 3, TURN
Round 2: Sl st into ch 2 sp from previous round and work ch 3, 2dc, into same ch 2 sp, *dc across to next ch 2 sp, (3dc, ch 2, 3dc) into ch 2 sp, repeat from * 2 more times, dc across to next ch 2 sp, 3 dc into ch 2 sp, ch 2, join to top of beginning ch 3
Fasten off.
Two Color Granny Square Pattern
*When changing colors, do not carry the yarn of the other color or crochet over it, leave it to the side until you come back to it.
Start with Color A
Round 1: Magic ring, ch 3, 2dc, ch 2, 3dc, ch 1, Change to Color B by slipping Color B yarn through the loop on the hook (this counts as another ch 1), 3 dc, ch 2, 3 dc, ch 2, join to beginning ch 3, TURN
Round 2: Sl st into ch 2 sp from previous round and work ch 3, 2dc, into same sp, dc across to next ch 2 sp, (3dc, ch 2, 3dc) into ch 2 sp, dc across to next ch 2 sp, 3 dc into ch 2 sp, ch 1, Change to Color A by slipping yarn through (this counts as another ch 1), 3dc into ch 2 sp, dc across to next ch 2 sp, (3dc, ch 2, 3dc) into ch 2 sp, dc across to next ch 2 sp, 3dc in ch 2 sp, ch 2, join to top of beginning ch 3
Fasten off.


This is beautiful, Maria! Thanks for another super fun project! I love mindless crochet for evenings in front of the TV with the husband. Can’t wait to get this started!