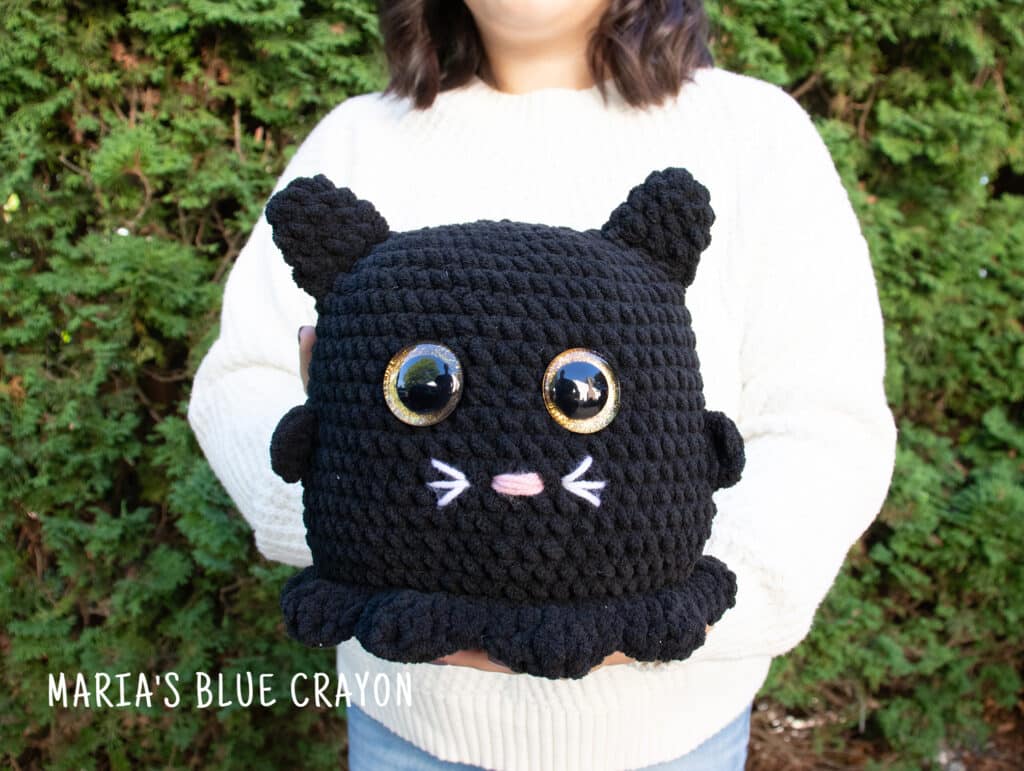
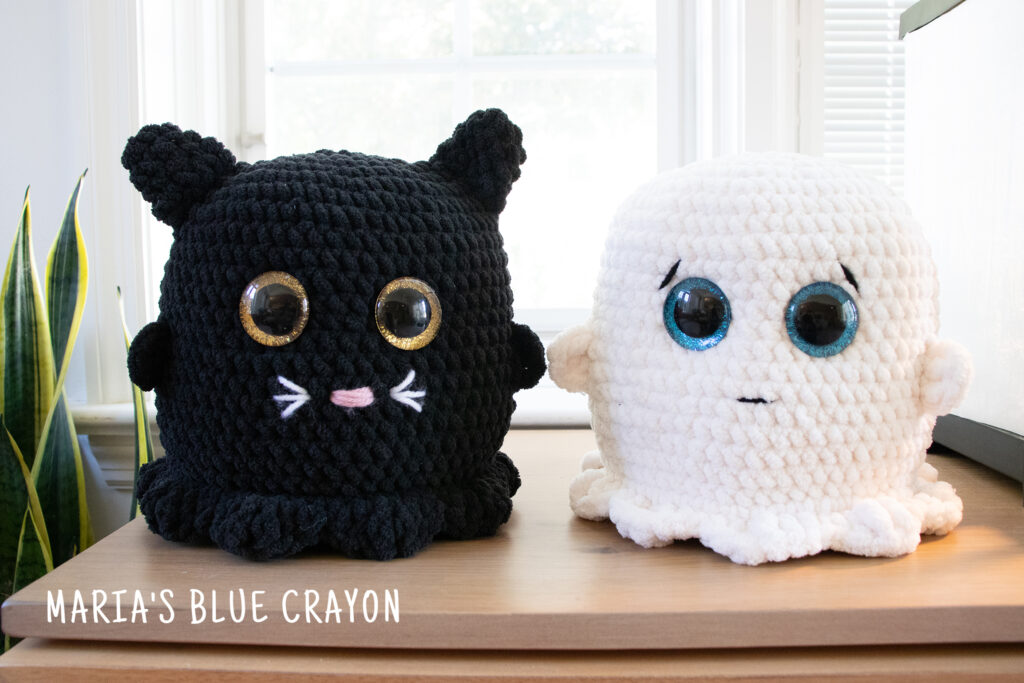
Crochet this squishy, adorable kitty cat ghosty along with the other Hallowen plushies! Using blanket yarn, these crochet ghosties are quick to work up and perfect for selling or gifting.
Make the whole set: ghost plushie pattern here, Frankenstein pattern here, pumpkin plushie pattern here
- Purchase the ad-free, download/printable on Etsy or Ravelry.
- PIN it to your Pinterest boards for later.
- View the crochet pattern below here on my blog.

Blanket Yarn for Amigurumi
What makes these plushies so special is using super bulky, (Bernat) blanket yarns instead of the typical worsted weight yarns.
You can also use chenille yarns in other brands as well. These yarns are soft, squishy and cozy which really makes your amigurumi that much more cute and cuddly.
For amigurumi, the stitches need to be tight with the fabric having no gaps or holes so even though the blanket yarn is a super bulky, you will be using a much smaller hook. Depending on your tension, you will want to use a 6.5mm crochet hook or even smaller.

Glittery Safety Eyes
The safety eyes I used are 35mm – they’re huge! But they make the kitty cat ghosty and original ghosty so adorable.
I got a pack of ten here on Etsy. You can get a mixed bag of colors or all the same color. They also have other sizes available.
In my experience, these eyes aren’t very “safe”. Meaning, they come apart easily even after attaching to the ghost face. Because of this, I would advise using a method to really seal the backing onto the safety eye.
I’ve seen people melt part of the eye after the backing is put on so it doesn’t come apart form the plastic washer. To do this, you would need to first attach your safety eye with washer backing. Carefully warm the part of the safety eye sticking out of the washer backing with either a hot iron or lighter. Smash that part down with a piece of cardboard or something other than your finger. This gives that stubby part of the safety eye a greater area surface and will not come back out of the backing.

Crochet Kitty Cat Ghosty Plushie Pattern
Materials
Bernat Blanket yarn in Coal (300g/220yds)
Worsted weight yarn in pink and white
6.5mm crochet hook
Polyfil
Tapestry needle
Scissors
Crochet Pattern Notes
Beginning chain of each round does not count as a stitch.
The cat ghosty is made by first crocheting the body, attaching and sewing on the face, then crocheting a circle piece for the bottom. The bottom circle piece will be crocheted together with the bottom of the ghost body. Arms are crocheted on and ears attached last.
Dimensions: ~7.5” tall and 9” wide with arms
Abbreviations: (US terms)
Ch = chain, sc = single crochet, hdc = half double crochet, dc = double crochet, tr = treble crochet, sl st = slip stitch, BLO = back loop only, st = stitch
Crochet Pattern
Cat Ghost Body
Round 1: Magic ring, ch 1, 10sc, join to first st (10)
Round 2: Ch 1, 2sc in each st around, join to first st (20)
Round 3: Ch 1, sc in first st, 2sc in next st, *sc in next st, 2sc in next st, repeat from * around, join to first st (30)
Round 4: Ch 1, *sc in next 2 st, 2sc in next st, repeat from * around, repeat from * around, join to first st (40)
Round 5: Ch 1, *sc in next 3 st, 2sc in next st, repeat from * around, repeat from * around, join to first st (50)
Round 6: Ch 1, *sc in next 4 st, 2sc in next st, repeat from * around, repeat from * around, join to first st (60)
Round 7-20: Ch 1, sc in each st around, join to first st (60)
Fasten off.
Attach safety eyes and use white and pink yarn and tapestry needle to sew on nose and whiskers.
Safety eye placement: between rows 12-13, about 7 stitches apart
Stuff body with polyfil.
Bottom Circle
Round 1: Magic ring, ch 1, 10sc, join to first st (10)
Round 2: Ch 1, 2sc in each st around, join to first st (20)
Round 3: Ch 1, sc in first st, 2sc in next st, *sc in next st, 2sc in next st, repeat from * around, join to first st (30)
Round 4: Ch 1, *sc in next 2 st, 2sc in next st, repeat from * around, repeat from * around, join to first st (40)
Round 5: Ch 1, *sc in next 3 st, 2sc in next st, repeat from * around, repeat from * around, join to first st (50)
Round 6: Ch 1, *sc in next 4 st, 2sc in next st, repeat from * around, repeat from * around, join to first st (60)
Round 7: Ch 1, sc in each st around, join to first st (60)
DO NOT FASTEN OFF.
Joining Bottom to Body
We will now be joining the bottom circle to the bottom of the ghost body/the last row of the ghost body. Be sure your ghost is stuffed before joining these two pieces.
Round 1: Ch 1, insert hook into first st of bottom circle and BLO of the last row of the ghost body, sc together and continue to sc together all the way around the bottom circle to BLO of the last row of the ghost, join to first st
Round 2: Ch 1, *hdc in next st, dc in next st, 2tr in next st, dc in next st, hdc in next st, sl st into next st, repeat from * around, join to first st
Fasten off and weave in ends.
Arms
First arm:
Attach yarn 14 rows down to the left of the face – about 6 stitches away from the left edge of the eye.
Ch 1, dc in next 2 sp, ch 2, sl st to next sp. Fasten off and weave in ends.
Second arm:
Attach yarn 17 rows down to the right of the face – about 6 stitches away from the right edge of the eye.
Ch 1, dc in next 2 sp, ch 2, sl st to next sp. Fasten off and weave in ends.
Ears
Round 1: Magic ring, ch 1, 8sc in ring, join to first st
Round 2: Ch 1, sc in each st around, join to first st
Round 3: Ch 1, *sc in next st, 2sc in next st, repeat from * around, join to first st
Fasten off and leave tail for sewing.
Make two ears and sew to top of head with tapestry needle.

Leave a Reply