
This post may contain affiliate links. For more information, please see our disclosure policy.
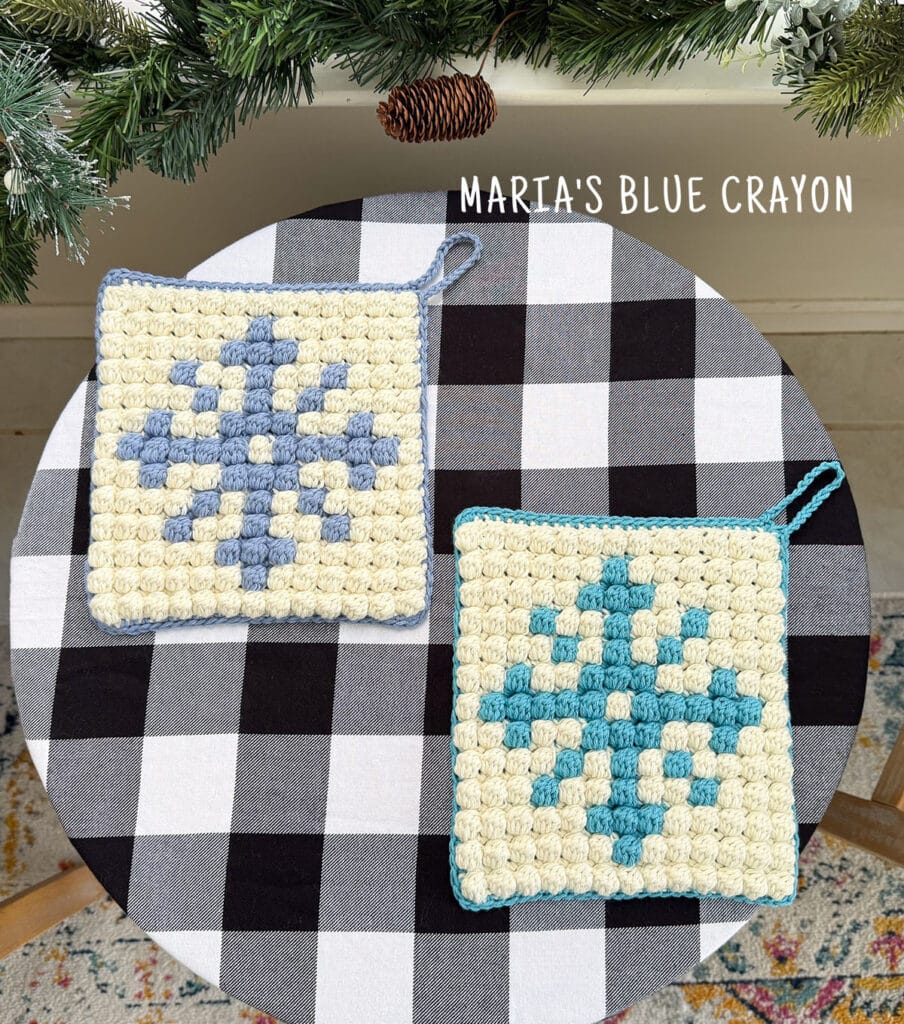
These crochet snowflake patterns are both stylish and double thick. Using the bobble stitch, the graph of the snowflake makes up the front panel. The back panel is made up of simple stitches to tie it all together and to make the potholder double thick.
- Grab the PDF download/printable on Ravelry or Etsy.
- PIN it to your Pinterest boards for later.
- View the entire free crochet pattern for the snowflake potholders along with the graph down below.
Crochet Snowflake Potholder Pattern Overview, Tips + Tricks
The snowflake potholder is made by crocheting a bobble graph for the front panel and crocheting a separate back panel using half double crochets. The panels are single crocheted together and a loop is added.
If you are new to crocheting bobble graphs, I have a tutorial on how to read and crochet along with a graph in the video tutorial below. This tutorial follows a different graph, but it has all the information you need to follow any graph. If you aren’t interested in learning how to do this, follow the row by row instructions in the pattern below. You can use the graph as reference to make sure you are on the right track.
As far as color changes, this graph does have more than a few color changes within the row. Because of this, I recommend using the bobbin method. This method involves splitting your yarn into several smaller balls so you can carry the yarn up each section of color vs cutting the yarn within the row.
For the materials, you want to use 100% cotton yarn. The cotton yarn is safest to use for pot holders and it will hold up as far as durability goes. I enjoy using I Love This Cotton! from Hobby Lobby and Dishie by Knit Picks. These cottons are easy on the hands and the colors do not bleed when working with them.
Crochet Bobble Tree Potholder Video Tutorial
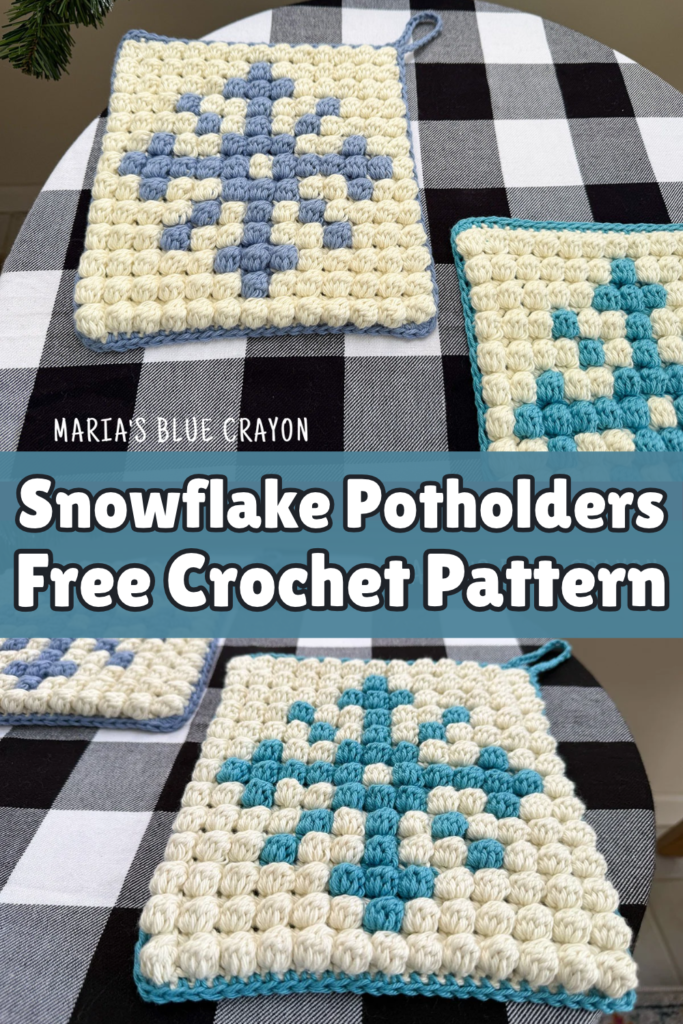
Be sure to watch the video tutorial of how I crocheted my last pot holder (with a tree graph) if you want to learn how to crochet soley from the graph and on how I did my color changes.
Free Crochet Snowflake Potholder Pattern
Materials
100% cotton, worsted weight (medium) yarn
I Love This Cotton! in Ivory and Stonewash (1 skein each)
Knit Picks Dishie in Azure (1 skein)
5.00 mm crochet hook
Tapestry needle/Scissors
Notes
For the more muted blue, I used the I Love This Cotton! yarn in Ivory and Stonewash yarn colors. The brighter blue, I used the ivory in I Love This Cotton! Yarn and Knit Picks Dishie in Azure.
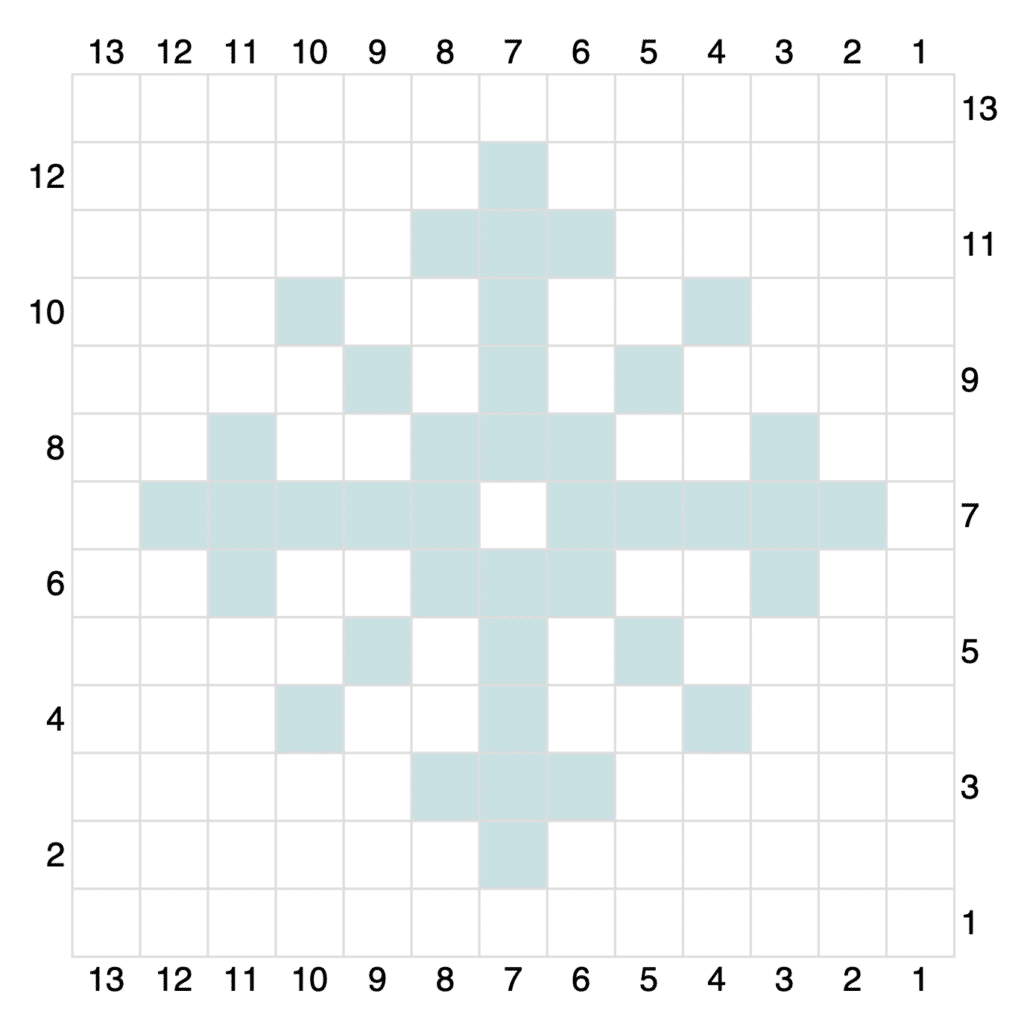
The pattern written out below follows the graph provided. Each line goes through stitches needed to be made as well as the colors.
If you know how to follow a bobble graph, feel free to use the graphs vs the written instructions. If you would like to learn how to read and follow a bobble graph, this video tutorial (a different graph) goes over that as well.
Video Tutorial: https://youtu.be/RkLEWnqQtuQ
Dimensions: 8” x 8”
Abbreviations: (US terms)
Ch = chain, sc = single crochet, hdc = half double crochet, st = stitch
How to read this pattern
**Each “bobble” will be a bobble stitch and a single crochet stitch. For example, if the pattern reads “1 blue bobble”, you will use the blue yarn to make one bobble stitch and one single crochet in the stitch after it.
You will need to change colors within the row by method of your choice. I used the bobbin method where I divided my skeins of yarn into several smaller balls to carry my yarn up each row without having to cut the yarn within the row.
Start each bobble stitch row with ch 2 and each single crochet row with ch 1.
Pattern
Front Panel
Start with Ivory yarn.
Row 1: Ch 27, sc in 2nd ch from hook and in each ch across, turn
Row 2: 13 ivory bobbles
Row 3: 12 ivory sc, 2 blue sc, 12 ivory sc
Row 4: 6 ivory bobbles, 1 blue bobble, 6 ivory bobbles
Row 5: 10 ivory sc, 6 blue sc, 10 ivory sc
Row 6: 5 ivory bobbles, 3 blue bobbles, 5 ivory bobbles
Row 7: 6 ivory sc, 2 blue sc, 4 ivory sc, 2 blue sc, 4 ivory sc, 2 blue sc, 6 ivory sc
Row 8: 3 ivory bobbles, 1 blue bobble, 2 ivory bobbles, 1 blue bobble, 2 ivory bobbles, 1 blue bobble, 3 ivory bobbles
Row 9: 8 ivory sc, 2 blue sc, 2 ivory sc, 2 blue sc, 2 ivory sc, 2 blue sc, 8 ivory sc
Row 10: 4 ivory bobbles, 1 blue bobble, 1 ivory bobble, 1 blue bobble, 1 ivory bobble, 1 blue bobble, 4 ivory bobbles
Row 11: 4 ivory sc, 2 blue sc, 4 ivory sc, 6 blue sc, 4 ivory sc, 2 blue sc, 4 blue sc
Row 12: 2 ivory bobbles, 1 blue bobble, 2 ivory bobbles, 3 blue bobbles, 2 ivory bobbles, 1 blue bobble, 2 ivory bobbles
Row 13: 2 ivory sc, 10 blue sc, 2 ivory sc, 10 blue sc, 2 ivory sc
Row 14: 1 ivory bobble, 5 blue bobbles, 1 ivory bobble, 5 blue bobbles, 1 ivory bobble
Row 15: 4 ivory sc, 2 blue sc, 4 ivory sc, 6 blue sc, 4 ivory sc, 2 blue sc, 4 ivory sc
Row 16: 2 ivory bobbles, 1 blue bobble, 2 ivory bobbles, 3 blue bobbles, 2 ivory bobbles, 1 blue bobble, 2 ivory bobbles
Row 17: 8 ivory sc, 2 blue sc, 2 ivory sc, 2 blue sc, 2 ivory sc, 2 blue sc, 8 ivory sc
Row 18: 4 ivory bobbles, 1 blue bobble, 1 ivory bobble, 1 blue bobble, 1 ivory bobble, 1 blue bobble, 4 ivory bobbles
Row 19: 6 ivory sc, 2 blue sc, 4 ivory sc, 2 blue sc, 4 ivory sc, 2 blue sc, 6 ivory sc
Row 20: 3 ivory bobbles, 1 blue bobble, 2 ivory bobbles, 1 blue bobble, 2 ivory bobbles, 1 blue bobble, 3 ivory bobbles
Row 21: 10 ivory sc, 6 blue sc, 10 ivory sc
Row 22: 5 ivory bobbles, 3 blue bobbles, 5 ivory bobbles
Row 23: 12 ivory sc, 2 blue sc, 12 ivory sc
Row 24: 6 ivory bobbles, 1 blue bobble, 6 ivory bobbles
Row 25: 26 Ivory sc
Row 26: 13 ivory bobbles
Row 27: 26 ivory sc
Fasten off and weave in ends.
Back Panel
Use blue yarn
Row 1: Ch 27, hdc into 2nd ch from hook and across, turn
This should match the width of your graph panel. You can add or subtract stitches as needed.
Row 2: Ch 1, hdc in each st across, turn
Repeat until you have a total of 22 rows or until it matches the height of your graph panel. Fasten off and weave in ends.
Assembly
Hold panels together with the bobble graph on top. Use blue yarn and single crochet together both pieces, start at the top right corner. Make 3sc in the corners. Before joining to the first st, ch 20, join to first st. Fasten off and weave in ends.
What’s Next?
I have other fun graph designs for these potholders! They are the same concept, just different pictures.
Leave a Reply