
This post may contain affiliate links. For more information, please see our disclosure policy.
Welcome to the last week of the Farm Blanket Crochet Along! It has been so much fun seeing everyone’s progress and I can’t wait to see all of the finished blankets!
In this last week, we will be joining all the granny squares then adding a border.
Click here to find the main post of the crochet along.
I love to join granny squares by crocheting them together. Personally, I think it’s a pretty quick and easy way to get the job done!
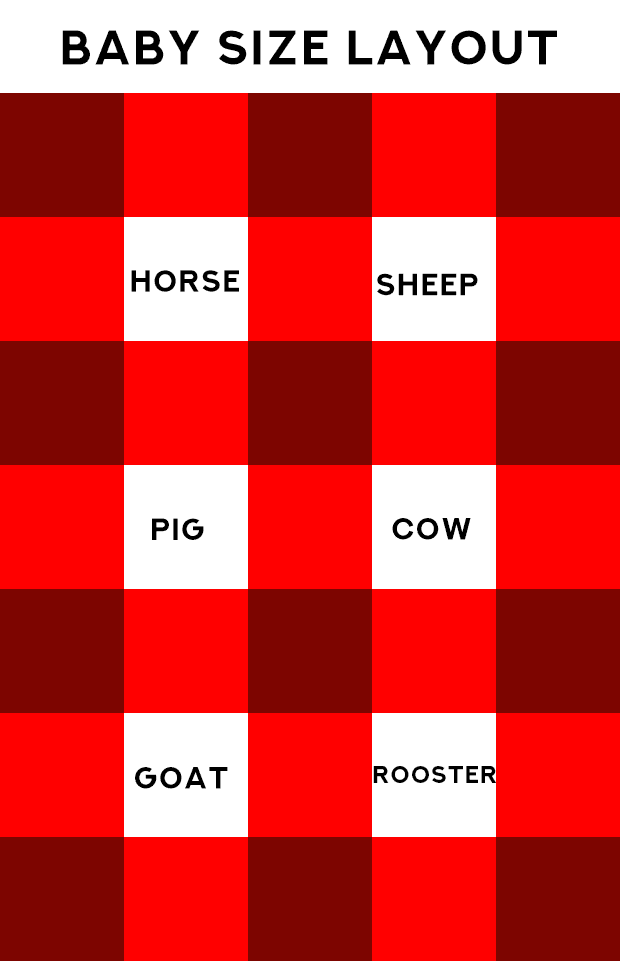
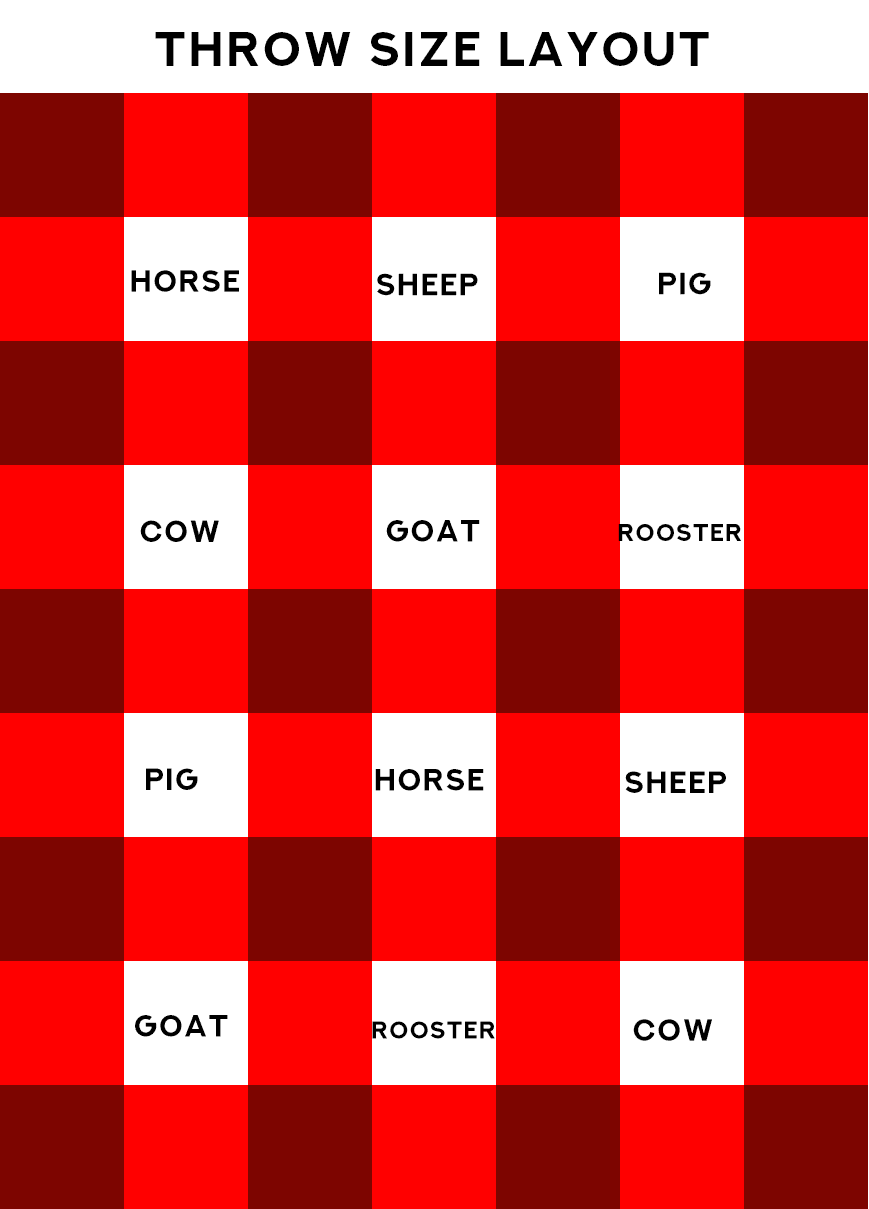
Below, you will find the layout of the blanket and a video of exactly how I crochet the squares together. I typically join the squares together vertically, then horizontally. You can do it vice versa, either way works!
Farm Blanket Layout
Border
p.p1 {margin: 0.0px 0.0px 0.0px 0.0px; font: 14.0px Helvetica; -webkit-text-stroke: #000000; min-height: 17.0px}
span.s1 {font-kerning: none}
p.p1 {margin: 0.0px 0.0px 0.0px 0.0px; font: 14.0px Helvetica; -webkit-text-stroke: #000000; min-height: 17.0px}
span.s1 {font-kerning: none}
Hi there i missed the horse one now i cant find it
Hello trying to peice the blanket together but I get turned around and wind up crocheting the squares together wrong! I need to know how to start.
Hi! To join the squares together, you will want to lay all of them out first. When joining, the right sides of the squares will be facing each other. I typically try to attach one row at a time. In this post I made for my other blanket, it’s explained a little better: https://mariasbluecrayon.com/2017/03/woodland-afghan-construction-joining.html
Thanks so much. I’m getting ready to put the border on now.J really love this throw!