
This post may contain affiliate links. For more information, please see our disclosure policy.
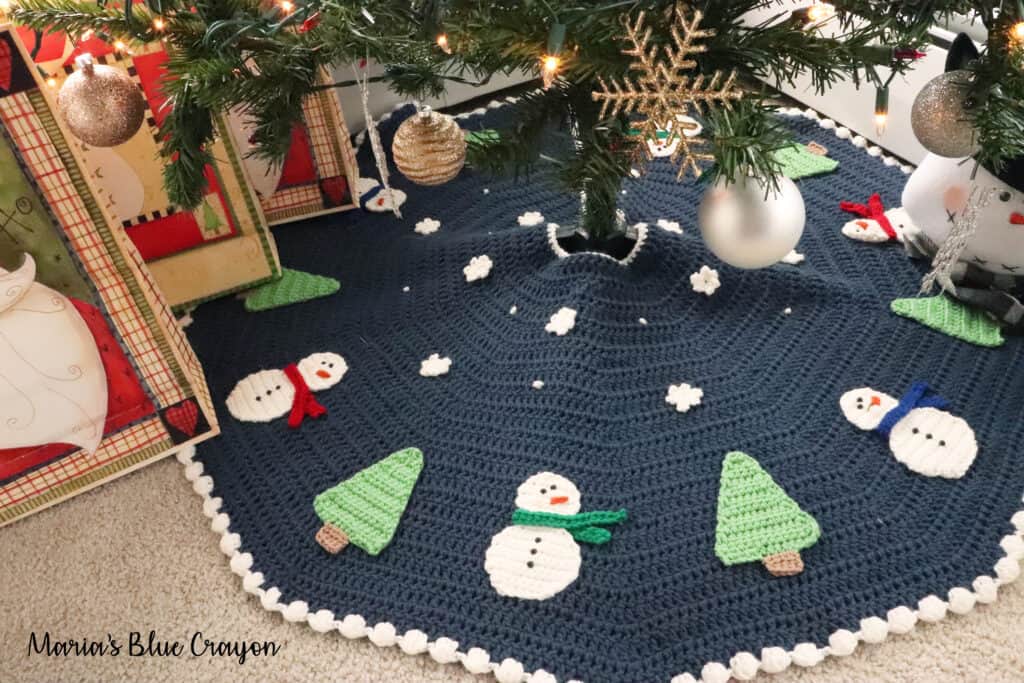
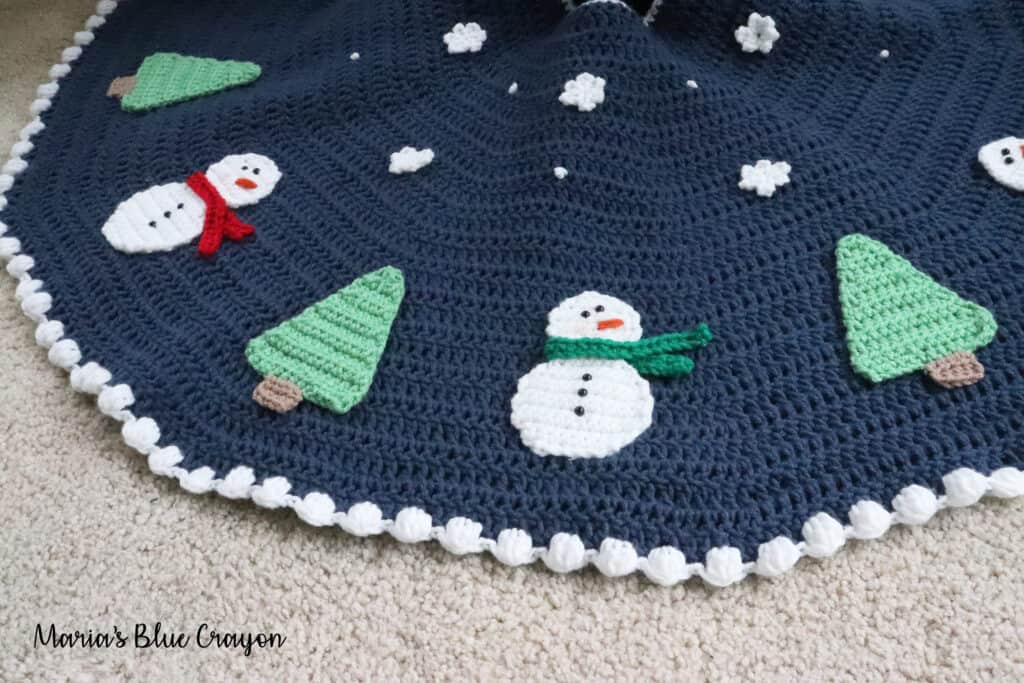
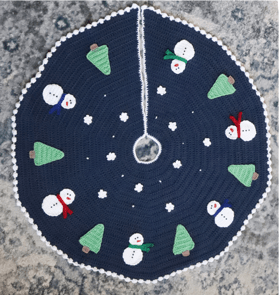
The snowman tree skirt is made by crocheting a large, simple base with a puff stitch border. Added to the tree skirt are snowmen, tree, and star appliques to create a fun winter scene.
The entire finished tree skirt measures 42″ in diameter.
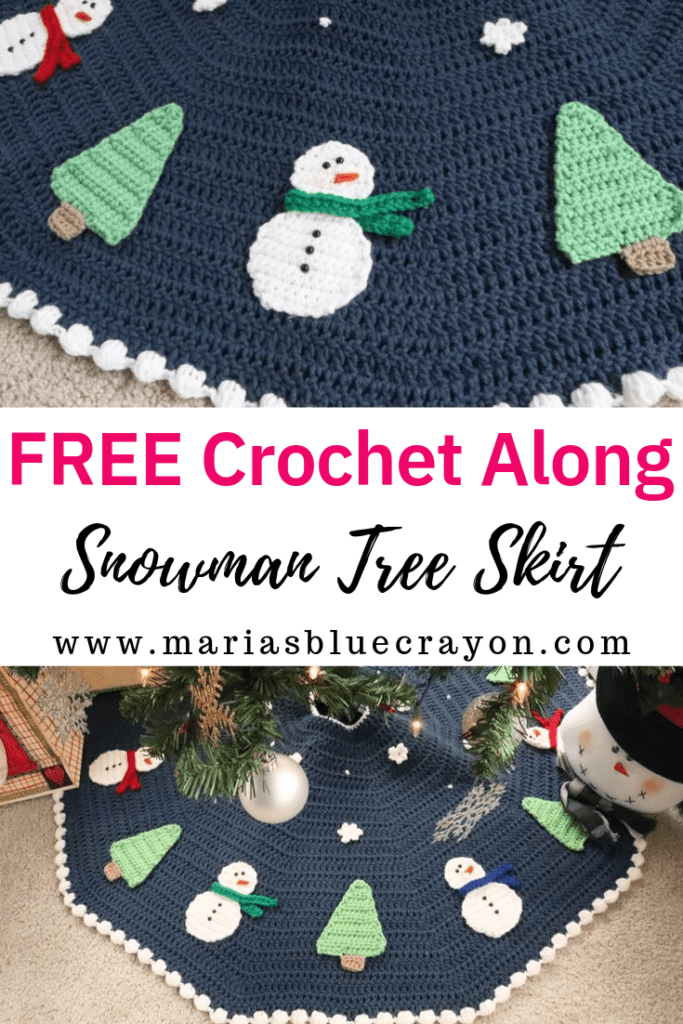
Find the free pattern to view on my blog below!
How Do I Find the Entire Pattern?
This project is a former crochet along so the pattern can be found in parts. Below, you will find Parts 1 – 4 all in this same post. All parts are available at this time.
It was meant to break up the project into manageable pieces. Each part has you crocheting part of the actual skirt and some of the appliques.

Materials List
2 skeins Caron One Pound in Cape Cod Blue
Worsted weight yarn in the following colors: white, light green, taupe/brown, orange, blue, red, and green
J/6.00mm, H/5.00mm, and G/4.00mm hooks
(30) 6mm safety eyes
I buy this pack from Amazon at a cheap price.
Tapestry needle
Scissors
Glue gun (optional for attaching appliques)
Blush (optional for snowmen)
Snowman Tree Skirt Printable Pattern
The entire tree skirt pattern is available in an ad-free PDF format to purchase on Ravelry or Etsy.
This is optional, as each part is available to view on my below.
Snowman Tree Skirt Part 1
For this first week, we will be working on part of the tree skirt and the tree appliques. You will find the patterns below as well as a video tutorial for the tree applique.
Notes
We will only be working on a portion of the tree skirt this week. After completing 15 rows, do not fasten off. We will continue next week.
The beginning chain does not count as a stitch.
Special Stitches
Hdc2tog is worked as follows: YO, insert hook into first st, pull up a loop, YO, insert hook into second st, pull up a loop, YO, pull through all 5 loops.
Hdc3tog is worked as follows: YO, insert hook into first st, pull up a loop, YO, insert hook into second st, pull up a loop, YO, insert hook into third st, pull up a loop, YO, pull through all 7 loops.
Gauge: Gauge: 4” x 4” ~ 11 stitches x 7 rows in double crochet
Abbreviations (US terms):
Ch = chain, sc = single crochet, hdc = half double crochet, dc = double crochet, st =
stitch(es), sc2tog = single crochet two together, hdc2tog = half double crochet two
together, hdc3tog = half double crochet three together, YO = yarn over
Tree Skirt Base
Use Cape Cod Blue yarn and J/6.00mm hook
Row 1: Ch 52, dc in 3rd ch from hook and across, turn (50)
Row 2: Ch 2, *dc in next 4 st, 2dc, repeat from * across, turn (60)
Row 3: Ch 2, *dc in next 5 st, 2dc, repeat from * across, turn (70)
Row 4: Ch 2, *dc in next 6 st, 2dc, repeat from * across, turn (80)
Row 5: Ch 2, *dc in next 7 st, 2dc, repeat from * across, turn (90)
Row 6: Ch 2, *dc in next 8 st, 2dc, repeat from * across, turn (100)
Row 7: Ch 2, *dc in next 9 st, 2dc, repeat from * across, turn (110)
Row 8: Ch 2, *dc in next 10 st, 2dc, repeat from * across, turn (120)
Row 9: Ch 2, *dc in next 11 st, 2dc, repeat from * across, turn (130)
Row 10: Ch 2, *dc in next 12 st, 2dc, repeat from * across, turn (140)
Row 11: Ch 2, *dc in next 13 st, 2dc, repeat from * across, turn (150)
Row 12: Ch 2, *dc in next 14 st, 2dc, repeat from * across, turn (160)
Row 13: Ch 2, *dc in next 15 st, 2dc, repeat from * across, turn (170)
Row 14: Ch 2, *dc in next 16 st, 2dc, repeat from * across, turn (180)
Row 15: Ch 2, *dc in next 17 st, 2dc, repeat from * across, turn (190)
Do not fasten off. We will continue to work on the tree skirt base next week.
Tree Applique
Use light green yarn and H/5.00mm hook
Row 1: Ch 14, hdc in 2nd ch from hook and across, turn (13)
Row 2: Ch 1, hdc across, turn (13)
Row 3: Ch 1, hdc2tog, hdc in next 9 st, hdc2tog, turn (11)
Row 4: Ch 1, hdc across, turn (11)
Row 5: Ch 1, hdc2tog, hdc in next 7 st, hdc2tog, turn (9)
Row 6: Ch 1, hdc across, turn (9)
Row 7: Ch 1, hdc2tog, hdc in next 5 st, hdc2tog, turn (7)
Row 8: Ch 1, hdc across, turn (7)
Row 9: Ch 1, hdc2tog, hdc in next 3 st, hdc2tog, turn (5)
Row 10: Ch 1, hdc across, turn (5)
Row 11: Ch 1, hdc2tog, hdc in next st, hdc2tog, turn (3)
Row 12: Ch 1, hdc3tog (1)
Fasten off.
Tree Stump
With the finished tree upside down, attach taupe/brown yarn on the bottom of the tree 6 stitches in from the right
Row 1: Ch 1, hdc in next 4 st, turn
Row 2: Ch 1, hdc across
Fasten off.
Make 6 trees.
View the crochet video tutorial for the tree applique below.
Temporarily disable ad-blocker if you are unable to view the video.
Snowman Tree Skirt Part 2
Continue working on tree skirt base…
Row 16: Ch 2, *dc in next 18 st, 2dc, repeat from * across, turn (200)
Row 17: Ch 2, *dc in next 19 st, 2dc, repeat from * across, turn (210)
Row 18: Ch 2, *dc in next 20 st, 2dc, repeat from * across, turn (220)
Row 19: Ch 2, *dc in next 21 st, 2dc, repeat from * across, turn (230)
Row 20: Ch 2, *dc in next 22 st, 2dc, repeat from * across, turn (240)
Row 21: Ch 2, *dc in next 23 st, 2dc, repeat from * across, turn (250)
Row 22: Ch 2, *dc in next 24 st, 2dc, repeat from * across, turn (260)
Row 23: Ch 2, *dc in next 25 st, 2dc, repeat from * across, turn (270)
Row 24: Ch 2, *dc in next 26 st, 2dc, repeat from * across, turn (280)
Row 25: Ch 2, *dc in next 27 st, 2dc, repeat from * across, turn (290)
Do not fasten off. We will continue to work on the base on Part 3.
Snowman Applique
Use white yarn and H/5.00mm hook
Row 1: Ch 8, sc in 2nd ch from hook and across, turn (7)
Row 2: Ch 1, 2sc, sc in next 5 st, 2sc, turn (9)
Row 3: Ch 1, 2sc, sc in next 7 st, 2sc, turn (11)
Row 4: Ch 1, 2sc, sc in next 9 st, 2sc, turn (13)
Row 5-8: Ch 1, sc across, turn (13)
Row 9: Ch 1, sc2tog, sc in next 9 st, sc2tog, turn (11)
Row 10: Ch 1, sc2tog, sc in next 7 st, sc2tog, turn (9)
Row 11: Ch 1, sc2tog, sc in next 5 st, sc2tog, turn (7)
Row 12: Ch 1, sc2tog, sc in next 3 st, sc2tog, turn (5)
Row 13: Ch 1, sc across, turn (5)
Row 14: Ch 1, 2sc, sc in next 3 st, 2sc, turn (7)
Row 15: Ch 1, 2sc, sc in next 5 st, 2sc, turn (9)
Row 16-18: Ch 1, sc across, turn (9)
Row 19: Ch 1, sc2tog, sc in next 5 st, sc2tog, turn (7)
Row 20: Ch 1, sc2tog, sc in next 3 st, sc2tog, turn (5)
Row 21: Ch 1, sc2tog, sc in next st, sc2tog, (3)
Fasten off.
Snowman Scarf
Use blue/green/red yarn and H/5.00mm hook
Row 1: Ch 30, sc in 2nd ch from hook and across
Fasten off.
Fold scarf in half around snowman’s neck. Sew the scarf onto snowman’s neck, leaving the tails of the scarf unsewn.
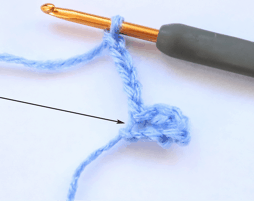
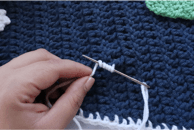
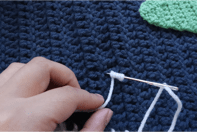
Attach safety eyes for the eyes and buttons using Photo 1 as a guide.
Use orange yarn and tapestry needle to sew nose on face using Photo 1 as a guide.
(Optional) Apply blush with finger or make up brush to snowman face to make a rosy cheek.
Make 6 snowmen – 2 with blue scarves, 2 with green scarves, and 2 with red scarves.
View the crochet video tutorial for the tree applique below.
Temporarily disable ad-blocker if you are unable to view the video.
Snowman Tree Skirt Part 3
Continue working on tree skirt base…
Row 26: Ch 2, *dc in next 28 st, 2dc, repeat from * across, turn (300)
Row 27: Ch 2, *dc in next 29 st, 2dc, repeat from * across, turn (310)
Row 28: Ch 2, *dc in next 30 st, 2dc, repeat from * across, turn (320)
Row 29: Ch 2, *dc in next 31 st, 2dc, repeat from * across, turn (330)
Row 30: Ch 2, *dc in next 32 st, 2dc, repeat from * across, turn (340)
Row 31: Ch 2, *dc in next 33 st, 2dc, repeat from * across, turn (350)
Row 32: Ch 2, *dc in next 34 st, 2dc, repeat from * across, turn (360)
Fasten off. Weave in ends.
Snowflakes
Use white yarn and G/4.00mm hook
Ch 6, sl st in 6th ch from hook
*Ch 5, sl st in very first ch made
Repeat from * 4 more times.
Fasten off.
Make 10 snowflakes.
Part 4
Notes/Special Stitches:
Bobble stitch is worked as follows: *YO, insert hook into st, pull up a loop, YO, pull through 2 loops, repeat from * 4 more times, YO, pull through all loops
Beginning chain does not count as a stitch.
When making bobble stitches, they can be “poked” to the side you want it on to form its shape.
We will now work on the edging/border of the tree skirt.
Use white yarn and J/6.00mm hook
Attach to the first row of tree skirt and sc across, continue to sc along the side of the tree skirt until you get to the bottom edge.
Bottom edge: 3sc in corner, *bobble st, sl st in next 2 st, repeat from * along the bottom edge of the tree skirt, 3sc in corner
Continue to sc up the side of the tree skirt until you get back to the first row.
Join to first sc and fasten off. Weave in ends.
Assembly
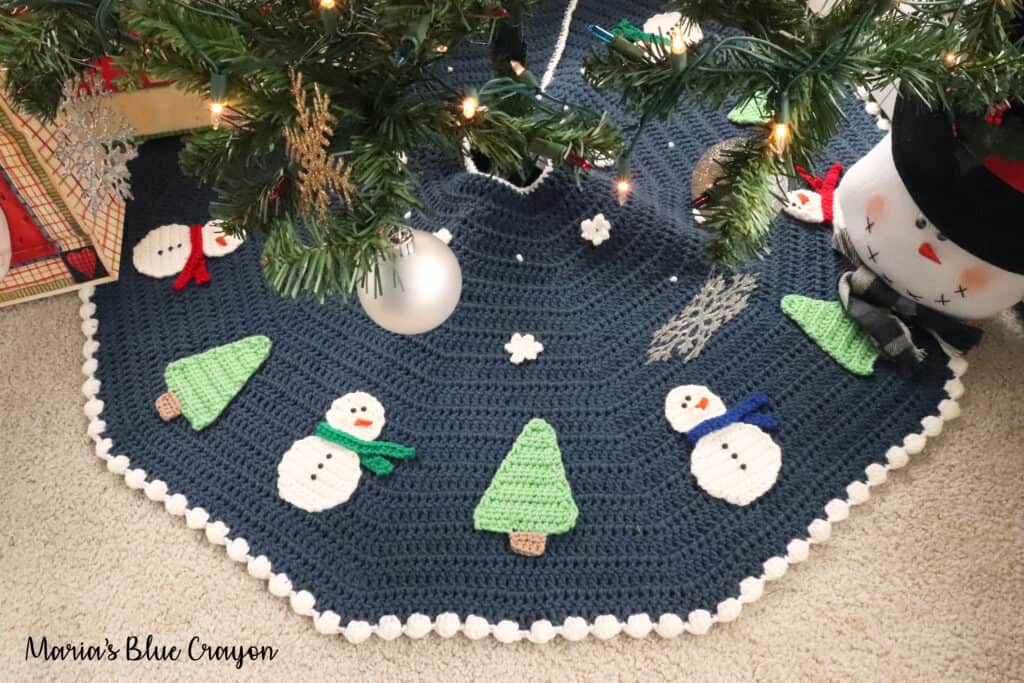
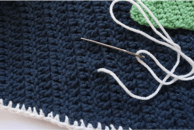
Sew on using tapestry needle and yarn OR hot glue on appliques using Photo 3 as a guide.
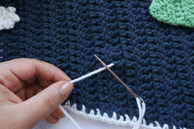
Use white yarn and tapestry needle to make french knots (tutorial below) between snowflakes using Photo as a guide.
French Knot Tutorial
Step 1: Knot the end of a piece of yarn and thread needle. Insert needle from the back to the front of your work.
*Inserting into the middle of a piece of yarn (splitting the yarn) will give you a sturdy knot that won’t pull through.
Step 2: Pull yarn taught close to where it has come through the crochet fabric.
Step 3: Wrap yarn around needle 5 times. *Wrap around more for a bigger french knot.
Step 4: Insert needle back into crochet fabric next to where the yarn came out from the back.
Pull needle through to the back.
Knot on the back to secure.
Thanks for this CAL, love all your patterns!
I’m so excited! Can’t wait to do this! Yay!
Hi Maria! The tree skirt is adorable! What are the dimensions as shown in the photo above? Does the pattern allow for adjustments to the size?
Great question! The finished size is 42″ in diameter. It would be easy to make this tree skirt larger or smaller by simply subtracting or adding rows to it
Hope to start this afternoon, thanks again Maria….. you don’t know how much I need something positive to focus on 😉
Can we still participate in the CAL if we make some slight modifications to the appliqué choices? 😬
Yes, absolutely! Get creative 🙂
About how much yarn is needed for this? Would like to use up what I have already but not sure if I have enough of one color.
I used one and a half caron one pound skeins. I was able to use less than a skein of white from my stash (I would say have 3/4 of a skein to be safe) and scraps of color from my stash for the snowmen and trees.
Week #2 on your mark get set go Dora! I am determined not to get behind,
thanks so much Maria