
This post may contain affiliate links. For more information, please see our disclosure policy.
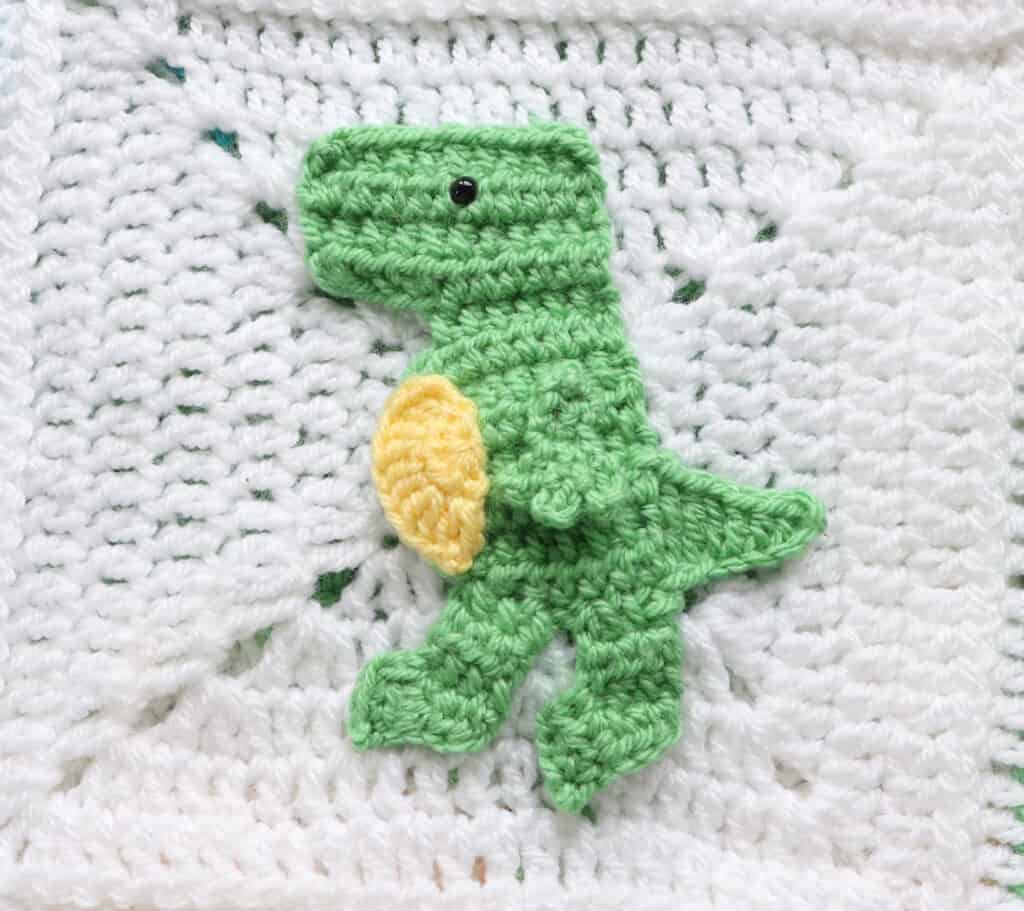
The T-Rex dinosaur applique is part of the crochet dinosaur themed blanket pattern. Below you will find the written pattern as well as the video tutorial that will allow you to follow along step by step!
Here you will find all the information for the dinosaur-themed blanket in order to make the entire blanket.
Below you will find the video tutorial and under that the written pattern. *Temporarily disable your ad-blocker if you are not able to view the video tutorial directly beneath this text.
Free T-Rex Dinosaur Applique Pattern
Hook: G/4.00mm (main body) and C/2.75mm (belly and arm)
Notes: Beginning chains do not count as a stitch.
For the dinosaur blanket: Make one green with yellow belly and one yellow with orange belly.
Body/Head G/4.00mm hook
Row 1: Ch 8, hdc in 3rd ch from hook and across, turn (6)
Row 2: Ch 2, hdc in next 5 st, 2hdc in last st, turn (7)
Row 3: Ch 2, 2hdc, hdc in next 6 st, turn (8)
Row 4: Ch 2, hdc in next 7 st, 2hdc, turn (9)
Row 5: Ch 2, hdc across, turn (9)
Row 6: Ch 2, hdc in next 7 st, hdc2tog, turn (8)
Row 7: Ch 2, hdc2tog, hdc in next 6 st, turn (7)
Row 8: Ch 2, hdc across, ch an additional 6, hdc in 3rd ch from hook and across each ch and st, turn (10)
Row 9-12: Ch 2, hdc across, turn (10)
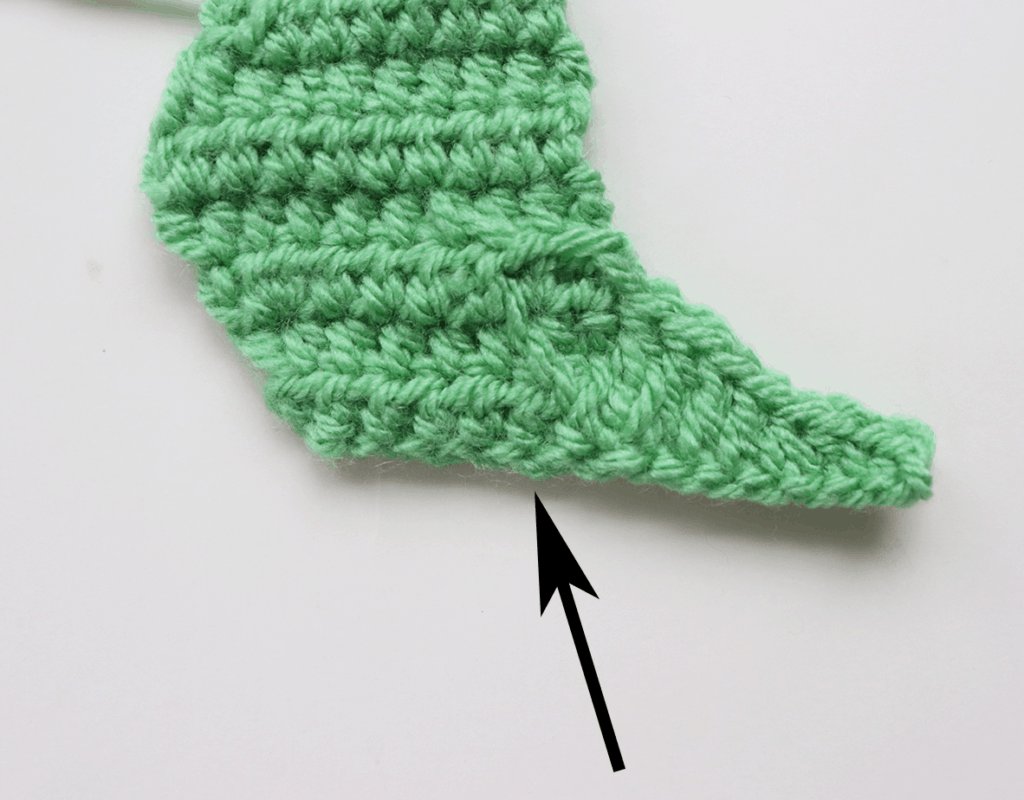
Tail
Attach to bottom corner of body opposite of the head.
Ch 8, sc in 2nd ch from hook, sc, hdc in next 2 ch, dc in next 2 ch, tr in next 2 ch, join to body 4 rows up from the
bottom
Legs
Attach yarn to the bottom right part of the
body next to the tail.
Row 1: Ch 2, hdc in next 3 st, turn (3)
Row 2-4: Ch 2, hdc across, turn (3)
Row 5: Ch 1, sc across (3)
Ch 1, turn work 90 degrees, hdc in next 3 sp, turn
Ch 1, sc across (3)
Fasten off.
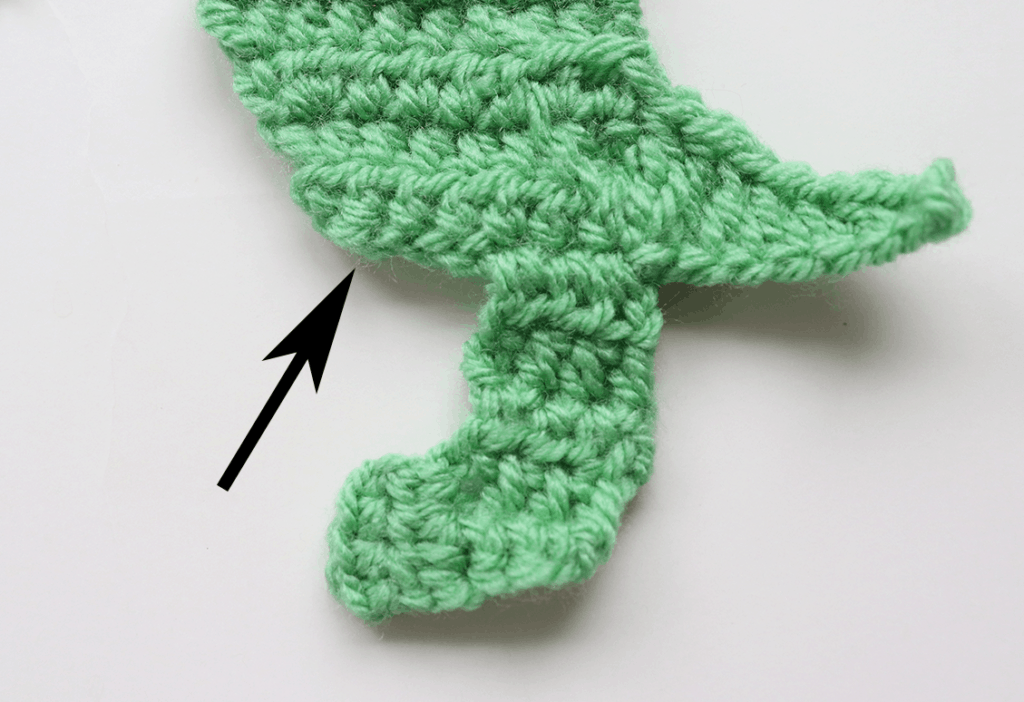
Attach yarn 3 sp away from first leg and make second leg with the same instructions for the first leg.
Belly
Using second color
Row 1: Magic ring, ch 2, 5 hdc in ring, turn (5) Row 2: Ch 2, 2dc in each st across (10) Fasten off.
Sew onto body using photo as a guide.
Arm C/2.75mm
Row 1: Ch 4, hdc in 2nd ch from hook and in each ch across, turn (3) Row 2-3: Ch 1, hdc across, turn (3)
Row 4: Ch 5, sl st in first st, ch 5, sl st in next st, ch 5, sl st in last st Fasten off and leave tail for sewing.
Granny Square Pattern
Note: If you are NOT joining as you go, add a 7th white row.
Beginning chain does not count as stitch unless noted.
J/6.00mm hook
Round 1: Magic ring, ch 2, 10 dc in ring, join to first dc (10)
Round 2: Ch 2, 2dc in each st around, join to first dc (20)
Round 3: Ch 3 (counts as stitch), (dc, ch 2, 2dc) in same st as ch 3, dc, hdc in next 2 st, dc, *(2dc, ch 2, 2dc) all in next st, dc, hdc in next 2 st, dc, repeat from * around, join to beginning ch 3 (each side of square will have 8 st)
Round 4: Sl st to ch 2 space from previous row, Ch 3 (counts as st) (dc, ch 2, 2dc) all in same ch 2 space, dc across, *(2dc, ch 2, 2dc) all in ch 2 space from previous row, dc across, repeat from * around, join to beginning ch 3 (each side of square will have 12 st)
Round 5-6: Repeat Round 4 (Each side will grow by 4 stitches after each round)
Fasten off and weave in ends.
Granny Square Video
Temporarily disable your ad-blocker if you are unable to view the video tutorial below.
Leave a Reply