
This post may contain affiliate links. For more information, please see our disclosure policy.
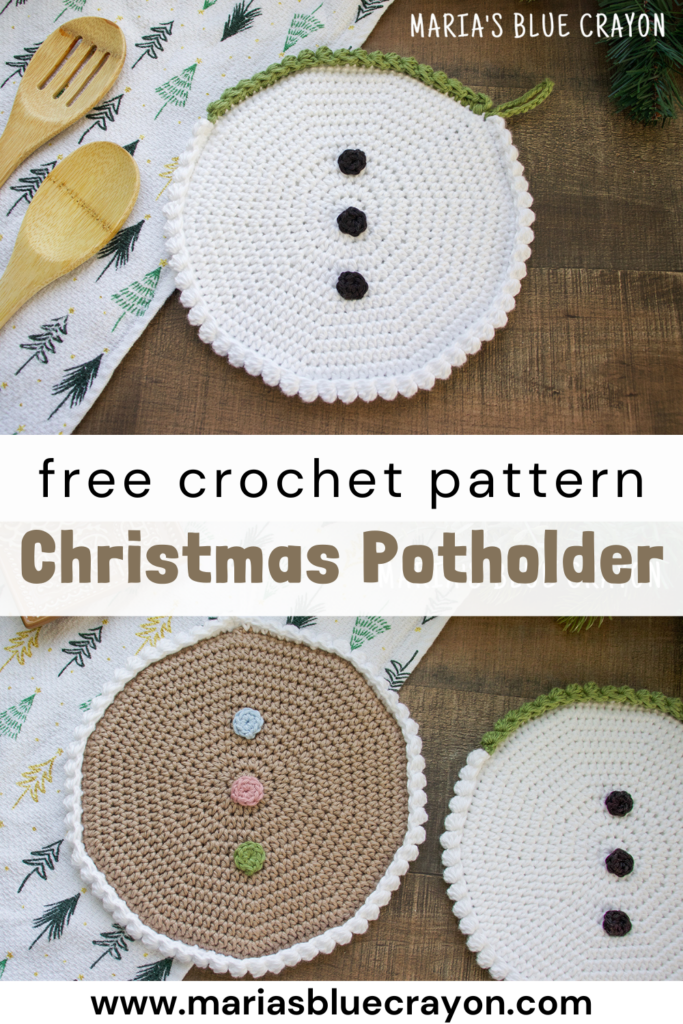
Add some festive flair to your kitchen with these free crochet patterns for Christmas potholders. Perfect for holiday baking and a thoughtful handmade gift for friends and family.
- Purchase the ad-free PDF on Etsy or Ravelry.
- PIN it to your Pinterest boards for later.
- View the free patterns for the Christmas crochet potholders (snowman and gingerbread) down below.
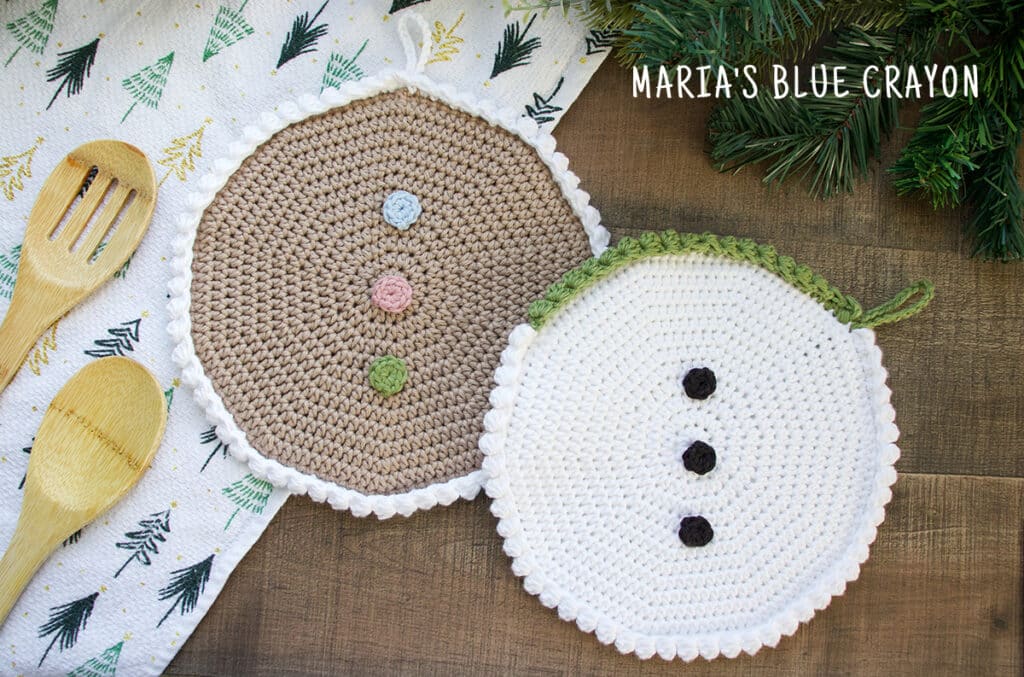
Christmas Themed Crochet Potholders
I’ve designed two simple crochet potholders perfect for Christmas! One is a snowman belly and one is a gingerbread belly.
Each potholder is a circle with a bobble border and buttons down the middle. They are cute, simple, and super easy to crochet!
You will need 100% cotton, worsted weight yarn and a 4.00 mm crochet hook. Cotton yarn is important when crocheting hot pads because you will want your hot dishes, pans, and pots to be on a material that will withstand the heat.
These potholders are perfect for the upcoming holiday season to have for Christmas dinner, baking cookies, and kitchen decor.
More Free Crochet Christmas Patterns
All of the patterns below can be found on my blog for free to add more holiday charm and decor to your home this season!
- Snowman Crochet Pillow – I got inspiration from this pillow to make the snowman potholder!
- Christmas Trees – the perfect small little decor for your desk, shelf, mantle, etc.
- Quick and Simple Christmas Tree Ornaments
Christmas Crochet Potholder Free Pattern
Materials
100% cotton, worsted weight yarn in white, green, black, light brown, pink, and blue
G/4.00 mm crochet hook
Tapestry needle
Scissors
Pattern Notes
I used 1 skein each of I Love This Cotton! In white, taupe, black, sage and some scrap cotton yarn for the button colors
Beginning chain of each round does not count as a stitch.
Number at the end of each round in parentheses is the number of stitches for that round.
Modified bobble stitch: *YO, insert hook into st, YO, pull up a loop, YO, pull through two loops, repeat from * 3 more times into the same stitch, YO, pull through all loops on your hook
I refer to the above stitch as the bobble stitch in the pattern.
Dimensions: Measures approximately 9” across.
Abbreviations: (US terms)
Ch = chain, sc = single crochet, hdc = half double crochet, hdc2tog = half double crochet two together, st = stitch, sl st = slip stitch
Snowman Potholder Crochet Pattern
Start with white colored yarn.
Round 1: Magic ring, ch 1, 10hdc into ring, join to first st (10)
Round 2: Ch 1, 2hdc in each st around, join to first st (20)
Round 3: Ch 1, *hdc in next st, 2hdc in next st, repeat from * around, join to first st (30)
Round 4: Ch 1, *hdc in next 2 st, 2hdc in next st, repeat from * around, join to first st (40)
Round 5: Ch 1, *hdc in next 3 st, 2hdc in next st, repeat from * around, join to first st (50)
Round 6: Ch 1, *hdc in next 4 st, 2hdc in next st, repeat from * around, join to first st (60)
Round 7: Ch 1, *hdc in next 5 st, 2hdc in next st, repeat from * around, join to first st (70)
Round 8: Ch 1, *hdc in next 6 st, 2hdc in next st, repeat from * around, join to first st (80)
Round 9: Ch 1, *hdc in next 7 st, 2hdc in next st, repeat from * around, join to first st (90)
Round 10: Ch 1, *hdc in next 8 st, 2hdc in next st, repeat from * around, join to first st (100)
Round 11: Ch 1, *hdc in next 9 st, 2hdc in next st, repeat from * around, join to first st (110)
Round 12: Ch 1, *hdc in next 10 st, 2hdc in next st, repeat from * around, join to first st (120)
Fasten off.
Make two circles with white yarn.
Buttons
Use black yarn. Make 3 buttons.
Round 1: Magic ring, ch 1, 6sc in ring, join to first st
Fasten off and weave in ends.
Assembly
Attach buttons onto one circle in a straight line to make it look like buttons on a snowman belly.
Hold two circles together (right sides facing out) and single crochet them together with white yarn. Fasten off.
Border
Attach green colored yarn. Be mindful of where the buttons are placed when attaching the yarn, you will start with the loop of the potholder. See photo as a guide.
Chain 20, sl st into same st you attached the yarn, ch 2, *bobble in next st, sc in next st, repeat from * until you have a total of 18 bobbles, change to white yarn, repeat from * around until you get to the beginning, join to first st
Fasten off and weave in ends.
Gingerbread Potholder Crochet Pattern
Start with light brown colored yarn.
Round 1: Magic ring, ch 1, 10hdc into ring, join to first st (10)
Round 2: Ch 1, 2hdc in each st around, join to first st (20)
Round 3: Ch 1, *hdc in next st, 2hdc in next st, repeat from * around, join to first st (30)
Round 4: Ch 1, *hdc in next 2 st, 2hdc in next st, repeat from * around, join to first st (40)
Round 5: Ch 1, *hdc in next 3 st, 2hdc in next st, repeat from * around, join to first st (50)
Round 6: Ch 1, *hdc in next 4 st, 2hdc in next st, repeat from * around, join to first st (60)
Round 7: Ch 1, *hdc in next 5 st, 2hdc in next st, repeat from * around, join to first st (70)
Round 8: Ch 1, *hdc in next 6 st, 2hdc in next st, repeat from * around, join to first st (80)
Round 9: Ch 1, *hdc in next 7 st, 2hdc in next st, repeat from * around, join to first st (90)
Round 10: Ch 1, *hdc in next 8 st, 2hdc in next st, repeat from * around, join to first st (100)
Round 11: Ch 1, *hdc in next 9 st, 2hdc in next st, repeat from * around, join to first st (110)
Round 12: Ch 1, *hdc in next 10 st, 2hdc in next st, repeat from * around, join to first st (120)
Fasten off.
Make two circles with light brown yarn.
Buttons
Use pink, blue, and green. Make 3 buttons.
Round 1: Magic ring, ch 1, 6sc in ring, join to first st
Fasten off and weave in ends.
Assembly
Attach buttons onto one circle in a straight line to make it look like buttons on a gingerbread belly.
Hold two circles together (right sides facing out) and single crochet them together with light brown yarn. Fasten off.
Border
Attach white colored yarn. Be mindful of where the buttons are placed, you will start with the loop of the potholder which should be at the top. See photo as a guide.
Chain 20, sl st into same st you attached the yarn, ch 2, *bobble in next st, sc in next st, repeat from * around until you get to the beginning, join to first st
Fasten off and weave in ends.
Leave a Reply