The crochet red truck ornament pattern is free to view right here on my blog! Scroll down below to follow the pattern.
Day 8 of the 12 Days of Christmas Crochet Ornaments is this iconic red truck!

Okay, so technically I already released this pattern as a gift card holder, but it doubles as a cute little ornament too!
I really love this little truck and since you can keep the bed of the truck open, you can make one for each member of your family and put a little something extra in it for Christmas morning!
Sign up to be on my email list so you don’t miss a single ornament pattern during this 12 Days of Christmas Crochet Ornaments Event.
You can find the running list of all the ornament patterns here in this post as they become available.

Free Red Truck Ornament Pattern
Materials
Worsted weight yarn in red, white, black, green
G/4.00mm hook
Tapestry needle and scissors
Notes
Truck will be worked in rows. Two will be made and then sewn together.
Beginning chains do not count as a stitch.
Special Stitches
Sc3tog: Insert hook into first st, pull up a loop, insert hook into 2nd st, pull up a loop, insert hook in 3rd st, pull up a loop, yarn over, pull through all loops.
Hdc3tog: Yarn over, insert hook into first st, pull up a loop, yarn over, insert hook into 2nd st, pull up a loop, yarn over, insert hook into 3rd st, pull up a loop, yarn over, pull through all loops.
Dimensions 5” x 3”
Abbreviations (US terms):
Ch = chain, sc = single crochet, hdc = half double crochet, sc2tog = single crochet two together, sc3tog = single crochet three together, hdc2tog = half double crochet two together, hdc3tog = half double crochet two together, st = stitch(es), sk = skip
Pattern
Truck
Row 1: Ch 23, sc in 2nd ch from hook and each st across, turn (22)
Row 2-3: Ch 1, sc across, turn (22)
Row 4: Ch 1, sc across until last 2 st, sc2tog in last 2 st, turn (21)
Row 5: Ch 1, sc2tog, sc in remaining st, turn (20)
Row 6 : Ch 1, sc across until last 2 st, sk last 2 st, turn (18)
Row 7: Ch 1, sc2tog, sc in next 8 st, turn (9)
Row 8: Ch 1, sc in next 7 st, sc2tog, turn (8)
Row 9-11: Ch 1, sc across, turn (8)
Fasten off. Leave tail for sewing.
Make two.
Window
Use white yarn.
Row 1: Ch 5, sc in 2nd ch from hook and across, turn (4)
Row 2-3: Ch 1, sc across, turn (4)
Fasten off and leave tail for sewing.
Sew window onto one of the trucks using photo as a guide.

Tree
Use green yarn.
Row 1: Ch 10, hdc in 2nd ch from hook and across, turn (9)
Row 2: Ch 1, hdc2tog, hdc in next 5 st, hdc2tog, turn (7)
Row 3: Ch 1, hdc across, turn (7)
Row 4: Ch 1, hdc2tog, hdc in next 3, hdc2tog, turn (5)
Row 5: Ch 1, hdc across, turn (5)
Row 6: Ch 1, hdc2tog, hdc in next st, hdc2tog, turn (3)
Row 7: Ch 1, hdc across, turn (3)
Row 8: Ch 1, hdc3tog (1)
Fasten off.
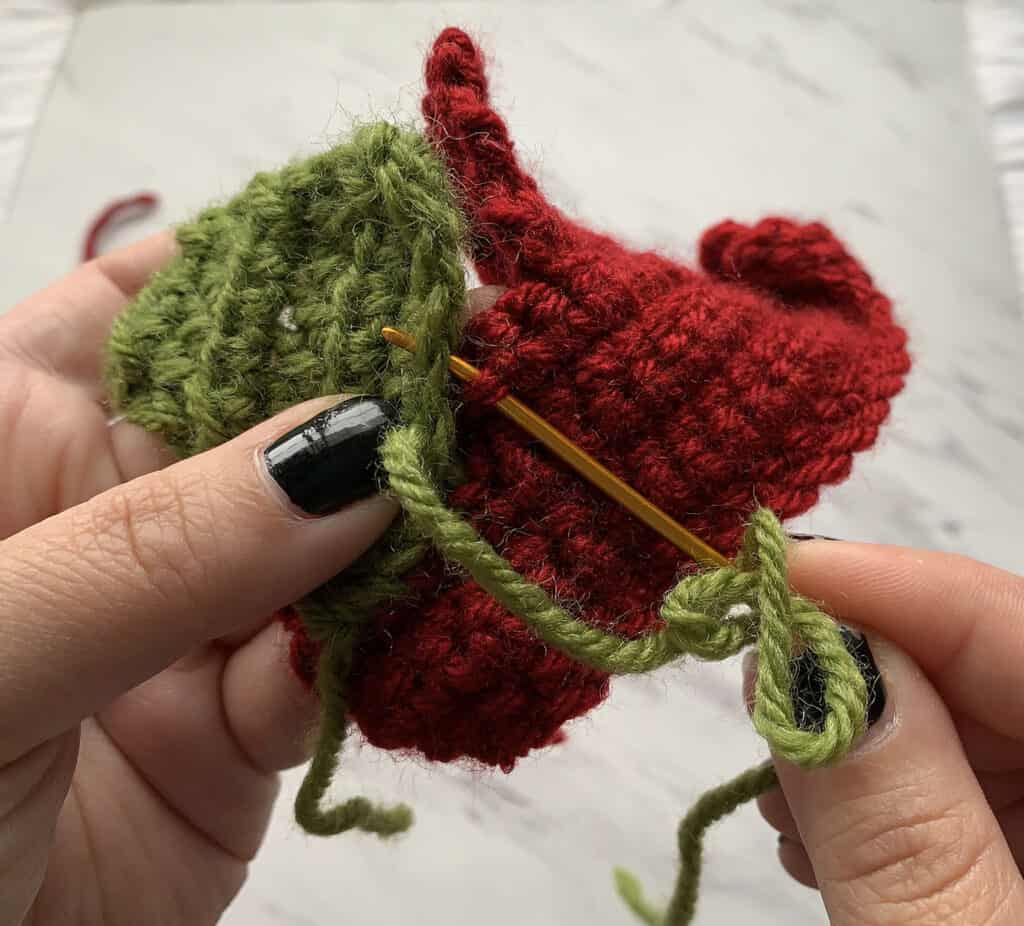
Sew tree onto the truck without the window on it. Using the whip stitch, sew onto the top loops only so you can not see the stitching on the back. See photo.
Tires
Use black yarn.
Round 1: Magic ring, ch 1, 6sc, join to first sc (6)
Round 2: Ch 1, 2sc in each st around, join to first sc (12)
Fasten off.
Make 4
Use tapestry needle and white yarn to sew on wheel spokes onto the tires.
Assembly
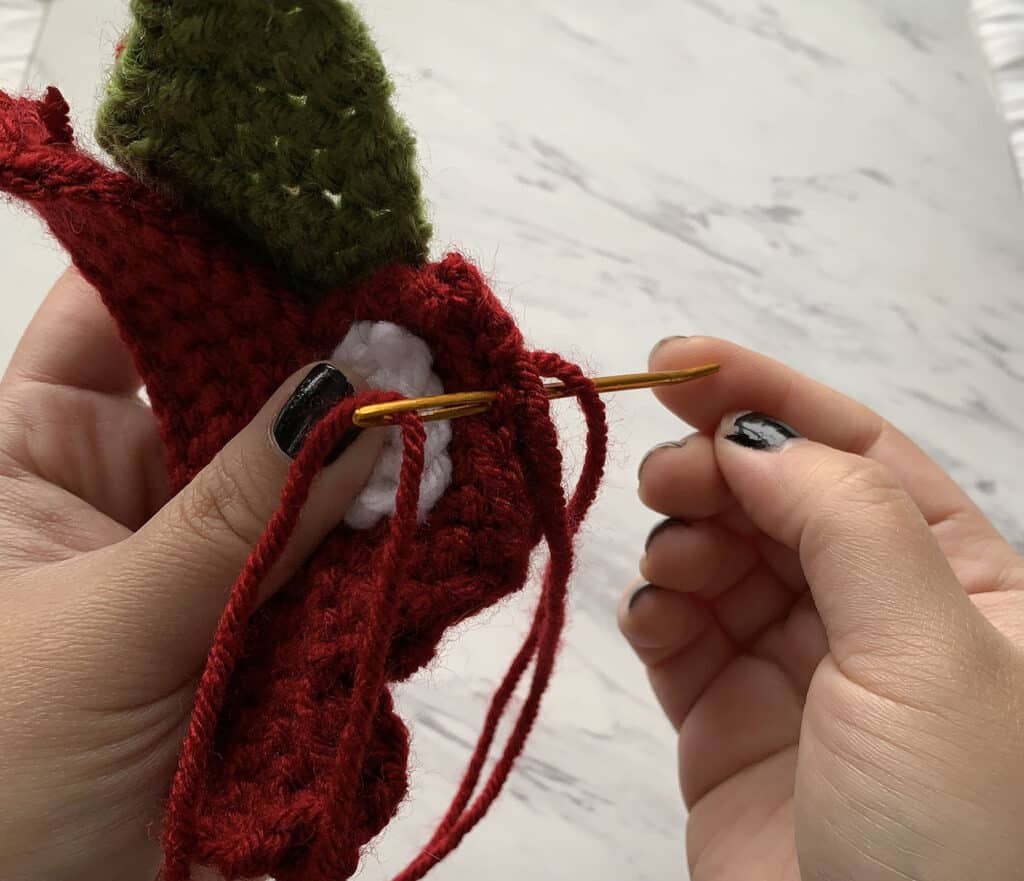
Put both of the trucks together, join by sewing them together with the tail end of red yarn. Leave the bed of the truck and the back of the cab unsewn. See Photo.
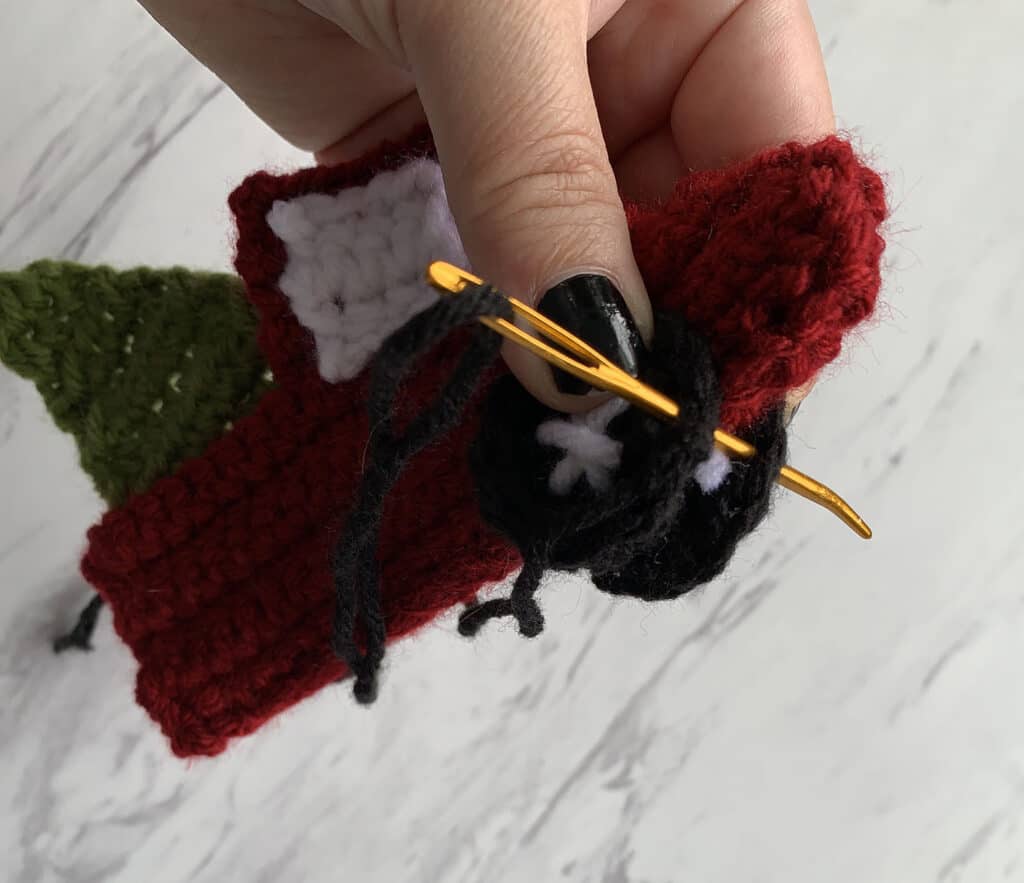
Sew tires onto truck, placing them on either side of the truck. See Photo.

Do you have a tutorial for the red truck with tree?
Thank you. I just love all your ornaments.