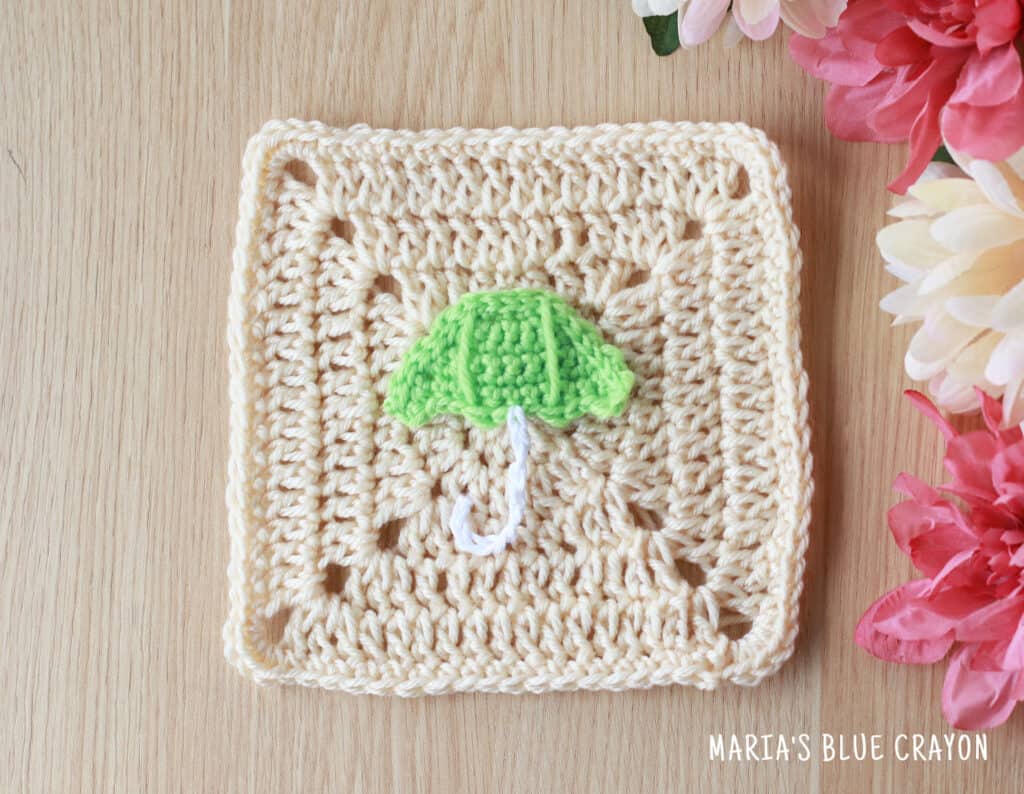
This crochet umbrella applique is one of several spring themed appliques I have made as part of my Spring Blanket.
View the free written pattern as well as the video tutorial below. The granny square pattern is also included.

Attaching Appliques
Attaching appliques to crochet projects can be tedious, but this is my favorite way to attach them for a clean backing. It’s basically using a whip stitch and sewing the applique onto just the top loops of your crochet piece.
Because it is attached to just the top loops, you will not see any seaming on the back side of the crochet piece. It’s pretty cool!

Crochet Umbrella Applique Pattern
Temporarily disable your ad-blocker if you are unable to view the video below this message.
Materials
Worsted weight yarn – color of your choice for the body of the umbrella and for the handle
F/3.75mm hook
Tapestry needle
Scissors
Notes: Beginning chain does not count as a stitch.
Abbreviations (US terms):
Ch = chain, sc = single crochet, dc = double crochet, sl st = slip stitch, st = stitch
Pattern
Start with the color for the body of the umbrella.
Row 1: Ch 5, sc in 2nd ch from st and in each ch across, turn (4)
Row 2: Ch 1, 2sc in each st across, turn (8)
Row 3: Ch 1, sc in each st across, turn (8)
Row 4: Ch 1, 2sc, sc in next 6 st, 2sc, turn (10)
Row 5: Ch 1, 2sc, sc in next 8 st, 2sc, turn (12)
Row 6: Ch 1, sc in each st across, turn (12)
Row 7: Ch 2, *dc, sl st in next 3 st, repeat from * one time, dc, sl st in last 2 st, dc in last st
Turn work 90 degrees and slip stitch around the umbrella. Stop when you get to the other side of the umbrella.
Use same color yarn and tapestry needle to sew on lines of the umbrella. Use photo as a guide.
Handle
Attach yarn to the bottom center of the umbrella. Chain 12. Fasten off.
Granny Square Pattern
J/6.00mm hook
Tapestry needle
Scissors
Notes:
Beginning chain does not count as a stitch UNLESS otherwise stated.
Granny square will start with a circle and form into a square.
Finished square measures roughly 5.5” when using Knit Picks Brava Worsted.
Round 1: Magic ring, ch 2, 12 dc in ring, join to first dc (12)
Round 2: Ch 2, 2dc in each st around, join to first dc (24)
Round 3: Ch 3 (counts as stitch), (dc, ch 2, 2dc) in same st as ch 3, dc in next st, hdc in next st, sc in next st, hdc in next st, dc in next st, *(2dc, ch 2, 2dc) all in next st, dc in next st, hdc in next st, sc in next st, hdc in next st, dc in next st, repeat from * around, join to beginning ch 3
Round 4: Sl st to ch 2 space from previous row, Ch 3 (counts as st) (dc, ch 2, 2dc) all in same ch 2 space, dc across, *(2dc, ch 2, 2dc) all in ch 2 space from previous row, dc across, repeat from * around, join to beginning ch 3
Round 5: Repeat Round 4
Fasten off and weave in ends.
If you are looking to get back to the main post of the Spring Blanket, click here.

Leave a Reply