
This post may contain affiliate links. For more information, please see our disclosure policy.
Discover how to create a cozy crochet scrap blanket using leftover yarn. This crochet blanket creates an eye-catching, patchwork design that uses mindless, simple crochet stitches. Perfect for beginners, this fun and easy project helps you turn scraps into a beautiful and useful piece.
What is A Crochet Scrap Blanket?
A crochet scrap blanket is essentially a blanket crocheted with scrap yarn. All those leftover, half-used skeins of yarn from other projects? Yep, that’s scrap yarn. Instead of stashing them away, you can use them all to make a colorful, fun blanket!
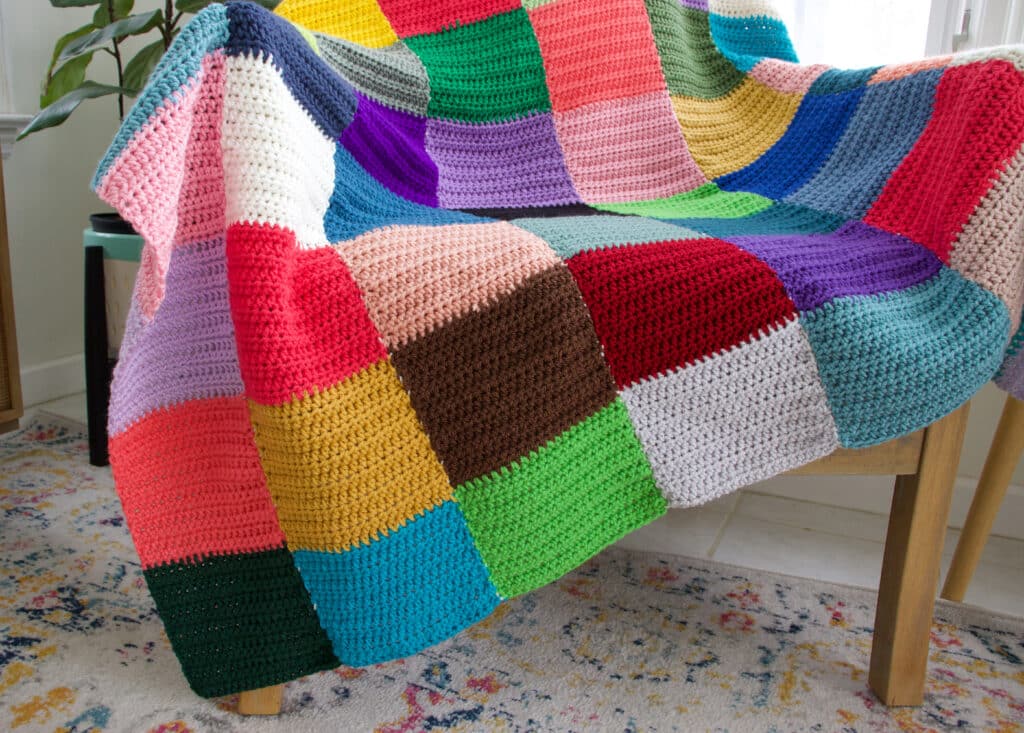
There are various crochet blanket patterns that you can use, but I love making blankets specifically with scrap yarn in mind. For this one, I had enough scrap yarn to make squares for each color to make a patchwork look. In previous scrap blankets, I have done rows or smaller sections of color because the amounts I had of each leftover skein was smaller.
These are my most popular crochet patterns for blankets using scrap yarn that you may be interested in trying out as well! Or keeping it in your back pocket for later when you have accumulated more scrap yarn.
Chevron Crochet Scrap Crochet Blanket
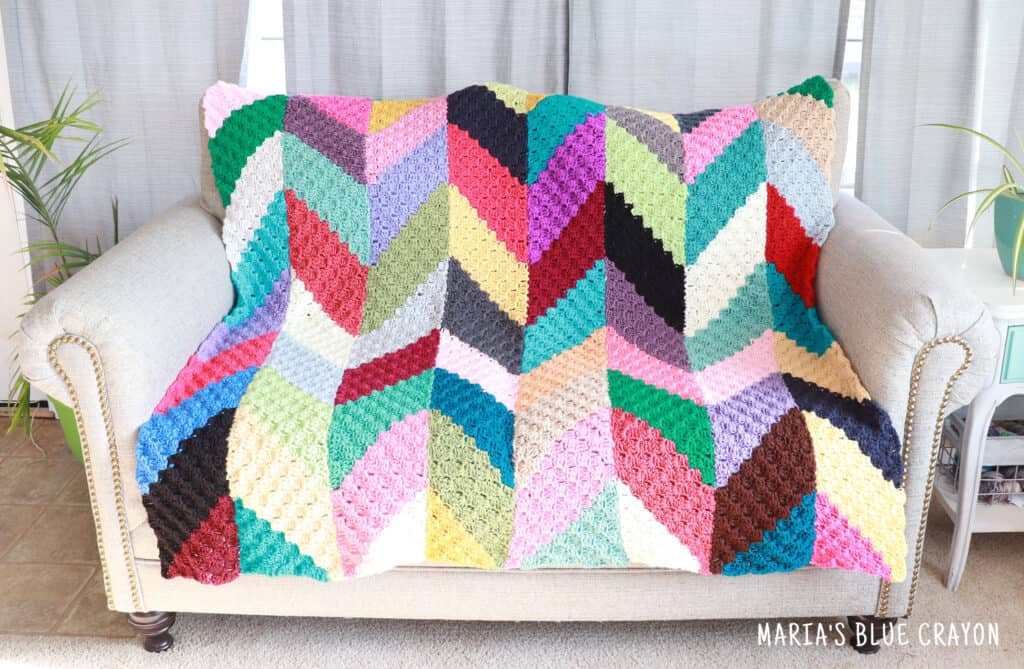
This crochet blanket tutorial is similar to this patchwork crochet blanket but instead of squares, we are working in a corner to corner fashion to create a herringbone/zig zag/chevron effect. This blanket is also made in long strips then sewn together. You can find the full tutorial here.
Corner to Corner Diamond Scrap Crochet Blanket
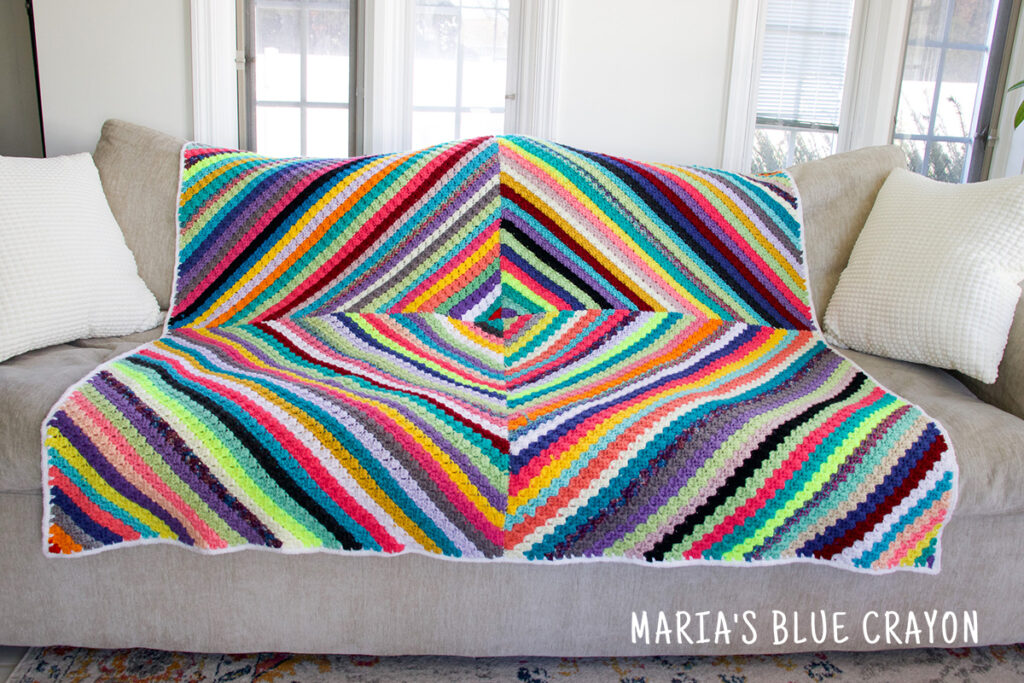
This crochet blanket made with scrap yarns is made with the corner to corner method. Four squares are made then joined together for this abstract diamond look. This crochet tutorial is great to use when you have all sorts of amounts of scrap yarn. When starting a corner to corner, it doesn’t use much yarn for the first few rows so for this blanket if you have small amounts of scraps – they can be put to good use! Find the full tutorial here.
Patchwork Crochet Scrap Blanket Overview
- Uses basic crochet stitches (half double crochets, to be specific)
- Long strips of crochet blocks are made by crocheting rows of half double crochets and changing colors
- Strips of crochet pieces are sewn together using the mattress stitch (don’t be scared! I have a video tutorial for you to follow)
- Perfect for a mindless, crochet project while you relax
- Worsted weight yarn is used for this project but you can use the yarn you have most of (all of which should be about the same thickness/weight of yarn)
- Blanket Dimensions: 50″ x 55″ (but of course you can make it as big or small as you’d like, as well as alter the dimensions of each block of square)
Patchwork Crochet Scrap Blanket Tutorial
Materials
Scrap yarn
K/6.5 mm crochet hook
Tapestry needle
Notes
This tutorial walks you through how to make your own patchwork crochet scrap blanket. I will give you the details and specifications of my own blanket as well as modifications as you see fit.
Dimensions of my finished blanket: 50″ x 55″
Step by Step Crochet Tutorial
Step 1: Gather Scrap Yarn
Collect all of your scrap yarn that you want to use into one place. Depending on the amount of scrap yarn as a whole and the amount of each color, your blanket will vary in size and you may even want to modify the size of each square to accommodate the amount of each color you have.
Be sure that all of the yarn you want to use is the same/similar weight. This will ensure each square is the same size. I used worsted weight/medium 4 weight yarn for my blanket. I think for most of us, we will have worsted weight or DK weight yarn. I did end up using two colors that were DK but they were similar enough to the worsted weight yarns, so it turned out well.
At this point, it may also be helpful to ball up or wind up your scraps and place them all in one basket or designated spot if you have not done this already. When I am crocheting, I’d much rather be in the flow than have to stop to detangle yarn. This can also help you decide which balls of scrap yarn will be enough. For example, I had very small amounts (just a few yards) that were not going to work for this project so I set those aside.
Step 2: Crochet Your First Strip of Squares
Row 1: Chain 21, half double crochet into the 2nd chain from hook and in each chain across, turn your work
Row 2: Chain 1, half double crochet in each stitch across, turn your work
Repeat until you have a total of 13 rows.
Each block will be 20 stitches across and 13 rows high. This should be a perfect square or pretty close to it. Depending on your tension, you may want to either omit rows or add rows so it is a “perfect” square. If you do modify the number of rows, be sure to take note as you will want each square to be the same.
Change yarn to next color and repeat Row 2 until you complete another 13 rows of that color.
Continue to make squares of different colors until you have a strip of 10 squares or however long you want your blanket to be.
Step 3: Continue to Crochet Strips of Squares
I crocheted a total of 8 strips. The length of each strip is how long your blanket will be. The width of your completed crochet blanket will be determined by the number of strips you crochet. I made my blanket 10 squares high x 8 strips/squares wide.
After every few strips, I laid them down together to see how it was looking. I wanted to make sure the colors look “random” and well dispersed enough. For example, I didn’t want too many pinks/reds all in one area. For my last strip, I even planned out the colors of the last strip (as you can see in the photo).
Step 4: Join Strips
I used an off-white color to join all of my strips. This join is relatively invisible, but not completely as we are using so many different colors. However, as far as I’m concerned – this joining method is pretty seamless and the best method to sew these scraps together.
You can view the video tutorial on how to join your strips using the mattress stitch here below. If you cannot view the video below this text, you can also view it on YouTube.
Step 5: Weave in Ends
Once you have joined all of your strips, you are left to weave in your ends and enjoy your blanket!
What’s Next?
Check out these scrap blanket crochet patterns and also crochet stitches for ideas on your future scrap yarn!
Leave a Reply