
This post may contain affiliate links. For more information, please see our disclosure policy.
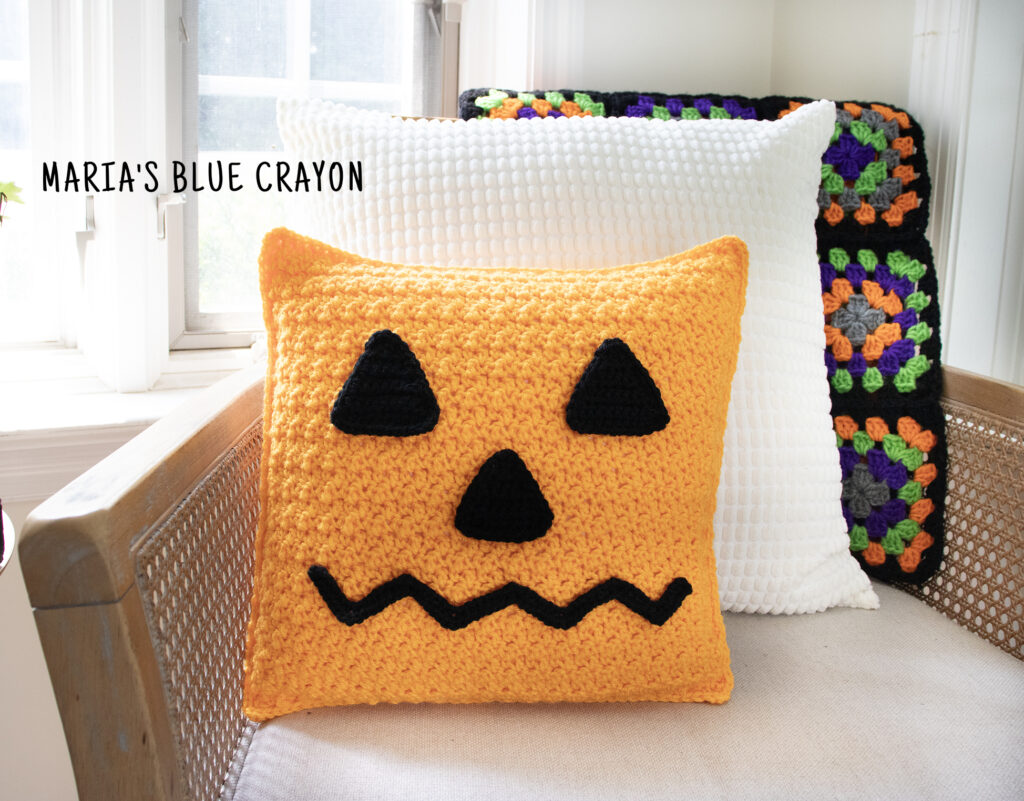
This fun crochet pumpkin pillow is perfect to add to your spooky decor this Halloween and fall! Crochet this quick project using the free crochet pattern below.
- Purchase the ad-free PDF on Etsy or Ravelry.
- PIN it to your Pinterest boards here.
- View the complete crochet pattern for free below on my blog supported by ads.
Crochet Pillow Variations
The crochet pattern for this pumpkin pillow is made with two panels that are crocheted together on all four sides. This makes it so the cover is not removable from the pillow insert.
However, you can make this a removable cover if you’d like! You can either add buttons or make an envelope style cover.
Removable Pillow Cover with Buttons
For this style, you will need about 4 buttons and some thread to sew them on.
Crochet together the front and back panels as instructed, but leave the bottom edge open. On the back panel sew some buttons along the bottom, a few inches above the edge.
Last you would crochet some chain loops on the bottom edge of the front panel that line up with the buttons. Now you will be able to use the chain loops to attach to the buttons.
Removable Envelope Style Pillow Cover
This style pillow cover will not require any buttons or sewing. You will simply need to make two smaller back panels.
You will have a front panel and two back panels (that are about 3/4 the size of the front panel).
Place the front panel with the back of it facing you. Place one of the smaller back panels on top with the top edge flush with the top edge of the front panel. Next, place the second smaller back panel on top with the bottom edge flush with the bottom edge of the front panel.
Now crochet together all 4 sides of the panels. There will be an opening in the middle where you can insert and remove your pillow insert.
Halloween Crochet Pillow Set
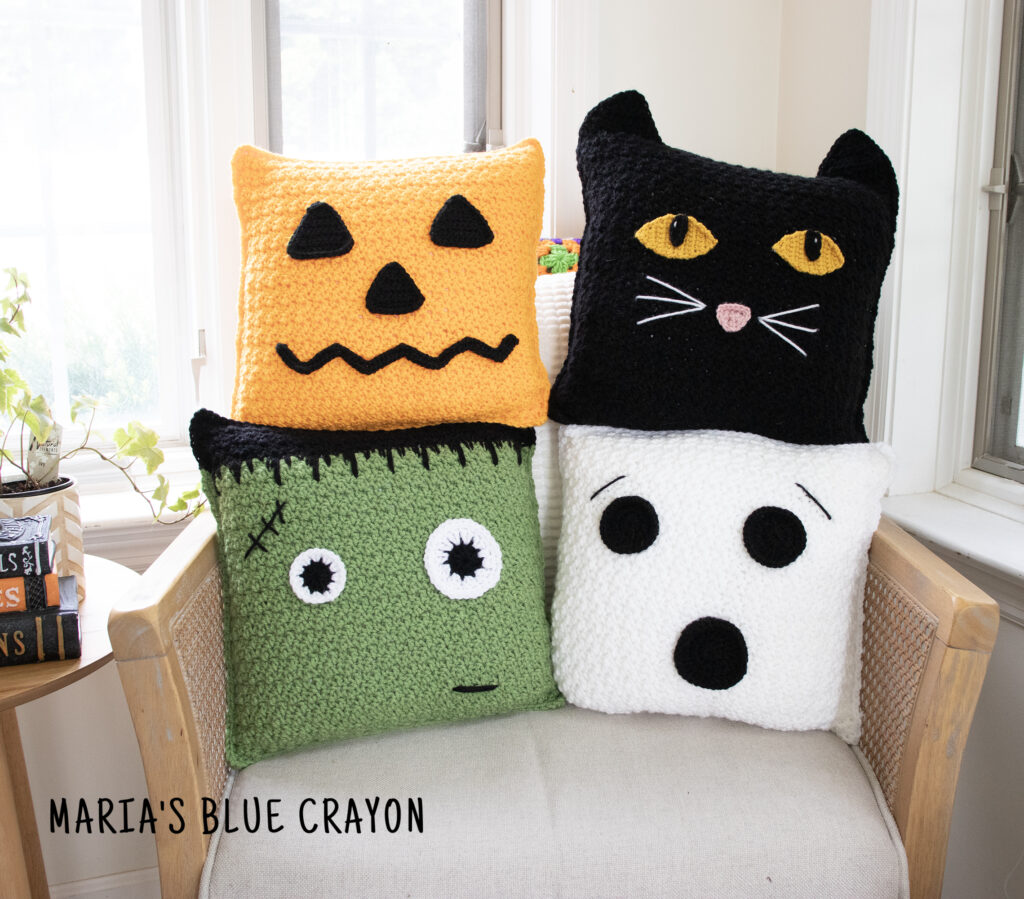
Make the whole set of these Halloween crochet pillows with the other free patterns on my blog:
More Fun Halloween Crochet Patterns
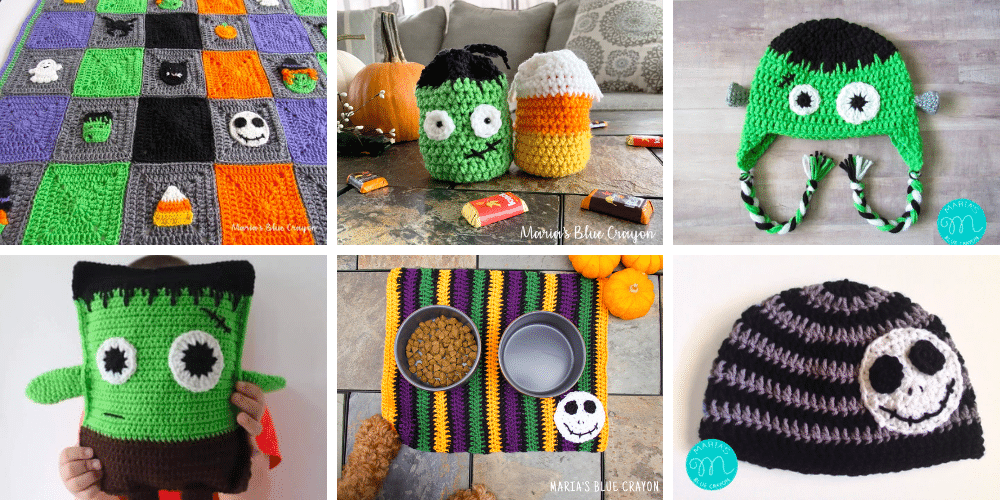
- Halloween Themed Blanket
- Halloween Treat Bags
- Frankenstein Hat
- Frankenstein Amigurumi
- Halloween Themed Dog Mats
- Skeleton Beanie
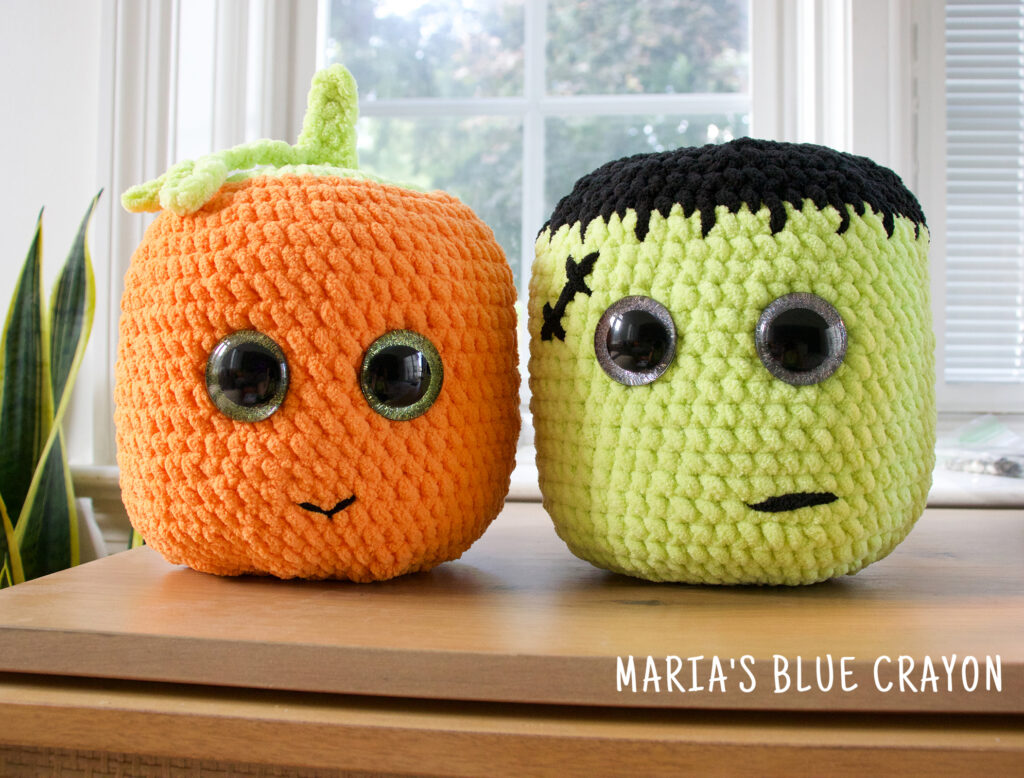
Halloween Crochet Plushie Set
Add to your Halloween decoration and make the whole plushie set as well! All of them are free crochet patterns on my blog.

Crochet Pumpkin Pillow Pattern
Materials
Brava worsted weight yarn: 2 skeins of Caution, 1 skein of Black
6.00mm and 4.00mm crochet hook
14” x 14” pillow insert (these 4 packs on Amazon are my go to)
Tapestry needle and scissors
Pattern Notes
This pillow is made by crocheting two separate panels then crocheting them together around the pillow insert. Pumpkin face is crocheted separately then sewn onto the front panel.
Beginning chains do not count as a stitch.
Dimensions
14” x 14”
Abbreviations (US terms)
Ch = chain, sc = single crochet, dc = double crochet, sc2tog = single crochet two together, sc3tog = single crochet three together, st = stitch
Crochet Pattern
Front and Back Panel
Use orange yarn with 6.00mm crochet hook.
Row 1: Ch 44, dc into the 3rd ch from hook, sc in next ch, *dc in next ch, sc in next ch, repeat from * across, turn (42)
Row 2: Ch 2, dc in first st, sc in next st, *dc in next st, sc in next st, repeat from * across, turn (42)
Repeat Row 2 until you have a total of 34 rows.
Fasten off. Make two panels.
Pumpkin Eyes
Use black yarn and 4.00mm crochet hook.
Row 1: Ch 11, sc in 2nd ch from hook and in each ch across, turn (10)
Row 2: Ch 1, sc2tog over first 2 st, sc in next 6 st, sc2tog over last 2 st, turn (8)
Row 3: Ch 1, sc in each st across, turn (8)
Row 4: Ch 1, sc2tog over first 2 st, sc in next 4 st, sc2tog over last 2 st, turn (6)
Row 5: Ch 1, sc in each st across, turn (6)
Row 6: Ch 1, sc2tog over first 2 st, sc in next 2 st, sc2tog over last 2 st, turn (4)
Row 7: Ch 1, sc in each st across, turn (4)
Row 8: Ch 1, sc2tog over first 2 st, sc2tog over last 2 st, turn (2)
Row 9: Ch 1, sc2tog (1)
Row 10: Ch 1, sc evenly around the triangle, making 3sc in each corner
Fasten off. Leave tail for sewing. Make two eyes.
Pumpkin Nose
Use black yarn and 4.00mm crochet hook.
Row 1: Ch 9, sc in 2nd ch from hook and in each ch across, turn (8)
Row 2: Ch 1, sc2tog over first 2 st, sc in next 4 st, sc2tog over last 2 st, turn (6)
Row 3: Ch 1, sc in each st across, turn (6)
Row 4: Ch 1, sc2tog over first 2 st, sc in next 2 st, sc2tog over last 2 st, turn (4)
Row 5: Ch 1, sc in each st across, turn (4)
Row 6: Ch 1, sc2tog over first 2 st, sc2tog over last 2 st, turn (2)
Row 7: Ch 1, sc2tog (1)
Row 8: Ch 1, sc evenly around the triangle, making 3sc in each corner
Fasten off. Leave tail for sewing.
Pumpkin Mouth
Use black yarn and 4.00mm crochet hook.
Row 1: Ch 62, sc into 2nd ch from hook and into next 5 ch, *3sc in next ch, sc in next 6 ch, sc3tog over next 3 st, sc in next 6 ch, repeat from* two more times, 3sc in next st, sc in last 6 st
Fasten off.
Assembly
Each panel should measure roughly 14” x 14”. They will be stretchy, so stretch them out a bit before sewing on the face.
Use the photo as a guide to sew on the eyes, nose, and mouth pieces onto one of the panels.
You can also use fabric glue or something similar to attach the pieces.
Hold both panels together and attach orange yarn. Use 6.00mm hook and crochet the panels together with single crochets evenly around. Make 3 single crochets in each corner. Once three sides are crocheted together, insert pillow and crochet remaining side. Join to first stitch, fasten off, and weave in ends.
Leave a Reply