
This post may contain affiliate links. For more information, please see our disclosure policy.
With this crochet pumpkin pattern and tutorial, I will show you how to make a pumpkin in two sizes that you see pictured PLUS a custom tutorial in which you can make the pumpkins any size with any yarn you’d like. This makes the ultimate tutorial so you can make all the pumpkins!
- Purchase the ad-free PDF download/printable on Etsy or Ravelry – includes instructions to make custom sized pumpkins with any yarn.
- PIN it to your boards for later.
- View the pattern below on my blog supported by ads.
Crochet Pumpkins
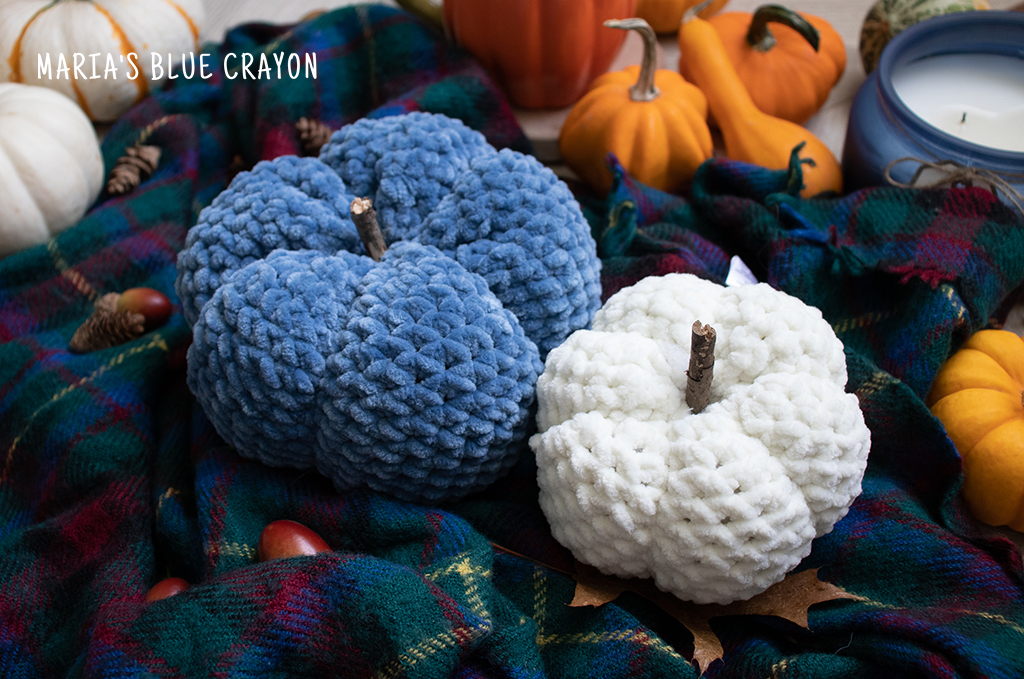
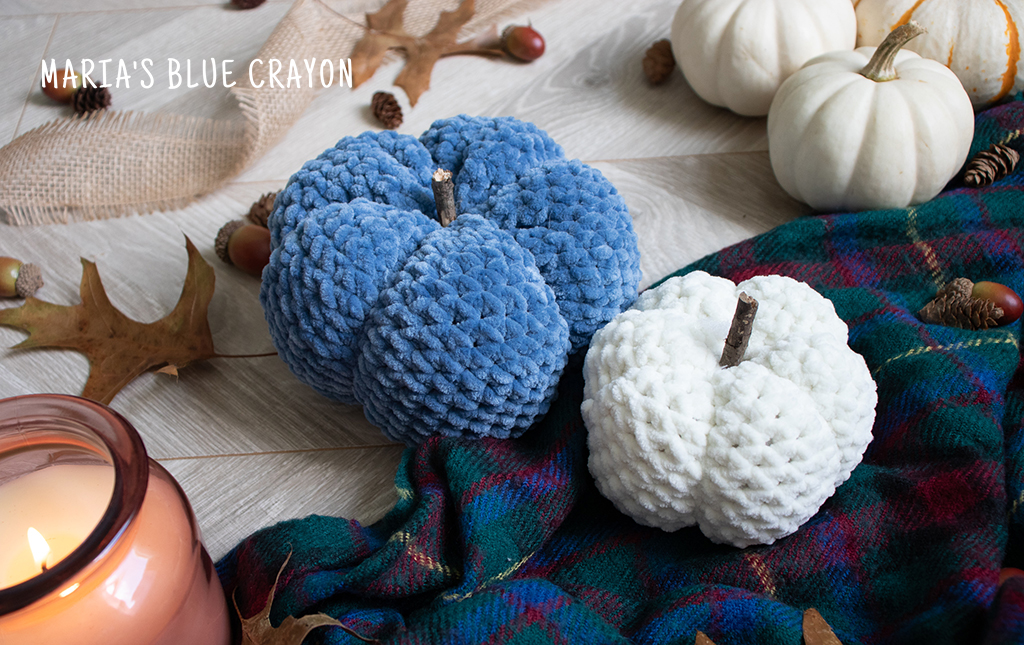
These crochet pumpkins are simple, basic pumpkins that anyone can make! Crocheting these pumpkins only consist of crocheting in the round. I used basic stitches (single crochets) for a super simple look, but you are welcome to use any stitch you would like to make your pumpkins unique.
The great thing about the customization is you can experiment with different yarns, stitches, and sizes. So you can use the same pattern but the outcomes will all be different! This is great especially if you want to make a handful of pumpkins to decorate or just have a few options at the craft fairs to sell.
For crochet stitches, the basic stitches are probably the quickest and easiest. However, you want to think about what stitches work best for stuffing. For example, double crochets may leave too much room for the stuffing to poke out. The moss stitch, single crochet in back loop only (for a nice ribbed texture), or just basic single crochets would work best. But of course – experiment and see what works!
The go-to yarn is probably worsted weight yarn but you can experiment with chunky yarn (I used this for my white and blue pumpkin in the photos) for a chunkier look. I think using tweed, variegated, or other fun yarns would be great to use too!
Stash Buster Project
If you have a lot of scrap yarn, this would be a great fall project for you! Make smaller pumpkins for small amounts of leftover yarn you have or make larger pumpkins (or really – any size in between!) for fuller skeins of yarn that you have.
I think crocheted pumpkins are adorable in all colors, not just orange! As you can see, the pumpkins I made are the non-traditional blue and white. You can make cute crocheted pumpkins to fit in with your home decor by using any colors you have in your stash.
Crochet Pumpkin Pattern and Tutorial
Materials
Hobbii Baby Snuggle (super bulky 6)
8.0 mm crochet hook
Tapestry needle/Yarn needle
Scissors
Polyfil/stuffing
Stick
Notes
You can use any yarn weight you would like for this project using the custom tutorial portion of this pattern. Be sure to use a hook size with choice of yarn that will ensure tight stitches so the stuffing does not poke out. If you are using the custom portion of this tutorial, gauge will not matter.
Dimensions
4.25” wide x 2.5” tall
6.5” wide x 3.5” tall
*Amount of stuffing used may vary the sizing.
Abbreviations (US terms)
Ch = chain, sc = single crochet, hdc = half double crochet, dc = double crochet, st = stitch, sl st = slip stitch
Pattern
Small Pumpkin
Before creating slip knot to start project, leave a long yarn tail before the slip knot so you can use this for sewing later.
Round 1: Ch 32, join to first ch
Round 2: Ch 1, sc in each st around, join to first st
Repeat Round 3 until you have a total of 18 rows.
Fasten off and leave a very long tail (to sew up top and create sections on the pumpkin).
See assembly instructions below.
Large Pumpkin
Before creating slip knot to start project, leave a long tail before the slip knot so you can use this for sewing later.
Round 1: Ch 48, join to first ch
Round 2: Ch 1, sc in each st around, join to first st
Repeat Round 3 until you have a total of 26 rows.
Fasten off and leave a very long tail (to sew up top and create sections on the pumpkin).
See assembly instructions below.
Custom Tutorial
Notes:
You can use any yarn with this custom tutorial. To pick a hook size, make sure the stitches are tight enough with the yarn you are using so the stuffing will not poke through.
You can also use any stitch you would like. If you are using a stitch other than single crochet for your pumpkin, be mindful of the beginning chain multiple and if the stitch can be worked in the round. I recommend a closed/tight stitch so the stuffing will not poke through.
Beginning chain will be the circumference of your pumpkin. Make it as small or as big as you’d like.
Before creating slip knot to start project, leave a long tail before the slip knot so you can use this for sewing later.
Round 1: Ch any number of ch and join to first ch
Round 2: Ch 1, sc in each st around, join to first st
Repeat Round 3 until height is about double of what you would like the height of your pumpkin to be. (Example: If you want a 3” tall pumpkin, repeat Round 3 until it is 6” in height.)
Fasten off and leave a very long tail (to sew up top and create sections on the pumpkin).
See assembly instructions below.
Assembly
*Photo guided assembly below
Use beginning tail end to sew up the bottom. Weave yarn in and out of stitches with tapestry needle. Cinch closed and knot.
Stuff pumpkin with polyfil.
Take the yarn tail from the other end of the pumpkin to cinch the top closed. Bring the yarn tail/needle down and into the bottom center of the pumpkin, push it up through to the top center of the pumpkin. Pull tight. This creates part of a section. Continue to make even sections around the pumpkin. Knot and pull yarn through other side of pumpkin to hide yarn tail. Cut off excess yarn.
Add stem. I used part of a stick from my backyard. You can also use a cinnamon stick.
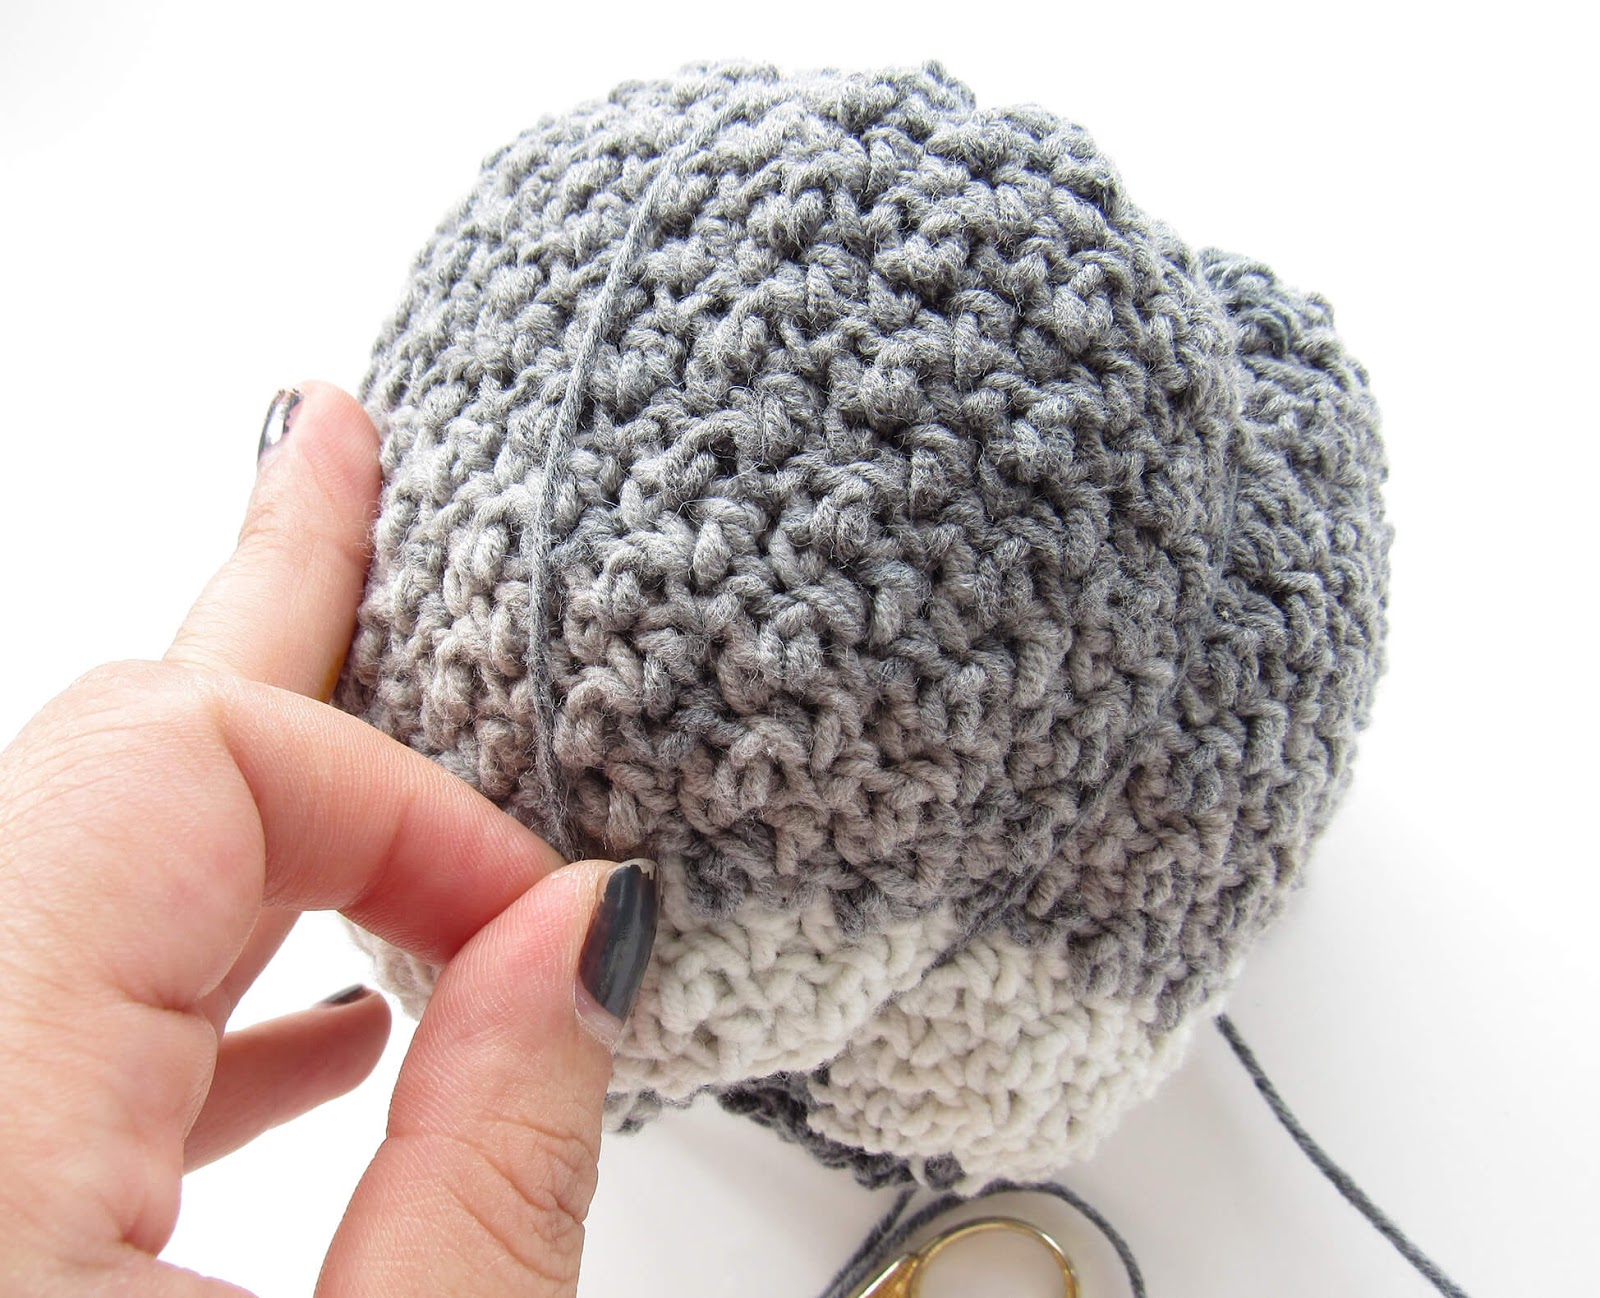
Crochet Pumpkin Construction/Assembly

1. This is what your work will look like after fastening off.
2. Use yarn tail to sew the bottom up. Weave in and out of the bottom stitches all the way around.
3. Pull tight and knot yarn. Hide yarn tail on the inside of the pumpkin.

4. Stuff with poly-fil.

5. Use the long tail to weave in and out of the top stitches of the pumpkin.
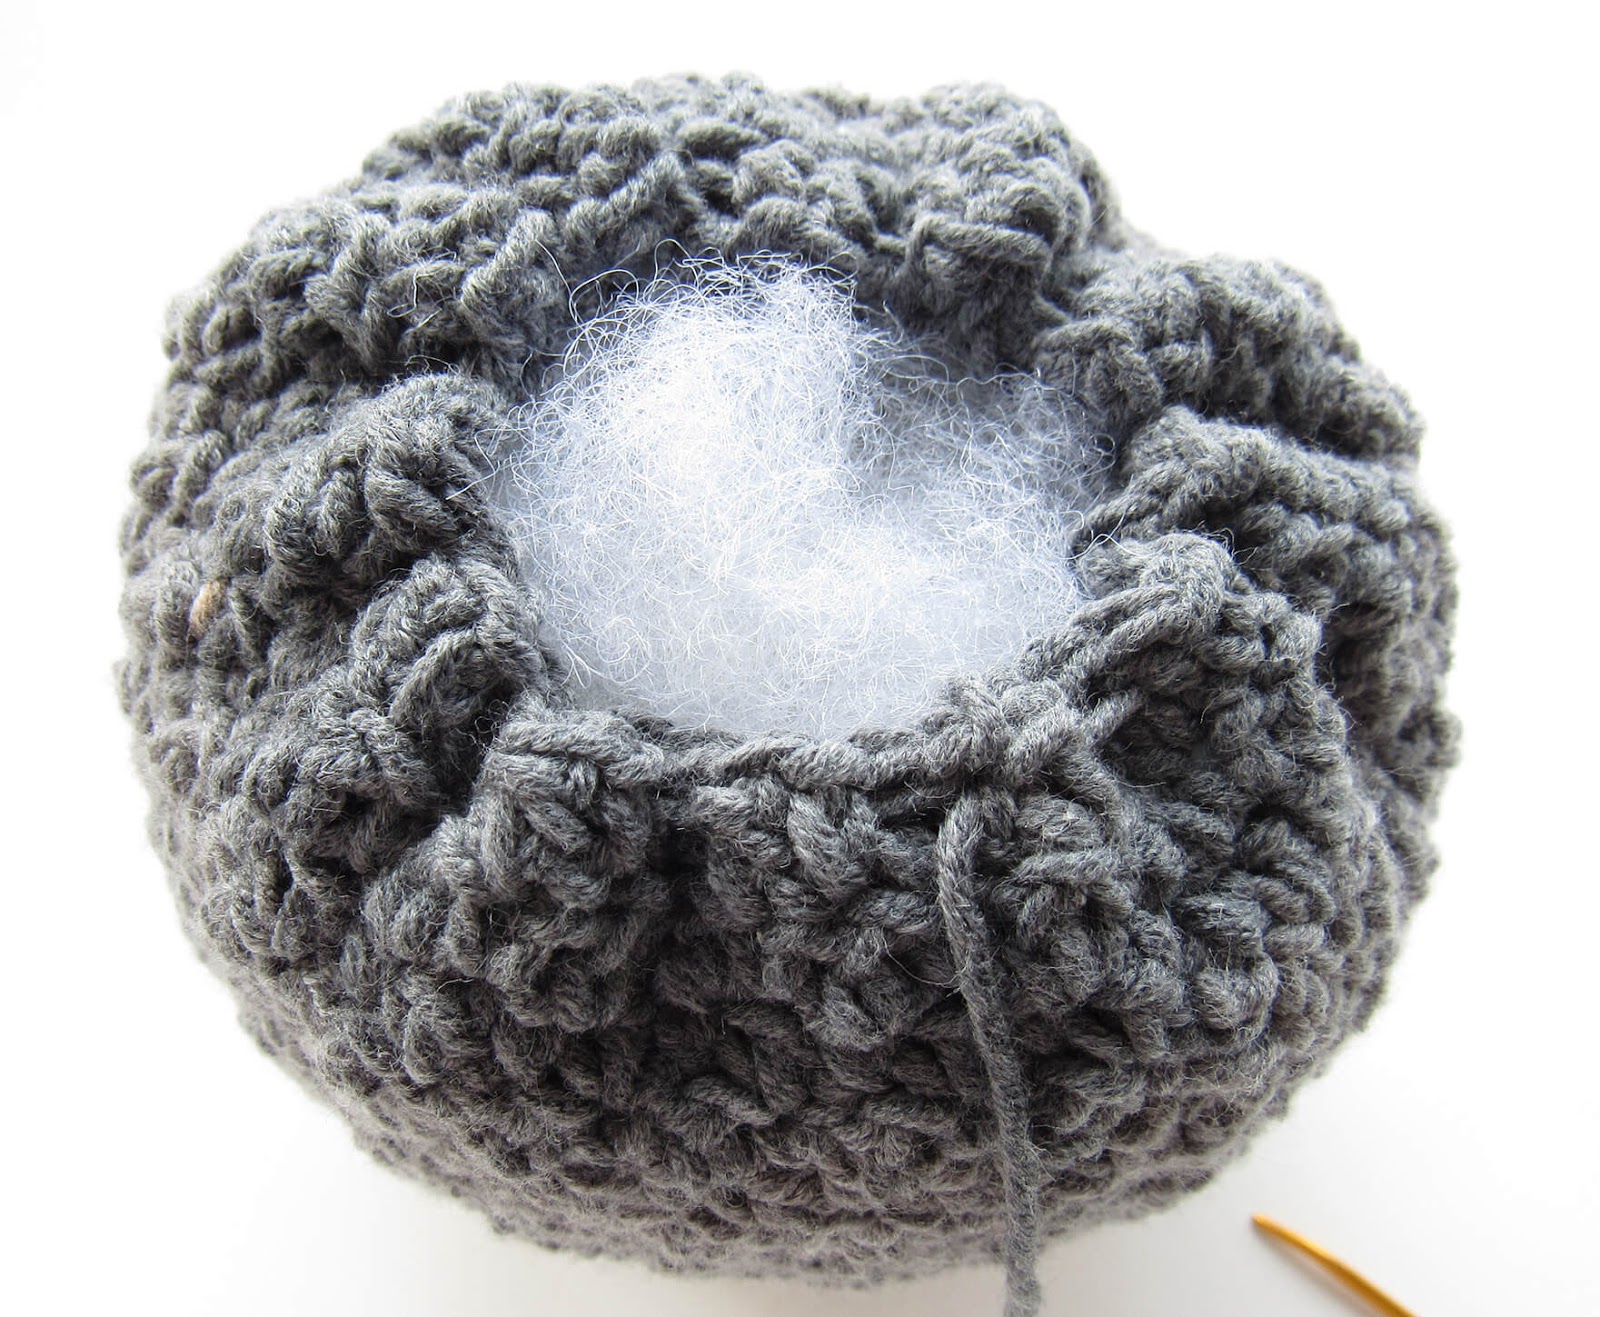
6. Pull tight to cinch together and add more poly-fil as needed. Don’t worry if there is a small hole you can’t close, this will be covered by the stem. Knot the yarn, do not cut off.

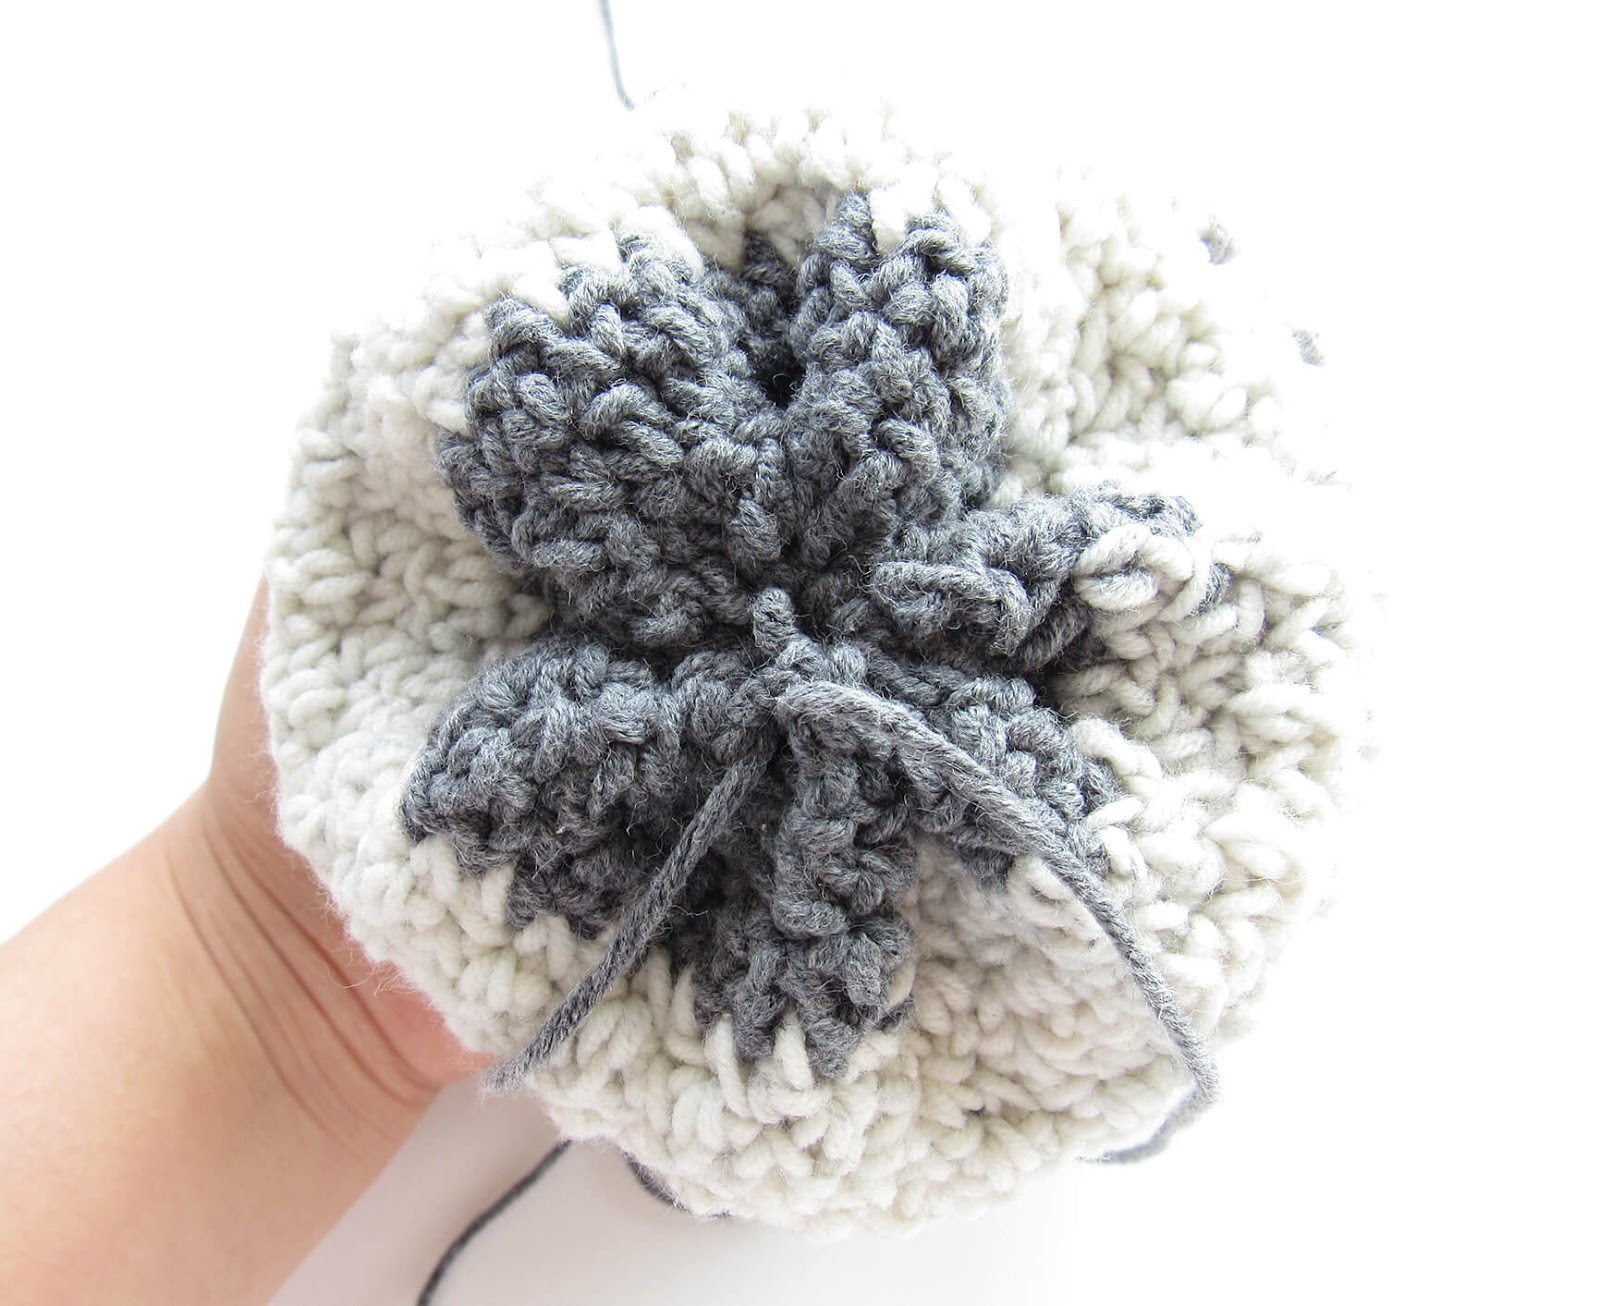
7. Take the yarn tail and insert into the bottom of the pumpkin with needle. We will now be making the grooves around the pumpkin.

8. Pull the needle up through the center to the top of the pumpkin. Pull tight (enough to make an indentation to form the grooves). Continue to make equal sectioned grooves by inserting the needle into the bottom and up through the top. I did this 6 times for a total of 7 sections/bumps. Knot and weave in ends.
Leave a Reply